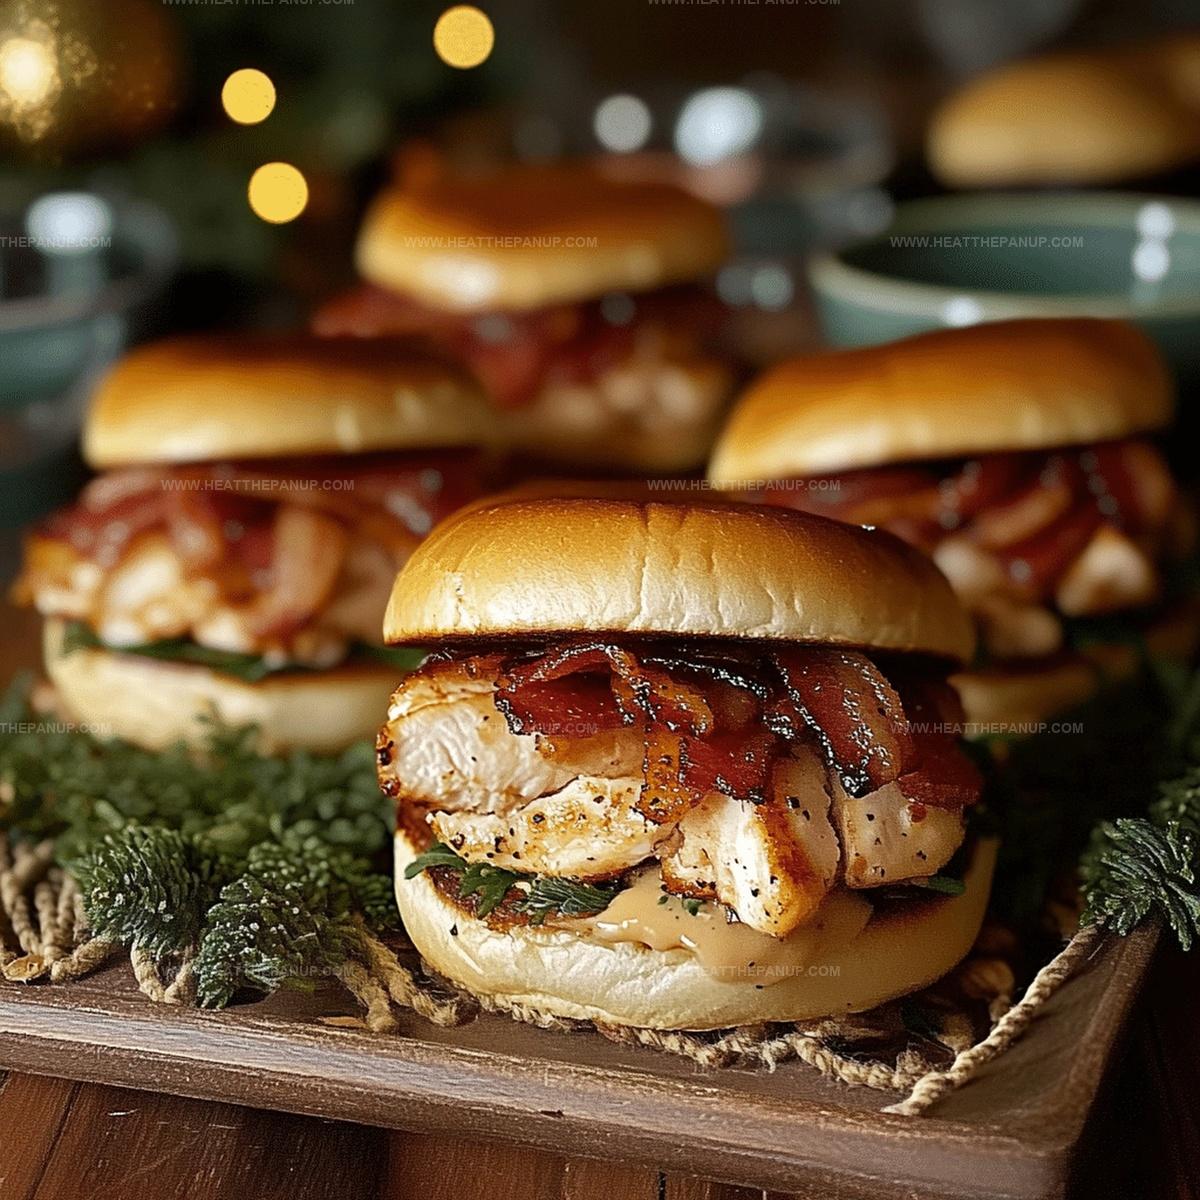
Quick & Tangy Chicken Bacon Ranch Sliders Recipe
Crispy and irresistible chicken bacon ranch sliders dance between comfort and culinary creativity.
Layers of savory ingredients promise an explosion of flavor in every bite.
Packed with juicy chicken and smoky bacon, these mini sandwiches deliver maximum satisfaction.
Creamy ranch dressing adds a tangy twist that makes mouths water instantly.
Perfectly seasoned and quick to assemble, you can whip up this crowd-pleaser in minutes.
Guests will devour these sliders faster than you can say “seconds, please!” Prepare to become the hero of your next gathering with this mouthwatering recipe.
Why Chicken Bacon Ranch Sliders Are Crowd Favorites
Everything Needed For Chicken Bacon Ranch Sliders
For the Proteins:For the Base:For the Seasonings and Condiments:Steps To Make Chicken Bacon Ranch Sliders
Step 1: Prepare Oven and Baking Surface
Preheat the oven to 375°F and line a baking sheet with parchment paper for easy cleanup and non-stick surface.
Step 2: Season Chicken
Generously coat chicken breast with garlic powder, onion powder, salt, and black pepper, ensuring complete and even seasoning coverage.
Step 3: Cook Bacon
Cook bacon in a skillet until crispy and golden brown. Transfer to paper towels to drain excess grease, then roughly chop into bite-sized pieces.
Step 4: Cook Chicken
Grill or pan-sear the seasoned chicken breast until fully cooked, ensuring the internal temperature reaches 165°F. Slice chicken into thin, uniform strips.
Step 5: Prepare Slider Buns
Slice slider buns horizontally, creating distinct top and bottom halves. Arrange bottom halves on the prepared baking sheet.
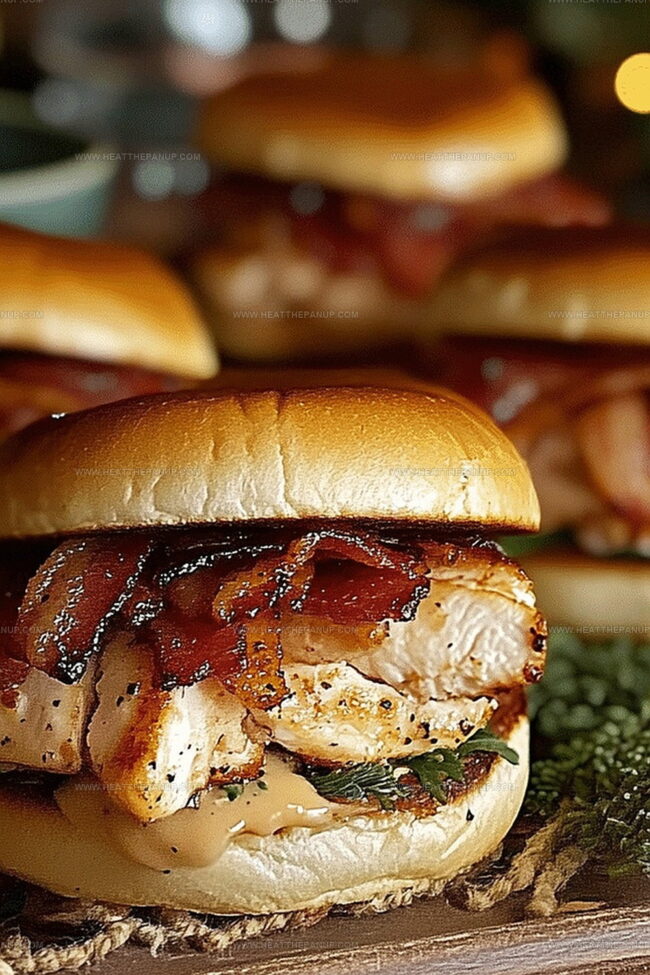
Step 6: Layer Chicken
Distribute sliced chicken evenly across the bottom bun halves, creating a consistent base for the sliders.
Step 7: Add Bacon
Sprinkle chopped bacon generously over the chicken, ensuring good coverage across each slider.
Step 8: Drizzle Ranch
Apply ranch dressing across the bacon and chicken, making sure to cover the entire surface of each slider.
Step 9: Add Cheese
Place a half slice of cheddar cheese on top of each slider, completely covering the chicken and bacon.
Step 10: Complete Sliders
Carefully position the top bun halves onto the cheese, forming complete slider sandwiches.
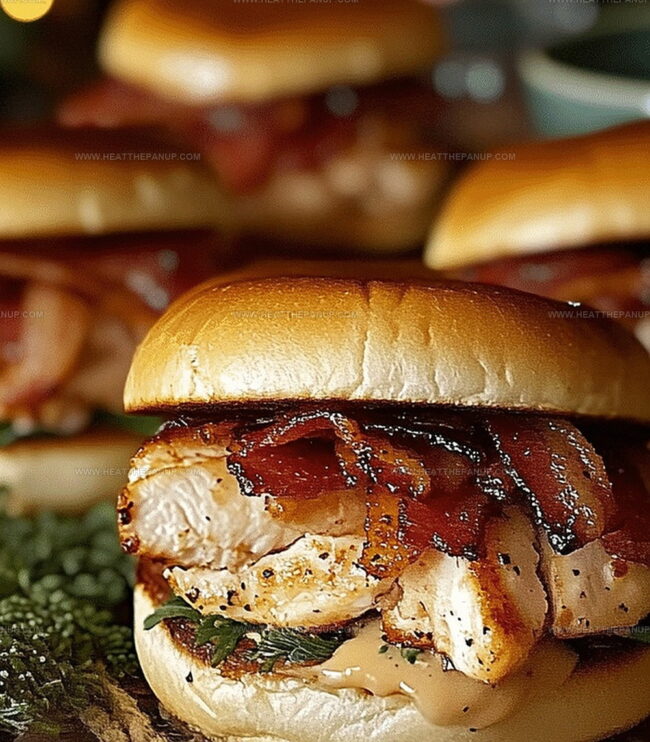
Step 11: Butter Buns
Melt butter and brush generously over the top of the slider buns to create a golden, glossy exterior.
Step 12: Bake Sliders
Bake in the preheated oven for 10-12 minutes, or until the cheese melts completely and buns turn light golden brown.
Step 13: Garnish
Remove from oven and sprinkle freshly chopped parsley over the sliders for a pop of color and fresh flavor.
Step 14: Rest and Serve
Allow sliders to rest for 2-3 minutes, letting the cheese set and flavors blend before serving hot.
Tips For Chicken Bacon Ranch Sliders Success
Tasty Takes On Chicken Bacon Ranch Sliders
What Goes Great With Chicken Bacon Ranch Sliders
Best Way To Store Chicken Bacon Ranch Sliders
Chicken Bacon Ranch Sliders FAQs Solved
No, these chicken bacon ranch sliders are not spicy. They have a savory flavor profile with garlic, onion, and ranch dressing.
Yes, you can substitute cheddar with provolone, swiss, or pepper jack cheese based on your preference.
Use a meat thermometer to check that the chicken reaches an internal temperature of 165°F to ensure it’s safely cooked through.
Absolutely! These sliders can be assembled ahead of time and refrigerated before baking, making them perfect for quick meals or gatherings.
Print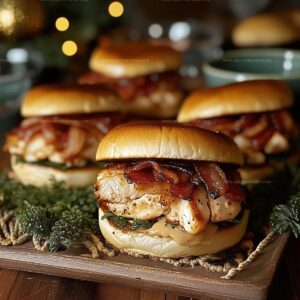
Zingy Chicken Bacon Ranch Sliders Recipe
- Total Time: 35 minutes
- Yield: 12 1x
Description
Mouthwatering chicken bacon ranch sliders promise a flavor explosion of creamy ranch, crispy bacon, and tender chicken nestled in buttery rolls. Delightful game day or party appetizer that guarantees smiles and satisfies hungry crowds with minimal effort.
Ingredients
Main Ingredients:
- 12 slider buns
- 1 lb chicken breast
- 8 slices bacon
- 1/2 cup ranch dressing
Seasoning:
- 1 tsp garlic powder
- 1 tsp onion powder
- 1/2 tsp salt
- 1/4 tsp black pepper
Topping/Cheese:
- 6 slices cheddar cheese
- 2 tbsp butter
- 1 tbsp chopped parsley
Instructions
- Preheat the oven to 375°F and line a baking sheet with parchment paper for easy cleanup.
- Season chicken breast thoroughly with garlic powder, onion powder, salt, and black pepper, ensuring even coverage.
- Cook bacon in a skillet until crispy, then drain on paper towels and roughly chop into bite-sized pieces.
- Grill or pan-sear the seasoned chicken breast until fully cooked, reaching an internal temperature of 165°F, then slice into thin strips.
- Slice slider buns horizontally, creating top and bottom halves, and arrange the bottom halves on the prepared baking sheet.
- Layer the sliced chicken evenly across the bottom bun halves, creating a uniform base for the sliders.
- Sprinkle chopped bacon over the chicken, distributing the pieces generously.
- Drizzle ranch dressing across the bacon and chicken, ensuring complete coverage.
- Place a half slice of cheddar cheese on top of each slider, covering the chicken and bacon.
- Carefully place the top bun halves onto the cheese, creating complete slider sandwiches.
- Melt butter and brush generously over the top of the slider buns for a golden, glossy finish.
- Bake in the preheated oven for 10-12 minutes, or until cheese is melted and buns are lightly toasted.
- Remove from oven and garnish with freshly chopped parsley for a burst of color and fresh flavor.
- Let sliders rest for 2-3 minutes before serving to allow cheese to set and flavors to meld.
Notes
- Customize the chicken seasoning by experimenting with different spice blends like Cajun or Italian herbs for varied flavor profiles.
- Swap regular bacon for turkey bacon to reduce fat content and make the recipe more diet-friendly for health-conscious individuals.
- Choose gluten-free slider buns to transform this recipe into a celiac-friendly meal without compromising taste and texture.
- Prep ingredients ahead of time by cooking chicken and bacon in advance, which cuts down assembly time and makes hosting easier.
- Prep Time: 15 minutes
- Cook Time: 20 minutes
- Category: Lunch, Dinner, Appetizer, Snacks
- Method: Baking
- Cuisine: American
Nutrition
- Serving Size: 12
- Calories: 350
- Sugar: 2 g
- Sodium: 800 mg
- Fat: 22 g
- Saturated Fat: 9 g
- Unsaturated Fat: 11 g
- Trans Fat: 0 g
- Carbohydrates: 28 g
- Fiber: 1 g
- Protein: 18 g
- Cholesterol: 75 mg
James Hambly
Founder & Recipe Creator
Expertise
Recipe Development, Culinary Education, Farm-to-Table Cooking, Southern Cuisine
Education
Asheville-Buncombe Technical Community College
Certificate in Culinary Arts
Focus: Hands-on training in professional cooking techniques, emphasizing farm-to-table practices and Southern cuisine.
The Chef’s Academy
Associate Degree in Culinary Arts
Focus: Comprehensive culinary education covering global cuisines, kitchen management, and food safety.
James grew up surrounded by the smells of cast-iron skillets and slow-cooked Southern meals in Asheville, North Carolina.
He sharpened his skills with a Certificate in Culinary Arts from Asheville-Buncombe Technical Community College, and later leveled up with an Associate Degree from The Chef’s Academy.
James’s philosophy is simple: the best meals don’t need fancy tricks, just fresh ingredients, a hot pan, and a little bit of heart. His favorite days are spent testing one-pan wonders, chasing bold flavors, and creating recipes that feel easy, even on a busy night.