
Easy White Trash Sliders Recipe: Fun Bites Everyone Loves
Packed with bold flavors and southern charm, these white trash sliders pack a punch that’ll make your taste buds dance.
These miniature sandwiches blend comfort food traditions with unexpected ingredients for an irresistible appetizer.
Each slider carries a perfect balance of savory meat and zesty toppings that surprise and delight.
The recipe combines classic deli meats and creamy sauces in a handheld format that screams casual party food.
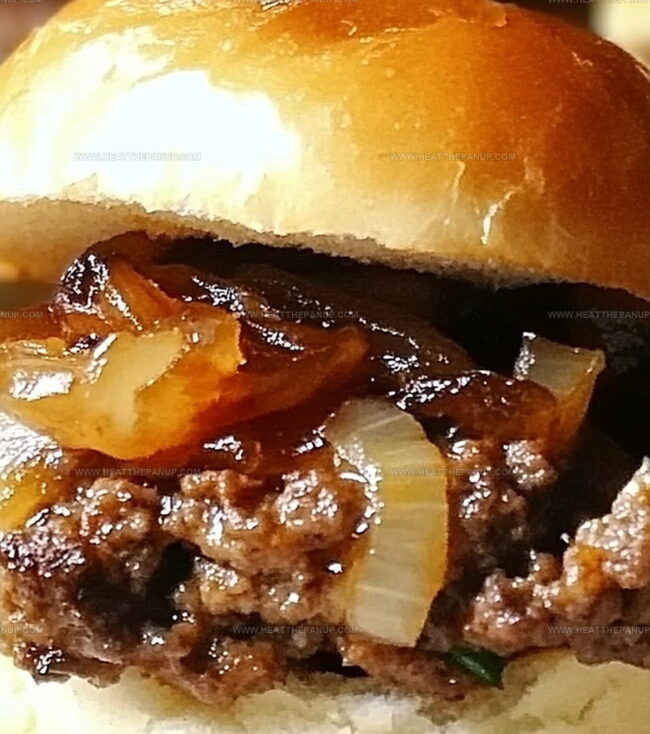
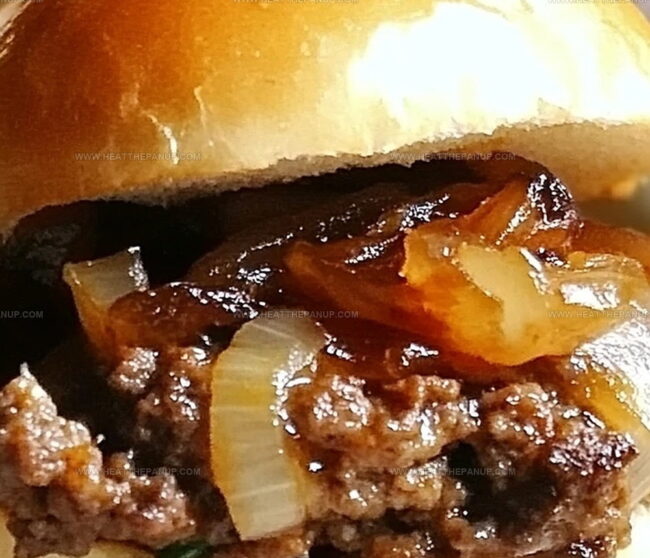
Layers of melted cheese and crispy elements create a texture adventure in every single bite.
Budget-friendly and crowd-pleasing, these sliders transform simple ingredients into something extraordinary.
Serve them at your next gathering and watch how quickly they disappear from the plate.
What Makes White Trash Sliders So Fun and Tasty
All the Ingredients for Tasty White Trash Sliders
Meat Base:Cheese and Seasoning:Bread:How to Put Together White Trash Sliders Fast
Step 1: Brown the Protein
Heat a large skillet over medium-high temperature.
Combine ground beef and sausage, cooking until the meat turns completely brown and develops a rich, deep color.
Break the meat into small crumbles while cooking to ensure even browning.
Once cooked, carefully drain off excess grease using a colander to prevent soggy sliders.
Step 2: Melt the Cheese Blend
Transfer the cooked meat to a saucepan set on low heat.
Add these ingredients:Stir the mixture continuously until the cheese transforms into a smooth, creamy sauce that completely coats the meat.
The low heat helps prevent burning and ensures a silky texture.
Step 3: Prepare the Slider Base
Gently split the slider buns in half.
For extra flavor, lightly toast the buns in a separate skillet or under the broiler until they develop a light golden color and crispy edges.
Step 4: Assemble Your Sliders
Spoon the hot, cheesy meat mixture generously onto the bottom half of each bun.
Place the top bun carefully over the filling, creating a perfect handheld sandwich.
Press down gently to help the ingredients meld together.
Step 5: Serve and Devour
Transfer the sliders to a serving platter.
Serve immediately while the cheese is still warm and melty.
These sliders are perfect for game day, casual gatherings, or a quick and satisfying meal.
Handy Tips for Gooey, Cheesy Sliders
Keeping Your Sliders Fresh and Warm Later
Sides That Go With These Fun Sliders
How to Change Up White Trash Sliders Easily
FAQs
These sliders have a mild flavor profile. The black pepper adds a slight kick, but they aren’t considered a hot or spicy dish. You can adjust the pepper amount to your personal heat preference.
Yes, you can substitute ground beef and sausage with ground turkey, chicken, or a plant-based meat alternative. Just ensure the meat is fully cooked and drained before mixing with cheese.
Processed American cheese or cream cheese are good substitutes. They melt smoothly and provide similar creamy texture. Shredded cheddar can work but might not be as smooth.
Absolutely! These sliders are perfect for game day, potlucks, or casual gatherings. They’re easy to make, crowd-pleasing, and can be prepared quickly for large groups.
Print
White Trash Sliders Recipe
- Total Time: 35 minutes
- Yield: 24 1x
Description
Sinful white trash sliders pack a punch of southern comfort with layers of crispy bacon, melted cheese, and zesty ranch dressing. Comfort food meets party favorite in this irresistible bite-sized treat you’ll crave at every gathering.
Ingredients
Meat:
- 1 pound (1 lb) ground beef
- 1 pound (1 lb) sausage (breakfast, Italian, or mild variety)
Cheese:
- 1 pound (1 lb) Velveeta cheese (cubed)
Seasonings:
- 1/2 teaspoon black pepper
- 1/2 teaspoon onion powder
Bread:
- 24 slider buns
Instructions
- Sizzle the ground beef and sausage in a spacious skillet over medium-high heat, ensuring the meats are thoroughly browned and cooked through.
- Eliminate excess fat by carefully draining the meat to prevent greasy sliders.
- Transfer the cooked meat mixture into a saucepan set on low heat, preparing for the next flavor transformation.
- Incorporate cubed Velveeta cheese, adding a sprinkle of black pepper and onion powder to elevate the meat’s taste profile.
- Gently stir the mixture, watching the cheese melt into a luxurious, creamy sauce that coats the meat completely.
- Delicately separate the slider buns, giving them a quick toast to enhance their texture and warmth.
- Generously ladle the rich, cheesy meat mixture onto the bottom half of each bun, creating a hearty base.
- Crown each slider with its matching bun top, creating a compact, mouth-watering package.
- Serve the sliders piping hot, allowing the melted cheese and seasoned meat to tantalize taste buds immediately.
Notes
- Customize meat blend by mixing different ground meats like beef, pork, or turkey for varied flavor profiles.
- Reduce cheese quantity for a lighter version or substitute with low-fat cheese alternatives to make the recipe more diet-friendly.
- Toast buns with butter or garlic spread to enhance the slider’s overall taste and add a crispy texture.
- Prep meat mixture ahead of time and reheat gently to save cooking time during busy weeknights.
- Prep Time: 10 minutes
- Cook Time: 25 minutes
- Category: Lunch, Dinner, Appetizer, Snacks
- Method: Sautéing
- Cuisine: American
Nutrition
- Serving Size: 24
- Calories: 306
- Sugar: 1 g
- Sodium: 620 mg
- Fat: 20 g
- Saturated Fat: 9 g
- Unsaturated Fat: 8 g
- Trans Fat: 0.5 g
- Carbohydrates: 14 g
- Fiber: 1 g
- Protein: 15 g
- Cholesterol: 55 mg
James Hambly
Founder & Recipe Creator
Expertise
Recipe Development, Culinary Education, Farm-to-Table Cooking, Southern Cuisine
Education
Asheville-Buncombe Technical Community College
Certificate in Culinary Arts
Focus: Hands-on training in professional cooking techniques, emphasizing farm-to-table practices and Southern cuisine.
The Chef’s Academy
Associate Degree in Culinary Arts
Focus: Comprehensive culinary education covering global cuisines, kitchen management, and food safety.
James grew up surrounded by the smells of cast-iron skillets and slow-cooked Southern meals in Asheville, North Carolina.
He sharpened his skills with a Certificate in Culinary Arts from Asheville-Buncombe Technical Community College, and later leveled up with an Associate Degree from The Chef’s Academy.
James’s philosophy is simple: the best meals don’t need fancy tricks, just fresh ingredients, a hot pan, and a little bit of heart. His favorite days are spent testing one-pan wonders, chasing bold flavors, and creating recipes that feel easy, even on a busy night.