Fluffy Sweetened Condensed Milk Snowballs Recipe for Winter Joy
Delicate and melt-in-your-mouth snowballs infused with sweet, creamy sweetened condensed milk promise a delightful winter treat.
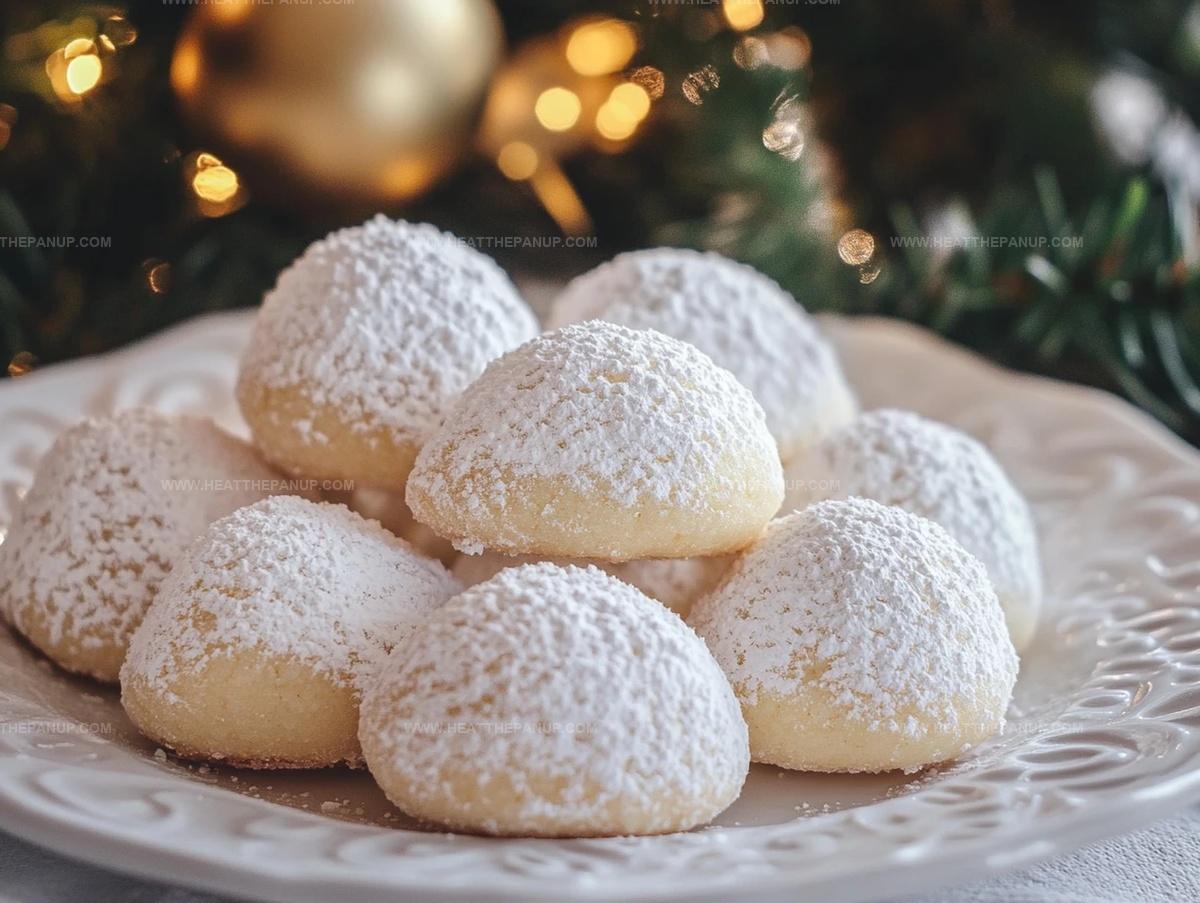
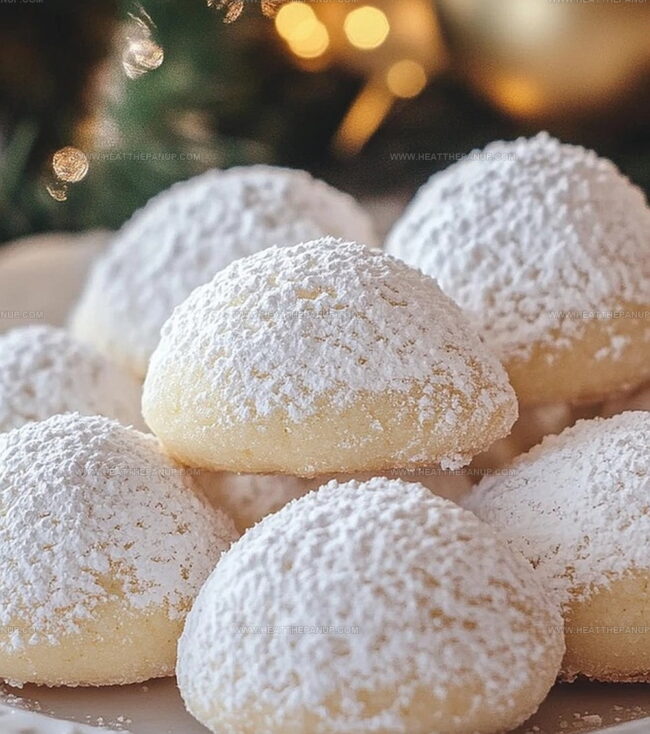
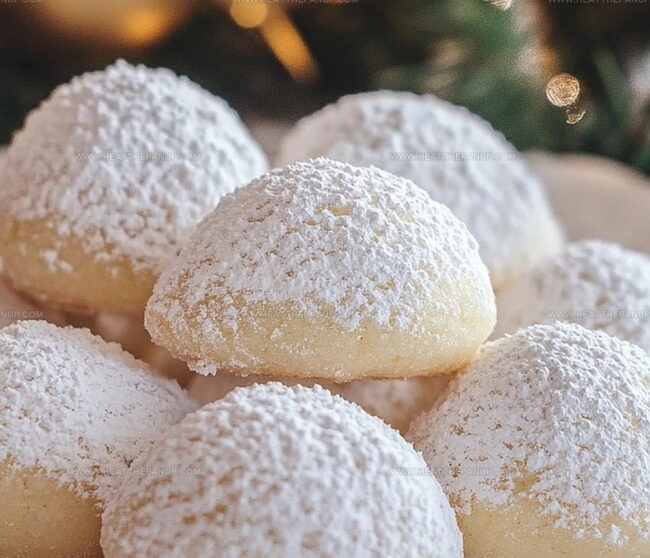
These powdery white confections sparkle like freshly fallen snow.
Each bite delivers a rich, velvety texture that dances across your palate.
Soft and delicate, the cookies crumble gently with a subtle sweetness that lingers.
Simple ingredients come together to create a magical dessert that feels both nostalgic and elegant.
You’ll find these little snowballs irresistibly charming and perfect for holiday gatherings.
Indulge in these delectable treats and let the winter magic unfold on your taste buds.
Why These Snowball Cookies Are So Sweet and Simple
Ingredients for Sweetened Condensed Milk Snowballs
Sweetened Condensed Milk Base:Dry Ingredients:Finishing Ingredients:Optional Mix-Ins:How to Make No-Bake Snowball Cookies
Step 1: Whip the Butter
In a spacious mixing bowl, grab your electric mixer and beat the softened butter until it transforms into a light, airy cloud.
This process takes about 3 minutes and creates a fluffy base for your delightful cookies.
Step 2: Blend in Sweet Nectar
Slowly pour the sweetened condensed milk into the whipped butter.
Continue mixing for 2 minutes until the mixture becomes completely smooth and uniform.
If you’re feeling adventurous, this is the perfect moment to add a splash of flavor extract for an extra twist.
Step 3: Marry Dry Ingredients
Pause and scrape down the bowl’s sides.
Now introduce the flour and baking powder to your creamy mixture.
Gently mix until the ingredients are just combined.
Want to jazz things up?
Fold in your favorite mix-ins like chocolate chips or chopped nuts.
Step 4: Form Delicate Rounds
Grab a cookie scoop or tablespoon to create uniform dough mounds.
Roll each portion between your palms to form perfect little balls.
Arrange these cookie spheres on a parchment-lined baking sheet, giving each one breathing room about 2 inches apart.
Step 5: Bake to Perfection
Warm up your oven to 320°F (160°C).
Slide the baking sheet inside and let the cookies bake for 12 minutes.
You’re looking for set edges but a pale, tender top – the hallmark of a truly divine snowball cookie.
Step 6: Initial Cooling
Once out of the oven, let the cookies rest on the baking sheet for 5 minutes.
This brief pause allows them to firm up slightly and makes handling easier.
Step 7: Sugar Shower
Transfer the cookies to a wire cooling rack.
Using a fine-mesh sifter, generously dust the still-warm cookies with a snowfall of confectioners’ sugar.
Watch them transform into magical white treats!
Step 8: Final Rest
Allow the cookies to cool completely.
Once they’ve reached room temperature, store them in an airtight container to maintain their delicate texture and powdery charm.
Tips for Shaping and Coating Snowballs Perfectly
How to Store and Enjoy Snowballs Later
Drinks and Sweets to Serve With Snowballs
Festive Ideas to Switch Up Snowball Cookies
FAQs
You can add flavor extracts like vanilla, almond, or coconut, or mix in chopped nuts, chocolate chips, or dried fruit to give the cookies a unique twist.
The lower temperature of 320°F helps the cookies bake evenly, preventing browning and keeping them pale and delicate, which is characteristic of snowball cookies.
Use a cookie scoop or tablespoon to portion the dough evenly, then gently roll each portion between your palms to create smooth, round balls. Consistent sizing ensures even baking.
Yes, you can prepare the dough in advance and refrigerate it for up to 2 days. When ready to bake, let the dough sit at room temperature for 15-20 minutes to soften slightly before shaping and baking.
Print
Sweetened Condensed Milk Snowballs Recipe
- Total Time: 25 minutes
- Yield: 24 1x
Description
Creamy Mexican sweetened condensed milk snowballs melt delightfully in your mouth with rich vanilla and powdered sugar coating. Delicate coconut cookies promise pure comfort and nostalgic charm for anyone craving traditional Latin American dessert bliss.
Ingredients
Main Ingredients:
- 2 cups all-purpose flour
- 1 cup butter, softened
- 1/2 cup sweetened condensed milk
Leavening Agent:
- 3 teaspoons baking powder
Finishing Ingredient:
- 1/2 cup confectioners sugar (for dusting)
Instructions
- Prepare a clean mixing bowl and cream the butter until it becomes airy and pale, generating a smooth, whipped texture that takes approximately 3 minutes of consistent beating.
- Gradually incorporate the sweetened condensed milk into the butter, mixing thoroughly for about 2 minutes until the mixture achieves a uniform consistency.
- Carefully introduce any desired flavor extract, gently stirring to distribute the additional flavor evenly throughout the mixture.
- Sift together the flour and baking powder, then gently fold them into the wet ingredients, mixing until just combined to prevent overmixing.
- If using additional mix-ins like nuts or chocolate chips, delicately fold them into the dough, ensuring even distribution.
- Utilize a cookie scoop or tablespoon to create uniform dough portions, rolling each into a perfect sphere with gentle pressure from your palms.
- Arrange the dough balls on a parchment-lined baking sheet, spacing them approximately 2 inches apart to allow for slight spreading during baking.
- Preheat the oven to 320°F (160°C), positioning the rack in the center for consistent heat circulation.
- Bake the cookies for 12-14 minutes, watching for set edges while maintaining a pale, soft center that indicates perfect doneness.
- Remove the baking sheet from the oven and allow the cookies to rest on the pan for 5 minutes, enabling them to firm up slightly.
- Carefully transfer the cookies to a wire cooling rack using a spatula to prevent breaking.
- While the cookies are still slightly warm, generously dust them with confectioners’ sugar using a fine-mesh sifter for an elegant, snow-like coating.
- Permit the cookies to cool completely before storing them in an airtight container, which helps preserve their delicate texture and prevents moisture buildup.
Notes
- Soft butter ensures smooth mixing and prevents lumpy dough, so take it out of the refrigerator 30 minutes before baking.
- Avoid overmixing the flour to keep cookies tender and prevent tough, dense textures.
- Use a light hand when rolling dough balls to maintain a delicate, melt-in-your-mouth consistency.
- Confectioners’ sugar coating works best when applied while cookies are still slightly warm, helping the sugar adhere beautifully.
- Prep Time: 10 minutes
- Cook Time: 15 minutes
- Category: Desserts, Snacks
- Method: Baking
- Cuisine: American
Nutrition
- Serving Size: 24
- Calories: 172
- Sugar: 2 g
- Sodium: 60 mg
- Fat: 8 g
- Saturated Fat: 5 g
- Unsaturated Fat: 3 g
- Trans Fat: 0 g
- Carbohydrates: 25 g
- Fiber: 0.5 g
- Protein: 2 g
- Cholesterol: 31 mg
James Hambly
Founder & Recipe Creator
Expertise
Recipe Development, Culinary Education, Farm-to-Table Cooking, Southern Cuisine
Education
Asheville-Buncombe Technical Community College
Certificate in Culinary Arts
Focus: Hands-on training in professional cooking techniques, emphasizing farm-to-table practices and Southern cuisine.
The Chef’s Academy
Associate Degree in Culinary Arts
Focus: Comprehensive culinary education covering global cuisines, kitchen management, and food safety.
James grew up surrounded by the smells of cast-iron skillets and slow-cooked Southern meals in Asheville, North Carolina.
He sharpened his skills with a Certificate in Culinary Arts from Asheville-Buncombe Technical Community College, and later leveled up with an Associate Degree from The Chef’s Academy.
James’s philosophy is simple: the best meals don’t need fancy tricks, just fresh ingredients, a hot pan, and a little bit of heart. His favorite days are spent testing one-pan wonders, chasing bold flavors, and creating recipes that feel easy, even on a busy night.