The Creamiest Smooth Hummus Recipe for Effortless Snacking
Whipping up a perfectly smooth hummus can feel like culinary magic for home cooks.
Mediterranean kitchens have long celebrated this creamy dip’s simple brilliance.
Chickpeas blend into silky perfection with just a few smart techniques.
Professional chefs know texture matters more than complex ingredient lists.
Salt, garlic, and tahini work together to create depth and richness.
Blending slowly and scraping down bowl sides ensures maximum smoothness.
A drizzle of olive oil and gentle processing will help you achieve that dreamy, cloud-like consistency everyone craves.
Why Smooth Hummus Always Works
Smooth Hummus Recipe Ingredient List
Fruit Base:Spices and Flavor Enhancers:Topping Ingredients:Hummus from Scratch – Mixing Instructions
Step 1: Gather Ingredients
Step 2: Prepare Chickpeas
Drain and rinse the chickpeas thoroughly. If you want extra smooth hummus, remove the chickpea skins by gently squeezing each chickpea between your fingers. This step takes time but creates an incredibly silky texture.
Step 3: Blend Ingredients
Place chickpeas, tahini, minced garlic, lemon juice, olive oil, salt, and cumin into a food processor. Blend until the mixture becomes completely smooth and creamy. Stop occasionally to scrape down the sides of the processor.
Step 4: Adjust Consistency
Add water or additional olive oil if the hummus feels too thick. Continue blending until you reach a perfectly smooth and spreadable consistency.
Step 5: Taste and Season
Sample the hummus and adjust seasonings as needed. Add more salt, lemon juice, or cumin to enhance the flavor profile.
Step 6: Serve and Garnish
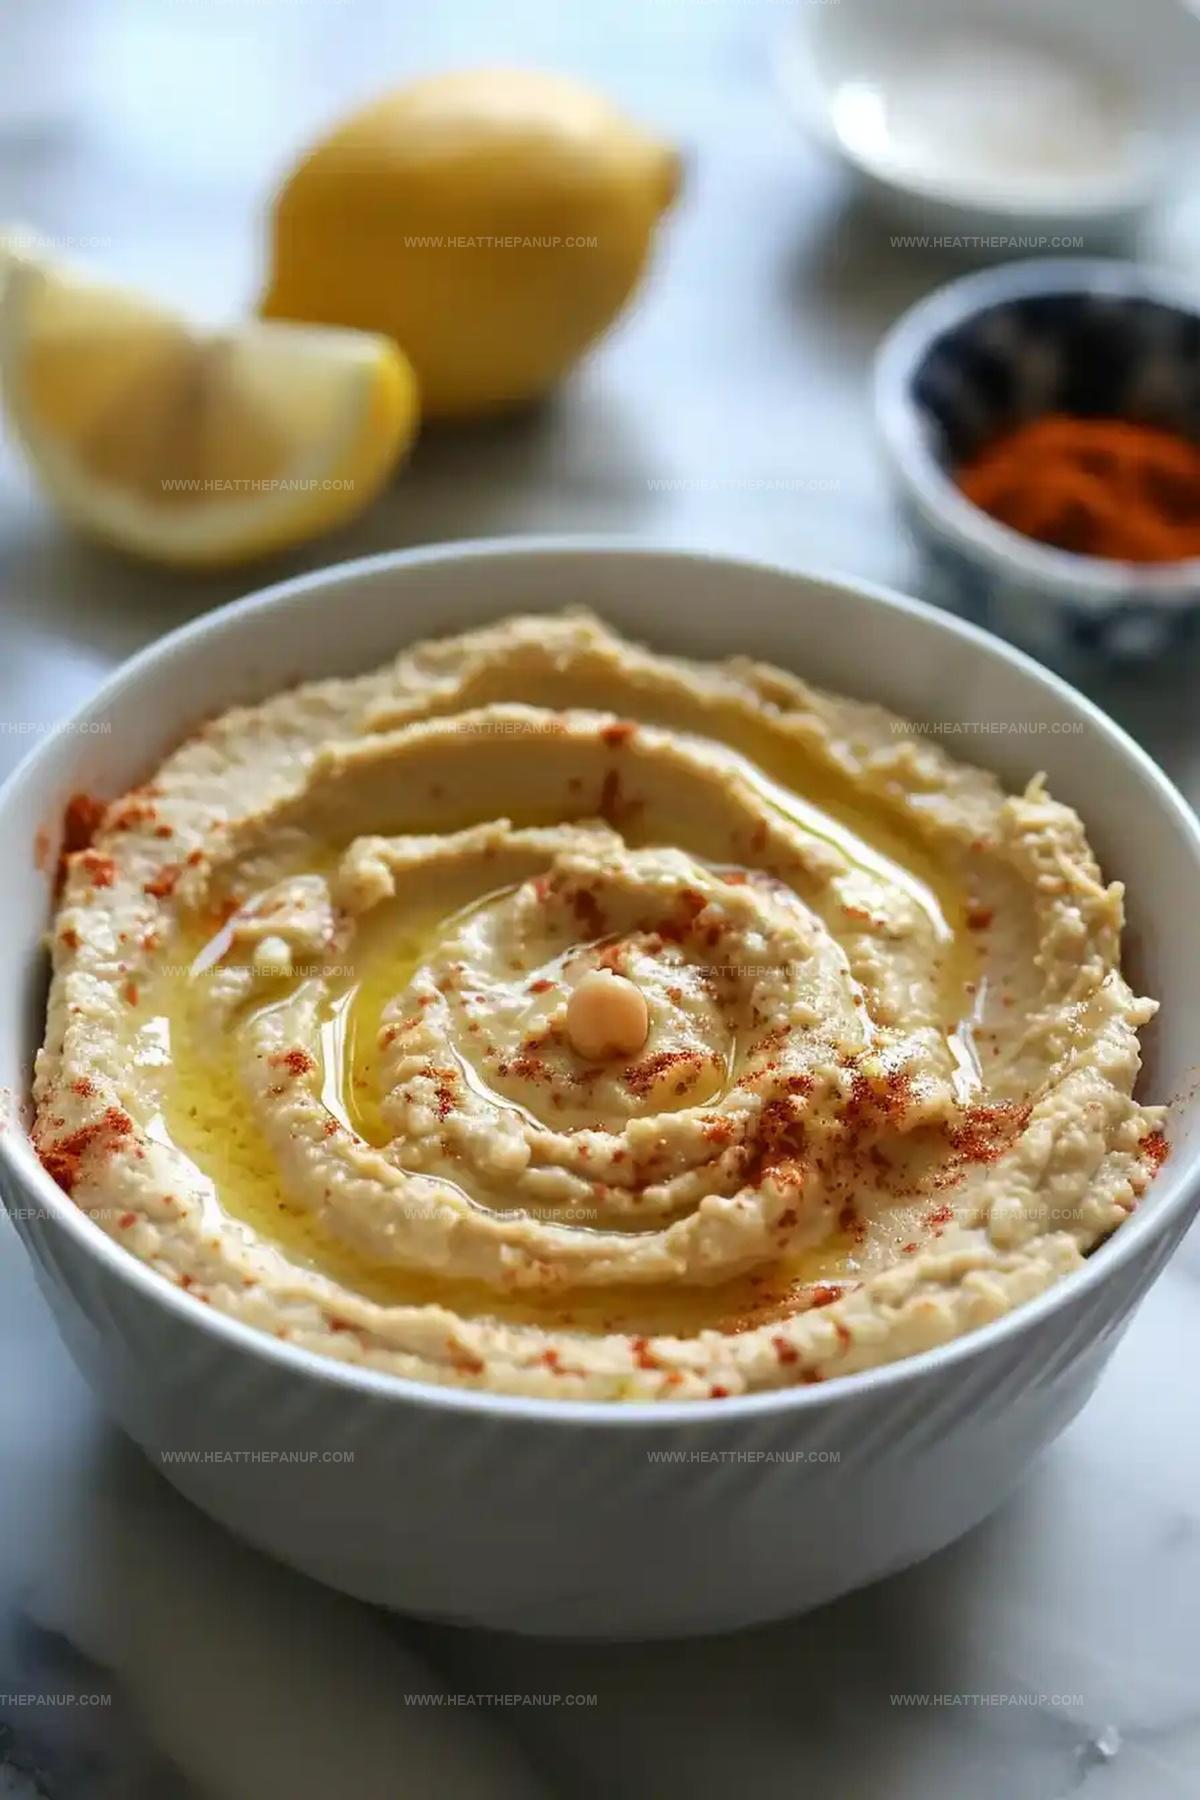
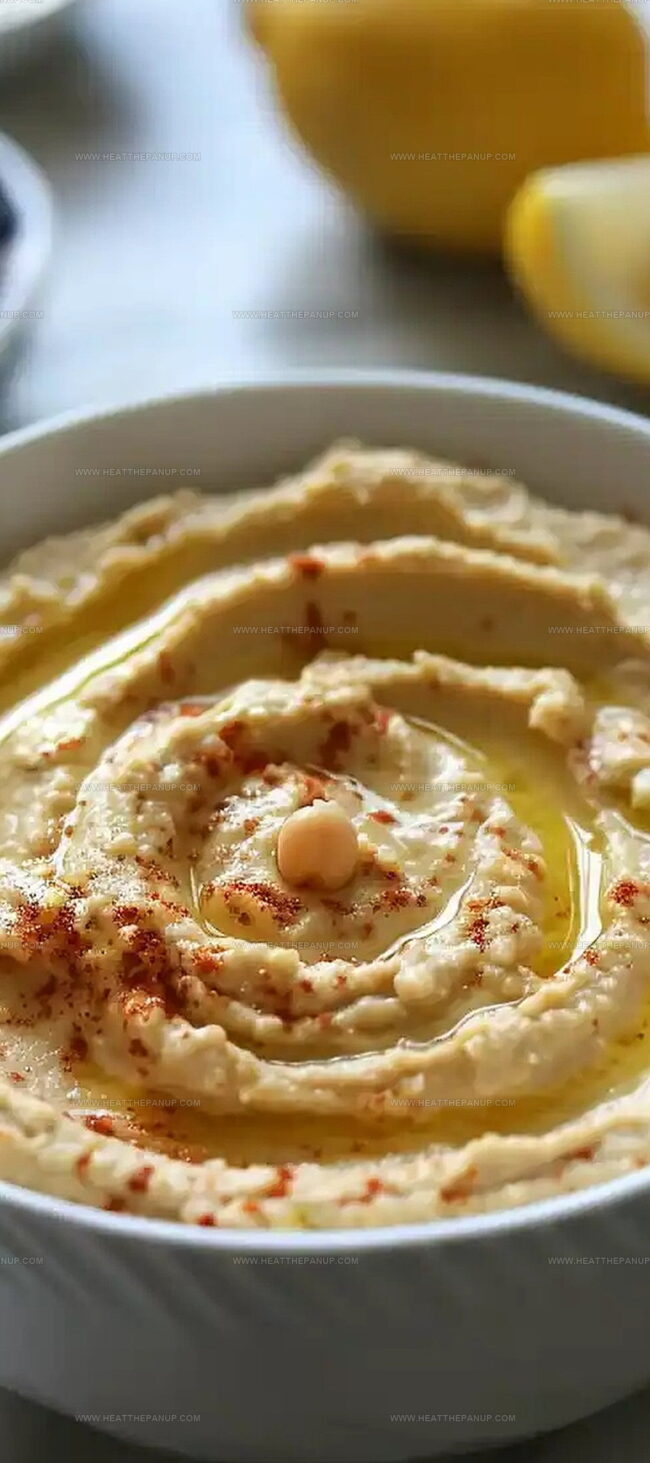
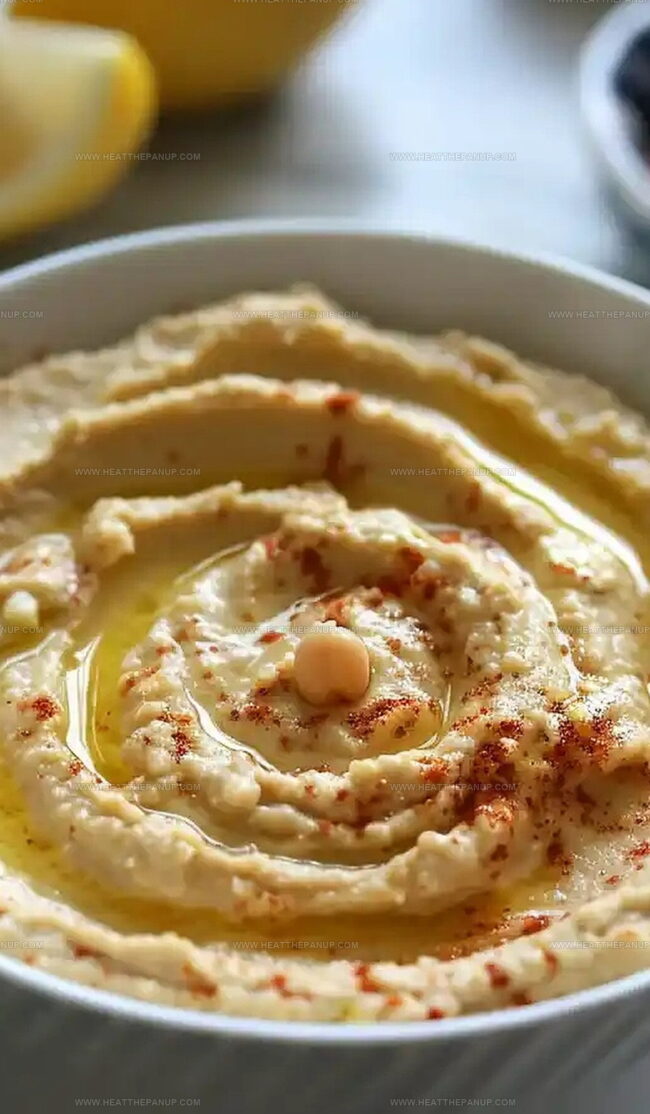
Transfer hummus to a serving bowl. Create a swirl on top using the back of a spoon. Drizzle with extra olive oil and sprinkle with paprika for a beautiful presentation.
Step 7: Store Properly
Store hummus in an airtight container in the refrigerator. It stays fresh for up to one week.
How to Nail Smooth Hummus
Smooth Hummus: Keep It Creamy And Fresh
Smooth Hummus Serving Matches
Smooth Hummus Style Upgrades
FAQs
The butter helps create a crisp texture by binding the dry ingredients and allowing them to brown and become crunchy when baked.
Yes, you can use any firm baking apple like Granny Smith, Honeycrisp, or Braeburn. A mix of apple varieties adds depth of flavor to the crisp.
Look for a golden brown topping and bubbling apple filling around the edges. The apples should be tender when pierced with a fork.
No, the recipe contains all-purpose flour. To make it gluten-free, substitute the flour with gluten-free flour or almond flour.
Print
Smooth Hummus Recipe
- Total Time: 1 hour
- Yield: 8 1x
Description
Silky smooth hummus emerges as a Middle Eastern culinary treasure, blending creamy chickpeas with zesty tahini and garlic. Mediterranean flavors dance across your palate, inviting you to savor each velvety spoonful of this classic dip.
Ingredients
Main Ingredients:
- 4 large apples, peeled, cored, and thinly sliced
- 1 cup old-fashioned oats
- 1/2 cup all-purpose flour
Sweeteners and Spices:
- 1/2 cup granulated sugar
- 1/2 cup brown sugar, packed
- 1 teaspoon ground cinnamon
- 1/2 teaspoon ground nutmeg
- 1/4 teaspoon salt
- 1 tablespoon lemon juice
Fats and Binding:
- 1/2 cup unsalted butter, chilled and diced
Instructions
- Prepare the baking environment by warming the oven to a moderate temperature of 350°F (175°C), ensuring a consistent heat for optimal baking.
- Select crisp, firm apples and slice them uniformly to create an even layer of fruit in the baking dish.
- Create a flavor foundation by gently coating apple slices with granulated sugar, aromatic cinnamon, warming nutmeg, and bright lemon juice to enhance their natural sweetness and prevent browning.
- Generously grease a 9-inch baking dish to prevent sticking and ensure easy serving.
- Craft a textural topping by combining rolled oats, flour, brown sugar, and a pinch of salt in a separate mixing bowl.
- Incorporate cold butter into the dry ingredients, using fingertips or a pastry cutter to develop a crumbly, sandy texture that will transform into a golden, crisp layer during baking.
- Distribute the oat mixture evenly across the seasoned apple base, ensuring complete coverage for a consistent, crunchy topping.
- Transfer the assembled crisp to the preheated oven and bake for approximately 45 minutes, watching for a rich golden-brown color and bubbling fruit edges.
- Remove from the oven and allow the dessert to cool slightly, which helps the filling set and intensifies the flavors.
- Serve warm, optionally accompanied by a scoop of creamy vanilla ice cream or a delicate dollop of whipped cream to complement the warm, spiced apple filling.
Notes
- Enhance apple selection by choosing firm, tart varieties like Granny Smith or Honeycrisp for maximum flavor and texture contrast.
- Adjust sweetness levels by reducing sugar for health-conscious diets or using alternative sweeteners like stevia or coconut sugar.
- Create gluten-free version by substituting regular flour with almond flour or gluten-free baking mix to accommodate dietary restrictions.
- Boost nutritional value by adding chopped nuts like pecans or walnuts to the topping for extra protein and crunch.
- Prep Time: 15 minutes
- Cook Time: 45 minutes
- Category: Appetizer, Snacks
- Method: Baking
- Cuisine: Middle Eastern
Nutrition
- Serving Size: 8
- Calories: 205
- Sugar: 10 g
- Sodium: 55 mg
- Fat: 9 g
- Saturated Fat: 5 g
- Unsaturated Fat: 4 g
- Trans Fat: 0 g
- Carbohydrates: 30 g
- Fiber: 3 g
- Protein: 3 g
- Cholesterol: 20 mg
James Hambly
Founder & Recipe Creator
Expertise
Recipe Development, Culinary Education, Farm-to-Table Cooking, Southern Cuisine
Education
Asheville-Buncombe Technical Community College
Certificate in Culinary Arts
Focus: Hands-on training in professional cooking techniques, emphasizing farm-to-table practices and Southern cuisine.
The Chef’s Academy
Associate Degree in Culinary Arts
Focus: Comprehensive culinary education covering global cuisines, kitchen management, and food safety.
James grew up surrounded by the smells of cast-iron skillets and slow-cooked Southern meals in Asheville, North Carolina.
He sharpened his skills with a Certificate in Culinary Arts from Asheville-Buncombe Technical Community College, and later leveled up with an Associate Degree from The Chef’s Academy.
James’s philosophy is simple: the best meals don’t need fancy tricks, just fresh ingredients, a hot pan, and a little bit of heart. His favorite days are spent testing one-pan wonders, chasing bold flavors, and creating recipes that feel easy, even on a busy night.