Easy Amish Peanut Butter Cream Pie Recipe for Sweet Bliss
Creamy dreams come alive in this mouthwatering amish peanut butter cream pie that’ll make your taste buds dance with joy.
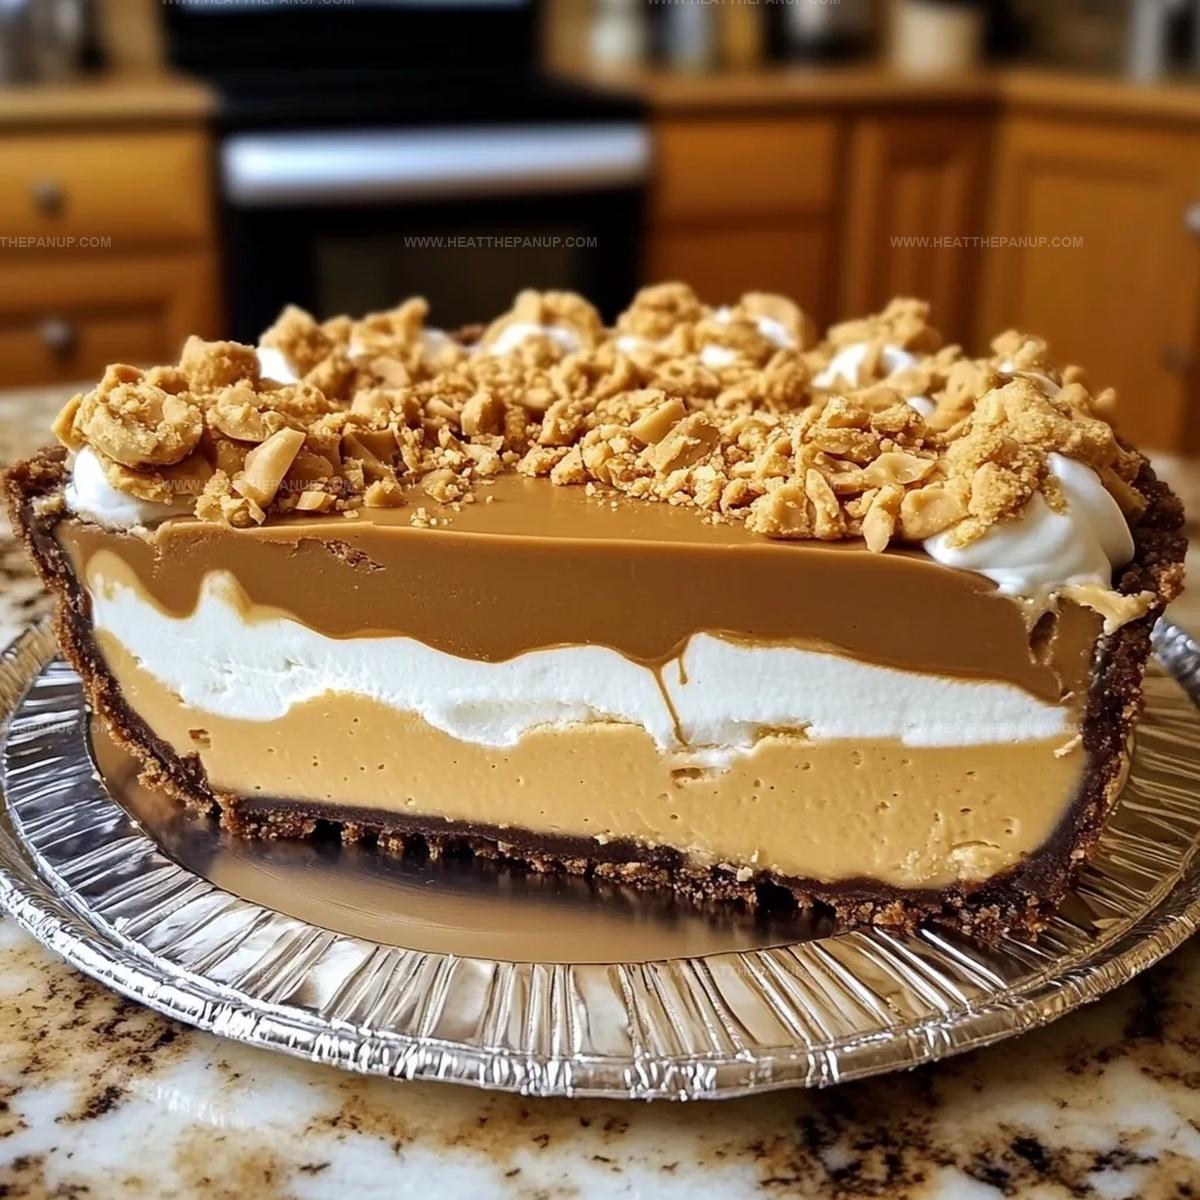
Layers of smooth, rich filling nestle between a crisp graham cracker crust that crumbles perfectly.
Generations of kitchen wisdom blend seamlessly in this delectable dessert.
Silky peanut butter mingles with velvety cream, creating a heavenly combination that melts on your tongue.
Each bite promises pure comfort and nostalgic warmth from traditional baking techniques.
Decadent and simple, this pie represents comfort in its most delicious form.
Dive into a slice and let the magic of homestyle baking transport you to a cozy kitchen filled with love.
What Makes Amish Peanut Butter Cream Pie So Dreamy
Ingredients for Amish Peanut Butter Cream Pie
Pie Crust:Peanut Butter Components:Filling Ingredients:Whipped Topping:Garnish:How to Make Amish Peanut Butter Cream Pie

Step 1: Create Crunchy Peanut Butter Clusters
In a mixing bowl, blend powdered sugar and creamy peanut butter using a fork.
Work the ingredients until they form small, irregular crumbles resembling tiny pebbles.
The goal is to achieve a texture that’s slightly dry and crumbly.
Set aside half of these delightful clusters for the final garnish.
Step 2: Whip Up Silky Peanut Butter Pudding
Grab a medium bowl and combine instant vanilla pudding mix, milk, and peanut butter.
Whisk vigorously for two minutes, ensuring the mixture transforms into a smooth, velvety custard.
The consistency should be thick and free of any stubborn lumps.
Step 3: Fold in Fluffy Cloud-Like Cream
Gently incorporate whipped cream into the peanut butter pudding base.
Use a spatula to fold softly, maintaining the airy volume of the cream.
The technique is to blend without deflating the delicate mixture, creating a light and pillowy filling.
Step 4: Build Your Dreamy Pie Layer
Scatter half of the prepared peanut butter clusters across the pie crust bottom.
Pour the creamy peanut butter filling over the clusters, spreading evenly.
Crown the pie with a generous layer of whipped cream, either smoothing it flat or creating elegant swirls.
Step 5: Chill and Set the Masterpiece
Slide the pie into the refrigerator for a minimum of two hours.
This crucial resting period allows the filling to firm up and develop its rich, decadent texture.
Just before serving, sprinkle the remaining peanut butter clusters on top for a delightful crunch.
Pro Tips for Smooth and Creamy Pie
How to Store and Chill Peanut Butter Cream Pie
What to Serve with Peanut Butter Cream Pie
Fun Twists on Amish Peanut Butter Cream Pie
FAQs
Look for small, pea-sized clusters that are slightly crumbly but hold together when pressed. If the mixture is too dry, add a bit more peanut butter. If it’s too wet, sprinkle in more powdered sugar until you achieve the perfect consistency.
Yes, absolutely! Homemade whipped cream works perfectly. Just whip heavy cream until stiff peaks form and use it as a direct replacement for Cool Whip in the recipe.
Creamy, smooth peanut butter is ideal. Avoid natural or separated peanut butter, as they can make the filling too runny. Stick with standard creamy brands like Jif or Skippy for the best results.
Yes, you can prepare the pie up to 2 days in advance. Keep it refrigerated and add the final crumble topping just before serving to maintain the best texture and flavor.
Print
Silky Amish Peanut Butter Cream Pie Recipe
- Total Time: 20 minutes
- Yield: 8 1x
Description
Hearty Amish peanut butter cream pie brings together creamy richness and rustic charm from Pennsylvania’s countryside kitchens. Sweet layers of silky filling and flaky crust promise comfort and nostalgia you’ll savor with each delightful bite.
Ingredients
Pie Crust:
- 1 pre-baked 9-inch (23 cm) pie crust (homemade or store-bought)
Peanut Butter Filling:
- 1 (3.4 ounces / 96 grams) box instant vanilla pudding mix
- 1 1/2 cups (360 milliliters) milk
- 1/2 cup (120 grams) creamy peanut butter
- 1 cup (240 milliliters) whipped cream or Cool Whip
Peanut Butter Crumbles and Whipped Topping:
- 1/2 cup (60 grams) powdered sugar
- 1/4 cup (60 grams) creamy peanut butter
- 2 cups (480 milliliters) sweetened whipped cream or 8 ounces (226 grams) Cool Whip
Instructions
- Create a delicate crumble mixture by blending powdered sugar with creamy peanut butter until small, pebbly clusters form. Reserve half the crumbles for garnishing the final pie.
- Whisk instant vanilla pudding mix with milk and peanut butter until the mixture transforms into a smooth, thick custard. Ensure the consistency is free of lumps and has a velvety texture.
- Incorporate whipped cream into the peanut butter pudding base, folding gently to maintain the mixture’s airy lightness. Use a spatula with delicate, sweeping motions to preserve the cream’s volume.
- Distribute the first half of peanut butter crumbles across the pre-baked pie crust, creating a textured base layer. Pour the peanut butter pudding mixture evenly over the crumbles, then crown with a generous layer of whipped cream.
- Chill the pie in the refrigerator for a minimum of two hours, allowing the filling to solidify and develop a perfect, sliceable consistency. Before serving, scatter the remaining peanut butter crumbles across the whipped cream topping for a delightful, crunchy finish.
Notes
- Swap peanut butter with sunflower seed butter for a nut-free version perfect for those with allergies, ensuring everyone can enjoy this delightful dessert.
- Use sugar-free pudding mix and whipped topping to create a diabetic-friendly option without compromising the creamy, indulgent texture.
- Enhance flavor complexity by adding a drizzle of chocolate sauce or sprinkling crushed roasted peanuts on top for extra crunch and visual appeal.
- Prepare crumbles and filling ahead of time to reduce last-minute preparation stress, making this pie an excellent make-ahead dessert for gatherings.
- Prep Time: 20 minutes
- Cook Time: 0 minutes
- Category: Desserts
- Method: Chilling
- Cuisine: American
Nutrition
- Serving Size: 8
- Calories: 320
- Sugar: 18 g
- Sodium: 250 mg
- Fat: 22 g
- Saturated Fat: 10 g
- Unsaturated Fat: 9 g
- Trans Fat: 0 g
- Carbohydrates: 30 g
- Fiber: 1 g
- Protein: 6 g
- Cholesterol: 25 mg
Angelina Wiles
Content Editor & Culinary Enthusiast
Expertise
Food Writing and Editing, Vegetarian and Vegan Cuisine, Baking and Pastry Arts, Sustainable Cooking Practices
Education
Portland Community College
Certificate in Culinary Arts
Focus: Emphasis on sustainable cooking practices, vegetarian cuisine, and food writing.
Oregon Culinary Institute
Diploma in Baking and Pastry Arts
Focus: Specialized training in artisanal baking, pastry techniques, and dessert presentation.
Angelina’s love for cooking started with handwritten family recipes and weekend trips to farmers’ markets around Portland. She followed her passion with a Certificate in Culinary Arts from Portland Community College, then perfected her sweet side with a Diploma in Baking and Pastry Arts at Oregon Culinary Institute.
Angelina believes recipes should feel like a conversation, not a science project. She’s all about helping readers trust themselves in the kitchen with simple steps, fresh ideas, and easy twists on classic meals.
When she’s not editing recipes, she’s baking bread, sipping coffee, or getting inspired by the changing seasons.