
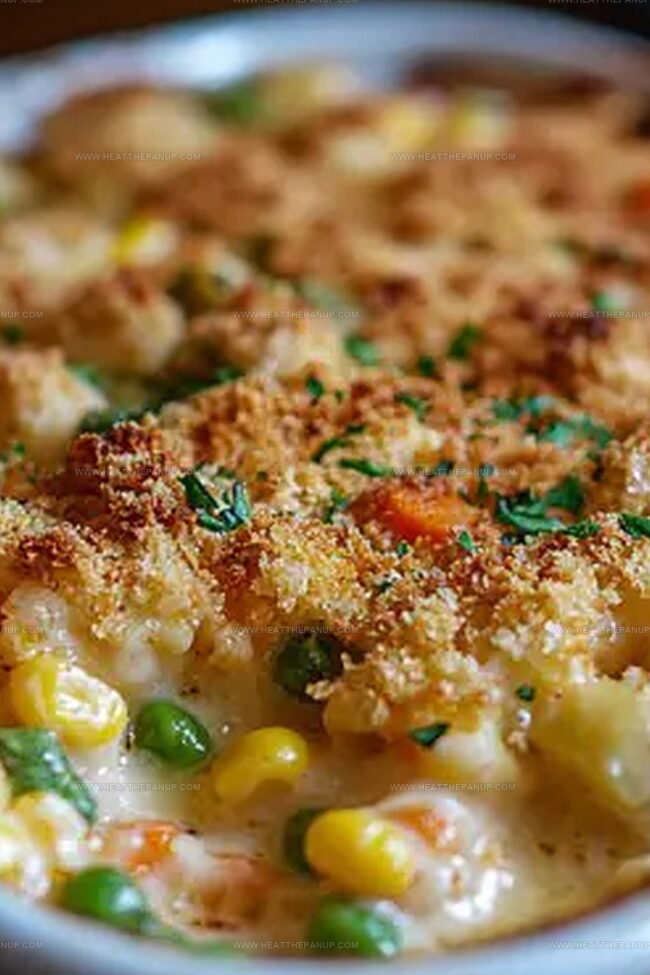
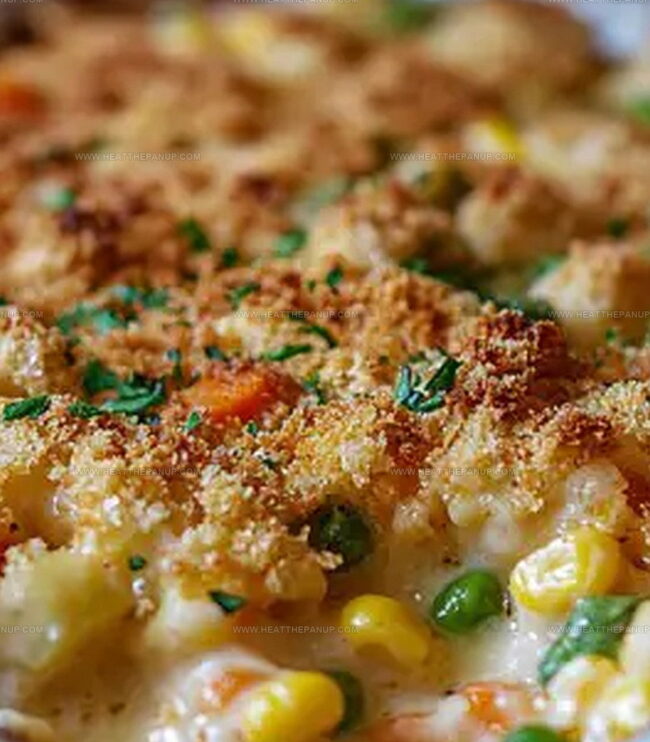
Creamy Shoepeg Casserole Recipe: A Comforting Family Favorite
Comfort arrives with this delightful shoepeg casserole that promises warmth in every single bite.
Midwestern kitchens have long celebrated these magical corn kernels nestled among creamy ingredients.
Southern grandmothers whisper secret techniques passed through generations of home cooking.
Crispy edges and melted cheese create a symphony of textures guaranteed to satisfy hungry souls.
Simple pantry staples combine into something extraordinary that feels like a culinary embrace.
Curious cooks will find this dish surprisingly easy to assemble with minimal preparation time.
Expect delighted smiles and empty plates when you serve this crowd-pleasing comfort classic.
What Makes Shoepeg Casserole So Comforting
Shoepeg Casserole Ingredient Lineup
Main Ingredients:
Fresh Vegetables:Corn and Dairy:Topping Ingredients:Seasoning:How to Assemble Shoepeg Casserole
Step 1: Preheat The Oven
Crank up your oven to a cozy 350°F.
Grab an 8×8-inch baking dish and give it a quick spray with non-stick cooking spray or lightly butter the surface to prevent sticking.
Step 2: Combine Veggie Mixture
In a spacious mixing bowl, toss together these delightful ingredients:Stir everything until it’s well blended.
Sprinkle in some salt and pepper to make those flavors pop.
Step 3: Fill The Baking Dish
Pour the veggie mixture into your prepared baking dish.
Spread it out evenly so every bite gets the same delicious combination.
Step 4: Create Crispy Topping
Crush the Ritz crackers into delicate crumbs.
Scatter them generously across the top of the casserole.
Drizzle melted butter over the crackers, ensuring they’re completely coated for maximum crunchiness.
Step 5: Bake To Perfection
Slide the casserole into the preheated oven.
Bake for 40-45 minutes until the top turns a beautiful golden brown and the edges start bubbling with excitement.
Step 6: Rest And Serve
Let the casserole rest for 5 minutes after removing from the oven.
This allows the flavors to settle and makes serving easier.
Dish up this warm, comforting meal and enjoy!
Tips to Keep Shoepeg Casserole Creamy
How to Store and Warm Shoepeg Casserole
Sides That Go with Shoepeg Casserole
Shoepeg Casserole Twists and Changes
FAQs
Shoepeg corn is a specific variety of white corn with small, narrow, and tightly packed kernels that are sweeter and more tender compared to traditional yellow corn varieties.
Yes, you can substitute canned green beans and corn with frozen vegetables. Simply thaw and drain them before mixing to prevent excess moisture in the casserole.
The current recipe contains dairy and is not vegetarian. To make it vegetarian, replace cream of celery soup with a vegetarian cream soup alternative and ensure all ingredients are vegetarian-friendly.
To make the casserole healthier, use low-fat sour cream, reduced-fat cheese, and whole grain crackers. You can also add more vegetables like spinach or zucchini to increase nutritional value.
Print
Shoepeg Casserole Recipe
- Total Time: 1 hour
- Yield: 6 1x
Description
Creamy Southern shoepeg casserole blends sweet corn kernels with rich cheese and crispy cracker topping for a comforting side dish. Hearty and nostalgic, this classic recipe brings warmth to family dinners with its irresistible blend of textures and flavors you’ll crave.
Ingredients
Vegetables:
- 1 large stalk celery, diced
- 1/2 yellow onion, diced
- 1/2 red bell pepper, diced
- 1 (11 ounces / 311 grams) can shoepeg or white corn, drained
- 1 (14 ounces / 397 grams) can French cut green beans, drained
Dairy and Soup:
- 1/2 cup shredded cheddar cheese
- 8 ounces (226 grams) sour cream
- 1 (10.75 ounces / 305 grams) can condensed cream of celery soup
- 1/2 cup butter, melted
Seasoning and Topping:
- Salt, to taste
- Pepper, to taste
- 1 sleeve Ritz crackers, crushed
Instructions
- Prepare a welcoming canvas for this hearty vegetable medley by heating the oven to 350°F and coating an 8×8-inch baking dish with a light layer of butter or non-stick spray.
- In a spacious mixing bowl, unite the crisp diced celery, fragrant onion, vibrant bell pepper, sharp cheddar cheese, tender shoepeg corn, green beans, creamy celery soup, and tangy sour cream into a harmonious blend.
- Gently fold the ingredients together, ensuring an even distribution of flavors, and enhance with a pinch of salt and pepper to elevate the taste profile.
- Carefully transfer the vegetable mixture into the prepared baking dish, spreading it into a smooth, inviting layer that promises delicious comfort.
- Transform Ritz crackers into a delicate, crunchy topping by crushing them into fine fragments and sprinkling them evenly across the casserole’s surface.
- Drizzle melted butter over the cracker topping, ensuring each crumb becomes a golden, crispy crown for the vegetable ensemble.
- Slide the casserole into the preheated oven and allow it to bake for 40-45 minutes, watching as the top transforms into a beautiful golden-brown landscape and the interior bubbles with anticipation.
- Once removed from the oven, let the casserole rest for 5 minutes, allowing the flavors to settle and the temperature to become perfectly inviting.
- Serve warm, revealing a comforting dish that blends textures and tastes in a delightful culinary experience.
Notes
- Swap frozen vegetables with fresh seasonal produce for enhanced flavor and nutrition, giving the casserole a vibrant and garden-fresh twist.
- Consider reducing cheese and using low-fat alternatives for a lighter, heart-friendly version that maintains delicious taste and creamy texture.
- Experiment with gluten-free crackers or breadcrumbs to make the dish celiac-friendly without compromising the crunchy topping’s satisfying crispness.
- For added protein, mix in shredded rotisserie chicken or diced ham to transform this side dish into a complete and hearty meal option.
- Prep Time: 15 minutes
- Cook Time: 45 minutes
- Category: Dinner, Lunch
- Method: Baking
- Cuisine: American
Nutrition
- Serving Size: 6
- Calories: 320
- Sugar: 3 g
- Sodium: 750 mg
- Fat: 22 g
- Saturated Fat: 12 g
- Unsaturated Fat: 8 g
- Trans Fat: 0 g
- Carbohydrates: 30 g
- Fiber: 2 g
- Protein: 7 g
- Cholesterol: 50 mg
Angelina Wiles
Content Editor & Culinary Enthusiast
Expertise
Food Writing and Editing, Vegetarian and Vegan Cuisine, Baking and Pastry Arts, Sustainable Cooking Practices
Education
Portland Community College
Certificate in Culinary Arts
Focus: Emphasis on sustainable cooking practices, vegetarian cuisine, and food writing.
Oregon Culinary Institute
Diploma in Baking and Pastry Arts
Focus: Specialized training in artisanal baking, pastry techniques, and dessert presentation.
Angelina’s love for cooking started with handwritten family recipes and weekend trips to farmers’ markets around Portland. She followed her passion with a Certificate in Culinary Arts from Portland Community College, then perfected her sweet side with a Diploma in Baking and Pastry Arts at Oregon Culinary Institute.
Angelina believes recipes should feel like a conversation, not a science project. She’s all about helping readers trust themselves in the kitchen with simple steps, fresh ideas, and easy twists on classic meals.
When she’s not editing recipes, she’s baking bread, sipping coffee, or getting inspired by the changing seasons.