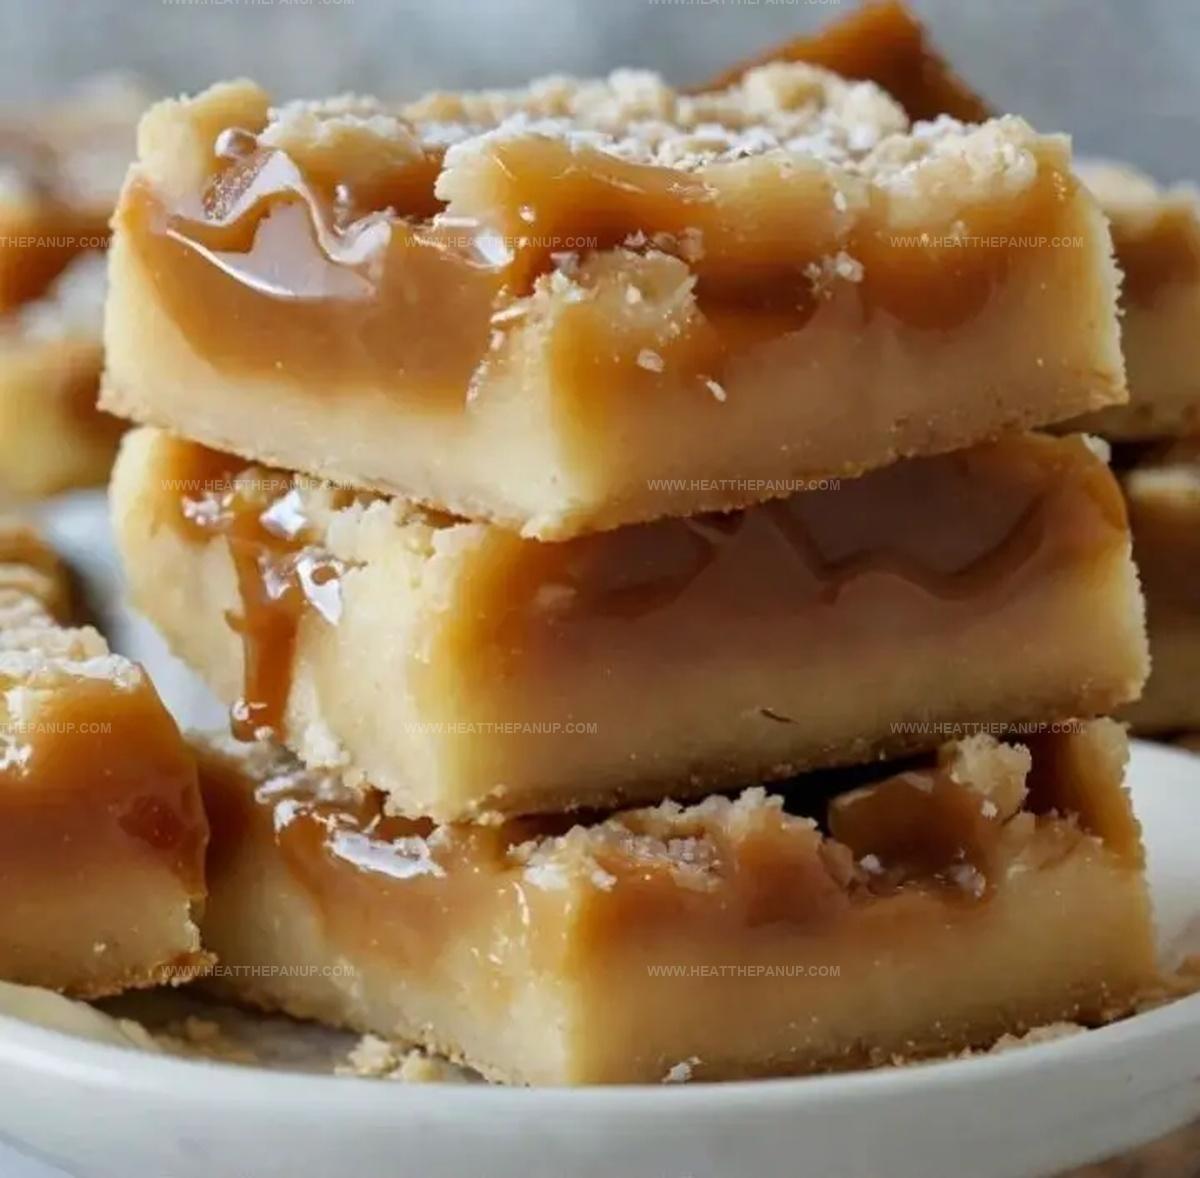
Sweet & Salty Bliss: Homemade Salted Caramel Butter Bars Recipe
Crumbly, buttery magic happens when salted caramel butter bars dance across your kitchen counter.
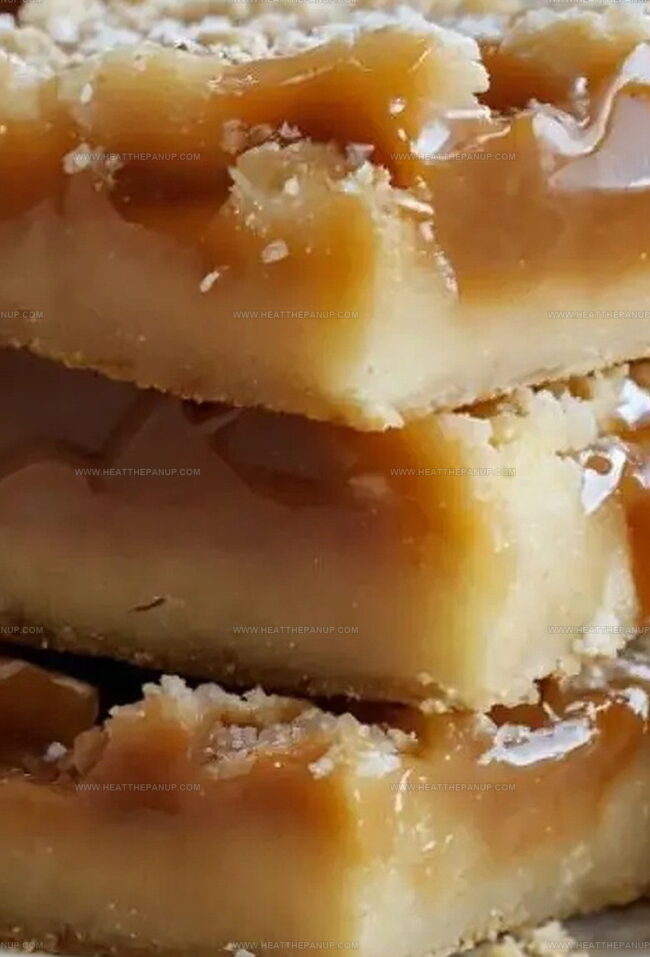
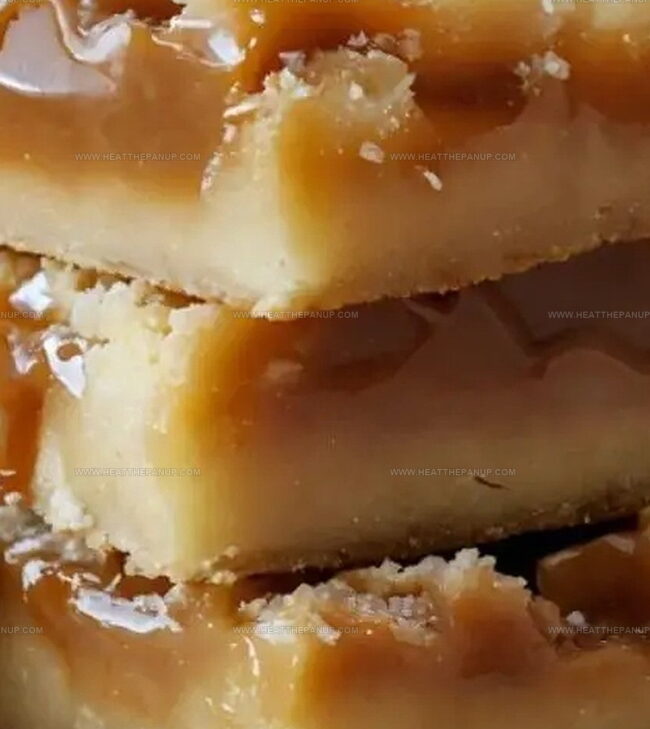
Sweet whispers of golden caramel peek through rich, tender layers of delectable pastry.
Butter melts into unexpected moments of pure comfort and indulgence.
Coastal bakers have long understood the secret charm of these decadent squares.
Childhood memories swirl around each perfectly crafted bite, promising pure satisfaction.
Simple ingredients conspire to create something magnificently irresistible.
Salt and sweet perform an elegant culinary waltz in this delightful treat.
You won’t be able to resist cutting just one more slice.
What Makes Salted Caramel Butter Bars So Addictive
Salted Caramel Butter Bars Ingredient Rundown
Main Ingredients:Flavor Enhancers:Baking Accessories:Salted Caramel Butter Bars Recipe Instructions
Step 1: Prepare Baking Station
Grab your 13×9-inch baking pan and line it with foil.
Give the foil a quick spray of cooking spray to prevent sticking.
Set your oven to warm up at 325°F.
Step 2: Create Buttery Dough Base
Pull out your stand mixer and combine:Beat these ingredients until they become light and fluffy.
Slowly add in:Mix until a soft, crumbly dough forms.
Step 3: Build the First Layer
Take half of your prepared dough and press it evenly into the lined baking pan.
Use your fingers to create a smooth, compact base.
Pop the remaining dough into the refrigerator to chill.
Step 4: Initial Baking
Slide the pan into the preheated oven and bake the first layer for 15 minutes.
The edges should start to turn a light golden color.
Step 5: Add Caramel and Topping
Once the base is out of the oven, pour a generous layer of caramel sauce over the warm crust.
Take the chilled dough and crumble it across the top of the caramel.
Sprinkle sea salt over the entire surface for that perfect sweet-salty combination.
Step 6: Final Baking and Cooling
Return the pan to the oven and bake for 25-30 minutes.
Watch for a beautiful golden-brown color across the top.
Remove and let the bars cool completely at room temperature.
Step 7: Chill and Slice
Place the cooled pan in the refrigerator for at least an hour.
This helps the bars set and makes cutting clean, crisp squares much easier.
Slice into perfect squares and serve.
Tips For Better Salted Caramel Butter Bars
Keeping Salted Caramel Butter Bars Fresh
Delicious Pairings For Salted Caramel Butter Bars
Variants For Salted Caramel Butter Bars
FAQs
Yes, you can make your own caramel sauce. Just ensure it’s thick enough to spread evenly and not too runny.
All-purpose flour is ideal. It provides the right texture and structure for the butter bar base.
Look for a golden-brown color on the crumbled top and edges. The crust should be set but not too dark.
Chilling the remaining dough helps it crumble more easily and prevents it from melting too quickly in the oven.
Print
Salted Caramel Butter Bars Recipe
- Total Time: 1 hour 5 minutes
- Yield: 12 1x
Description
Salted caramel butter bars melt hearts with their irresistible blend of sweet and salty flavors. Buttery, rich layers promise a delightful dessert experience that lingers long after the last crumbly bite.
Ingredients
Main Ingredients:
- 4 cups all-purpose flour
- 2 cups (907 grams) unsalted butter, softened
- 1 cup (200 grams) white sugar
Sweeteners and Flavors:
- 1.5 cups (170 grams) powdered sugar
- 1 tablespoon vanilla extract
Finishing Ingredients:
- 1 11.5 ounces (326 grams) jar salted caramel sauce
- Sea salt (to taste)
Instructions
- Transform butter and sugar into a cloud-like mixture using an electric mixer until light and airy, blending in powdered sugar and vanilla extract for depth of flavor.
- Gently fold flour into the creamy mixture, creating a delicate, pliable dough that will form the foundation of these luxurious bars.
- Carefully spread half the dough across the prepared baking pan, creating an even, smooth base layer that will cradle the caramel.
- Slide the remaining dough into the refrigerator to firm up while preparing the initial crust.
- Warm the oven to a precise 325°F, positioning the rack in the center to ensure even baking.
- Line the baking pan with aluminum foil, generously coating with non-stick spray to prevent any potential sticking.
- Bake the initial dough layer for approximately 15 minutes, allowing it to develop a light golden hue and subtle crispness.
- Drizzle rich, velvety caramel across the partially baked crust, ensuring complete and even coverage.
- Retrieve the chilled dough and delicately crumble it over the caramel, creating a rustic, textured topping.
- Sprinkle a delicate layer of sea salt across the surface, enhancing the sweet-savory flavor profile.
- Return the pan to the oven, baking for 25-30 minutes until the top achieves a beautiful golden-brown color.
- Allow the bars to cool completely at room temperature, then refrigerate to set before slicing into decadent squares.
Notes
- Chill the dough before pressing into the pan to prevent sticking and ensure a more even, compact base.
- Use high-quality caramel sauce or make your own for a richer, more authentic flavor that elevates the entire dessert.
- Sprinkle sea salt sparingly to create a perfect balance between sweet and salty, enhancing the caramel’s depth.
- Allow bars to cool completely and set in the refrigerator for clean, precise cuts and a firmer texture that holds together beautifully.
- Prep Time: 20 minutes
- Cook Time: 45 minutes
- Category: Desserts, Snacks
- Method: Baking
- Cuisine: American
Nutrition
- Serving Size: 12
- Calories: 330
- Sugar: 22 g
- Sodium: 150 mg
- Fat: 20 g
- Saturated Fat: 12 g
- Unsaturated Fat: 8 g
- Trans Fat: 0 g
- Carbohydrates: 36 g
- Fiber: 0 g
- Protein: 2 g
- Cholesterol: 60 mg
Angelina Wiles
Content Editor & Culinary Enthusiast
Expertise
Food Writing and Editing, Vegetarian and Vegan Cuisine, Baking and Pastry Arts, Sustainable Cooking Practices
Education
Portland Community College
Certificate in Culinary Arts
Focus: Emphasis on sustainable cooking practices, vegetarian cuisine, and food writing.
Oregon Culinary Institute
Diploma in Baking and Pastry Arts
Focus: Specialized training in artisanal baking, pastry techniques, and dessert presentation.
Angelina’s love for cooking started with handwritten family recipes and weekend trips to farmers’ markets around Portland. She followed her passion with a Certificate in Culinary Arts from Portland Community College, then perfected her sweet side with a Diploma in Baking and Pastry Arts at Oregon Culinary Institute.
Angelina believes recipes should feel like a conversation, not a science project. She’s all about helping readers trust themselves in the kitchen with simple steps, fresh ideas, and easy twists on classic meals.
When she’s not editing recipes, she’s baking bread, sipping coffee, or getting inspired by the changing seasons.