
Creamy Ricotta Cannoli Squares Recipe: Sweet Italian Magic
Sweet and creamy ricotta cannoli squares have been my secret dessert weapon during countless family gatherings.
Memories of Sicily flood back with each delectable bite I take.
Decadent pastry layers mingle with smooth, rich filling that captures traditional Italian dessert magic.
Crisp edges crackle with delightful texture against silky cream center notes.
Powdered sugar dusting adds elegant whispers of sweetness across each square’s surface.
Minimal ingredients and simple preparation make this recipe accessible for bakers of all skill levels.
Let’s transform your kitchen into a Palermo-inspired pastry paradise and create something truly memorable.
Ricotta Cannoli Squares That Offer a Crunchy, Creamy Delight
What You’ll Need for Making Ricotta Cannoli Squares
Main Ingredients:
Crust Base Ingredients:Filling Ingredients:Topping and Garnish Ingredients:Ricotta Cannoli Square Assembly in Steps
Step 1: Craft The Buttery Crust
Whisk together flour, sugar, and baking powder in a spacious mixing bowl.
Slice cold butter into small pieces and work it into the dry ingredients using your fingertips until the mixture looks like coarse, crumbly sand.
Pour in egg and vanilla extract, blending until a soft dough forms.
Press the dough smoothly into a parchment-lined 9×9-inch baking pan, creating an even layer.
Step 2: Bake The Golden Base
Slide the pan into a preheated oven at 350°F.
Bake for 15-18 minutes until the edges turn light golden brown.
Remove and let the crust cool completely at room temperature.
Step 3: Whip Up Creamy Ricotta Filling
In a separate bowl, combine:Blend until silky smooth.
Gently fold in mini chocolate chips, creating a delightful speckled mixture.
Step 4: Layer And Chill The Filling
Spread the ricotta mixture evenly across the cooled crust, using a spatula to create a perfect smooth surface.
Refrigerate for at least 2 hours, allowing the filling to set firmly.
Step 5: Create The Crumbly Topping
Roll out remaining dough to 1/4 inch thickness between parchment sheets.
Bake on a separate sheet at 350°F for 20-25 minutes until crisp and golden.
Let cool completely, then crumble into coarse pieces.
Step 6: Assemble And Garnish
Sprinkle the crumbly top layer over the chilled ricotta filling, gently pressing to adhere.
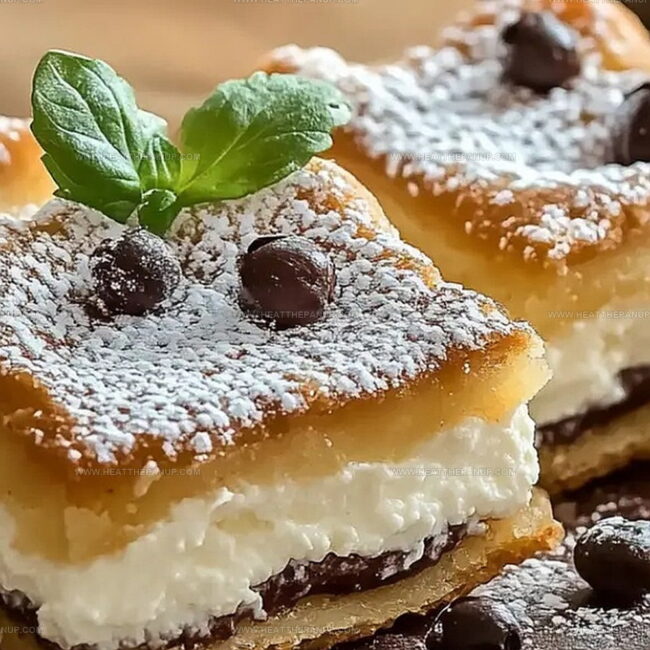
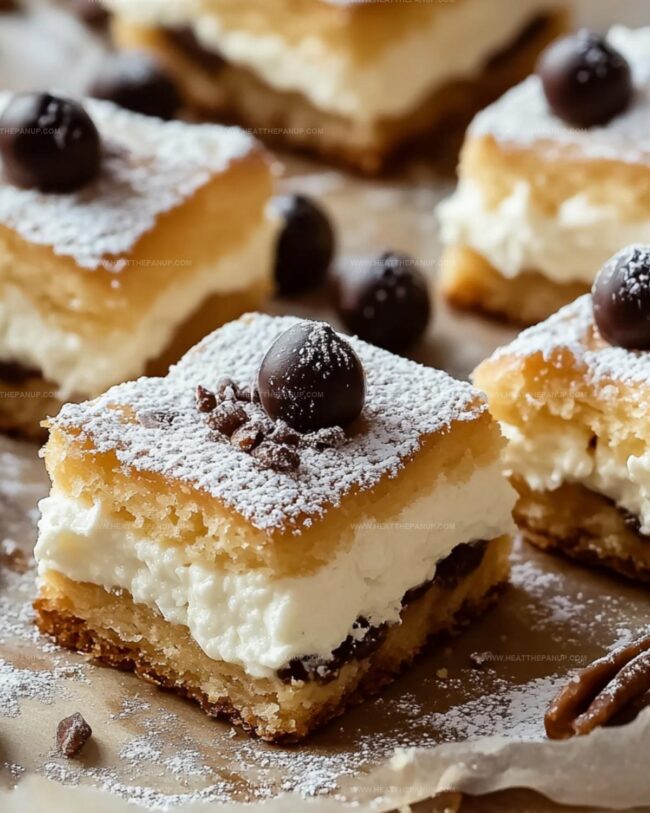
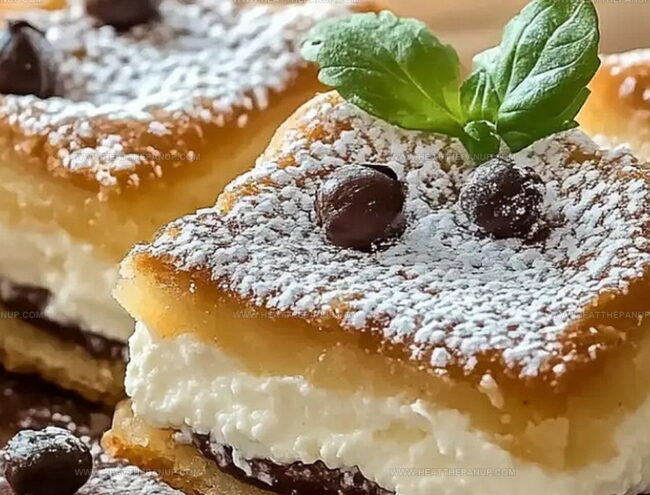
Dust with powdered sugar.
Scatter mini chocolate chips and chopped pistachios for extra texture and visual appeal.
Step 7: Slice And Serve
Remove the dessert from the pan using parchment paper overhang.
Transfer to a cutting board and slice into 12 elegant squares.
Serve chilled and enjoy the delightful cannoli-inspired treat.
Ricotta Cannoli Squares: Layering Tricks for a Sweet Finish
Storing Ricotta Cannoli Squares
Ricotta Cannoli Squares Pairings
Ricotta Cannoli Squares with Dessert Variants
FAQs
Yes, you can use store-bought ricotta, but for the best texture and flavor, choose a high-quality, well-drained ricotta cheese. Drain excess moisture using a cheesecloth for a firmer filling.
Ensure the crust is completely cooled before adding the ricotta filling. Also, make sure the ricotta is well-drained to prevent excess moisture from making the base soggy.
Absolutely! You can prepare the cannoli squares up to 2 days in advance. Keep them refrigerated and add the powdered sugar and toppings just before serving to maintain their fresh appearance and crunch.
You can replace orange zest with lemon zest for a different citrus twist. If you don’t have mini chocolate chips, you can use regular chocolate chips or chopped dark chocolate as an alternative.
Print
Ricotta Cannoli Squares Recipe
- Total Time: 55 minutes
- Yield: 12 1x
Description
Sicilian-inspired ricotta cannoli squares blend creamy sweetness with crisp pastry layers, delivering a delightful dessert experience. Delicate textures and rich flavors invite you to savor each indulgent bite of this classic Italian treat.
Ingredients
Crust and Top Crust Ingredients:
- 2 cups (480 milliliters) all-purpose flour
- 1/2 cup (100 grams) granulated sugar
- 1/2 teaspoon baking powder
- 1/2 cup (113 grams) unsalted butter (cold and cubed)
- 1 large egg
- 1 teaspoon vanilla extract
Main Filling Ingredients:
- 2 cups (454 grams) ricotta cheese (well-drained)
- 1/2 cup (85 grams) mini chocolate chips
- 1 cup (120 grams) powdered sugar (sifted)
Additional Flavor and Garnish Ingredients:
- 1 teaspoon vanilla extract
- 1/2 teaspoon orange zest (optional)
- Powdered sugar (for dusting)
- Mini chocolate chips (for garnish)
- Chopped pistachios (optional)
Instructions
- Craft the foundational layer by combining flour, sugar, and baking powder in a mixing vessel. Integrate cold butter until the mixture transforms into a grainy texture resembling coarse sand.
- Incorporate egg and vanilla extract, blending until the dough coheres into a uniform mass. Transfer the mixture into a parchment-lined baking vessel, pressing evenly to create a consistent base.
- Roast the crust in a preheated oven at 350°F until it achieves a delicate golden hue, approximately 15-18 minutes. Allow the base to cool completely before proceeding.
- Prepare the creamy ricotta filling by whisking ricotta cheese with powdered sugar, vanilla extract, and fragrant orange zest until the mixture reaches a silky, uniform consistency.
- Gently fold mini chocolate chips into the ricotta mixture, distributing them evenly throughout the filling.
- Spread the ricotta mixture across the cooled crust, utilizing a spatula to create a smooth, level surface. Refrigerate for a minimum of two hours to allow the filling to set firmly.
- Once chilled, elevate the dessert from the pan using parchment paper edges and transfer to a cutting surface.
- Slice the dessert into twelve equal squares, creating precise, clean cuts.
- Enhance the squares with a delicate dusting of powdered sugar, then garnish with additional mini chocolate chips and finely chopped pistachios for textural contrast and visual appeal.
Notes
- Adapt the crust by substituting gluten-free flour blend for traditional flour to make the dessert celiac-friendly and inclusive for those with wheat sensitivities.
- Experiment with dairy-free ricotta alternatives like cashew or almond-based ricotta for vegan guests, ensuring everyone can enjoy these delightful squares.
- Consider reducing sugar content by using monk fruit sweetener or stevia for a lower-calorie version that maintains the dessert’s delectable flavor profile.
- Toast pistachios before chopping to enhance their nutty flavor and provide an extra layer of complexity to the garnish, elevating the overall taste experience.
- Prep Time: 30 minutes
- Cook Time: 25 minutes
- Category: Desserts
- Method: Baking
- Cuisine: Italian
Nutrition
- Serving Size: 12
- Calories: 275
- Sugar: 18 g
- Sodium: 150 mg
- Fat: 14 g
- Saturated Fat: 8 g
- Unsaturated Fat: 6 g
- Trans Fat: 0 g
- Carbohydrates: 34 g
- Fiber: 1 g
- Protein: 5 g
- Cholesterol: 30 mg
Angelina Wiles
Content Editor & Culinary Enthusiast
Expertise
Food Writing and Editing, Vegetarian and Vegan Cuisine, Baking and Pastry Arts, Sustainable Cooking Practices
Education
Portland Community College
Certificate in Culinary Arts
Focus: Emphasis on sustainable cooking practices, vegetarian cuisine, and food writing.
Oregon Culinary Institute
Diploma in Baking and Pastry Arts
Focus: Specialized training in artisanal baking, pastry techniques, and dessert presentation.
Angelina’s love for cooking started with handwritten family recipes and weekend trips to farmers’ markets around Portland. She followed her passion with a Certificate in Culinary Arts from Portland Community College, then perfected her sweet side with a Diploma in Baking and Pastry Arts at Oregon Culinary Institute.
Angelina believes recipes should feel like a conversation, not a science project. She’s all about helping readers trust themselves in the kitchen with simple steps, fresh ideas, and easy twists on classic meals.
When she’s not editing recipes, she’s baking bread, sipping coffee, or getting inspired by the changing seasons.