
The Perfect Red Velvet Spritz Cookies Recipe for Holiday Magic
Sweet memories swirl around this delightful red velvet spritz cookies creation that captures childhood wonder.
Memories of grandma’s kitchen dance through every buttery bite.
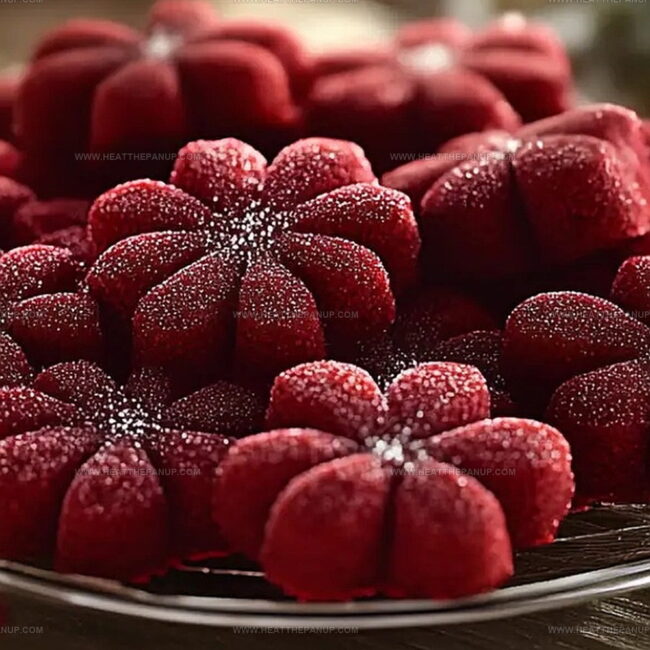
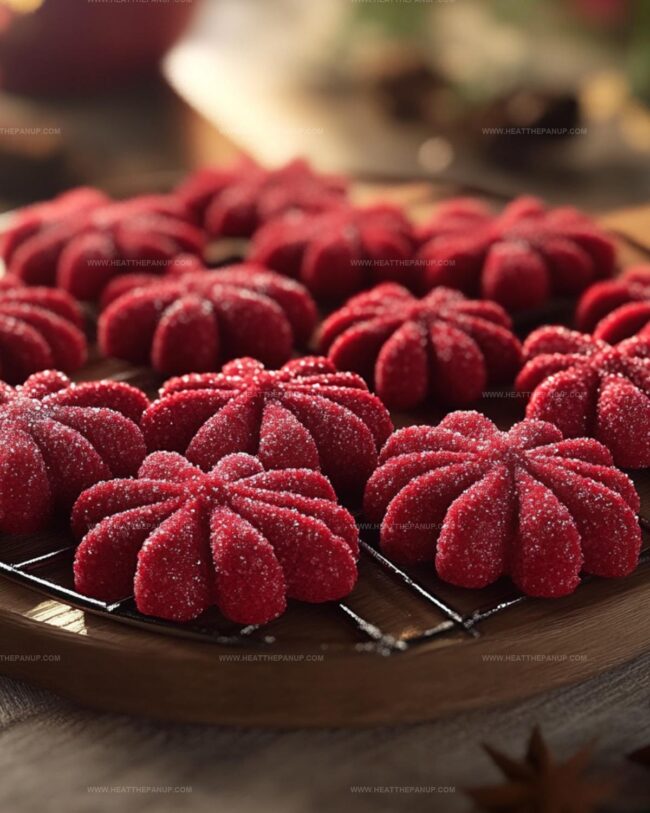
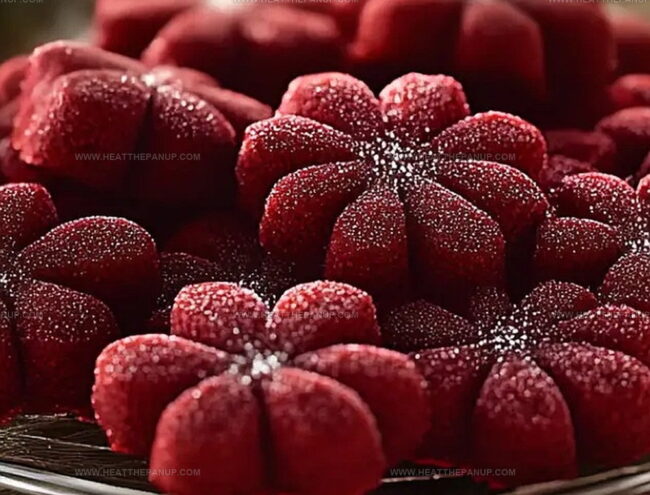
Delicate crimson cookies emerge from vintage cookie presses with elegant charm.
Soft cocoa undertones blend seamlessly with creamy vanilla hints.
Each spritzed cookie promises a melt-in-your-mouth experience that whispers comfort.
Vibrant color and delicate texture make these treats perfect for special moments.
You’ll fall in love with how simple yet stunning these cookies can be.
Bake these and watch faces light up with pure joy.
Red Velvet Spritz Cookies That Melt With a Sweet Snap
Red Velvet Spritz Cookie Ingredients
Main Ingredients:
Wet Ingredients:Dry Ingredients:Flavor and Color Enhancers:Decorative Ingredients:Baking Red Velvet Spritz Cookies to Impress
Step 1: Warm Up The Oven
Turn the oven to 375°F and prepare a clean baking workspace.
Get your mixing equipment ready for a delightful baking adventure.
Step 2: Create Creamy Base
In a large mixing bowl, blend together:Whip these ingredients until they become light and fluffy, creating a smooth foundation for your cookies.
Mix until the texture looks airy and pale.
Step 3: Add Flavor Boosters
Pour in:Stir everything until the mixture transforms into a vibrant red color with a consistent texture.
Step 4: Form The Cookie Mixture
In a separate bowl, combine:Slowly incorporate the dry ingredients into the wet mixture.
Gently fold until a soft dough develops.
If the dough feels too thick, add a splash of water to create a smoother consistency.
Step 5: Shape The Delights
Load the cookie press with your prepared dough.
Choose a decorative disc and press cookies onto clean baking sheets.
Space each cookie about an inch apart for perfect separation.
Step 6: Sprinkle Magic
Scatter nonpareils or festive sprinkles across the cookie surfaces, adding a playful touch before baking.
Step 7: Bake To Perfection
Slide the baking sheets into the preheated oven.
Bake for 8-10 minutes until cookies are set but not darkened.
Watch carefully to maintain their delicate texture.
Step 8: Cool And Enjoy
Remove cookies from the oven and let them rest on the baking sheet for two minutes.
Transfer to wire cooling racks and allow them to cool completely before serving.
Spritz Cookie Tips with That Classic Red Velvet Look
Keep Red Velvet Spritz Cookies Fresh
Red Velvet Spritz Cookies Serving Ideas
Spritz Cookies with Red Velvet Styling
FAQs
Red velvet spritz cookies combine the classic buttery spritz cookie texture with a rich red velvet flavor, achieved by adding cocoa powder and red food coloring to create a distinctive taste and vibrant color.
Yes, you’ll need a cookie press to create the classic spritz cookie shapes. These devices have different discs that allow you to create various decorative designs like stars, flowers, or wreaths.
While food coloring gives the cookies their signature red color, you can omit it and still have delicious cocoa-flavored spritz cookies. The taste will remain the same, just without the bright red appearance.
Make sure your dough is at the right consistency – not too soft or too stiff. If the dough is too firm, add a tablespoon of water. Also, press the cookie press firmly and lift straight up to create clean, distinct shapes.
Print
Red Velvet Spritz Cookies Recipe
- Total Time: 25 minutes
- Yield: 24 1x
Description
Red velvet spritz cookies bring classic holiday charm with a modern twist. Rich cocoa and cream cheese frosting create irresistible elegance you cannot resist.
Ingredients
Main Ingredients:
- 2 1/4 cups all-purpose flour
- 1 cup butter, softened
- 4 ounces (113 grams) cream cheese, softened
- 3/4 cup sugar
- 1 large egg, room temperature
Flavor and Color Ingredients:
- 2 tablespoons baking cocoa
- 1 teaspoon vanilla extract
- 1/2 teaspoon peppermint extract
- 1/2 teaspoon red paste food coloring
- 1 tablespoon water (if needed for consistency)
Garnish:
- Nonpareils or sprinkles
Instructions
- Preheat the oven to 375°F (190°C), creating an optimal baking environment for delicate spritz cookies.
- In a spacious mixing bowl, whip the butter, cream cheese, and sugar together until the mixture transforms into a light, airy consistency, which typically takes 2-3 minutes of vigorous mixing.
- Infuse the dough with vibrant flavor by incorporating vanilla extract, peppermint extract, egg, and red food coloring, stirring until the ingredients are thoroughly integrated and the mixture achieves a uniform crimson hue.
- Prepare the dry ingredients by whisking flour and baking cocoa in a separate bowl, ensuring no lumps remain.
- Gradually fold the dry ingredients into the wet mixture, gently combining until a soft, malleable dough emerges. If the texture seems overly firm, introduce a tablespoon of water to enhance smoothness.
- Load the dough into a cookie press, selecting an intricate disc to create eye-catching shapes.
- Carefully press the cookies onto ungreased baking sheets, positioning them approximately one inch apart to allow for slight spreading during baking.
- Embellish the unbaked cookies with a sprinkle of nonpareils or festive sprinkles, adding a delightful decorative touch.
- Slide the baking sheets into the preheated oven and bake for 8-10 minutes, watching carefully to ensure the cookies set without developing excessive browning.
- After removing from the oven, allow the cookies to rest on the baking sheet for two minutes, then transfer to wire cooling racks to complete the cooling process.
Notes
- Chill the dough briefly if it becomes too soft, ensuring crisp, well-defined spritz cookie shapes.
- Swap food coloring for natural alternatives like beetroot powder for a chemical-free red hue.
- Use gluten-free flour blend to make these cookies suitable for those with wheat sensitivities.
- Experiment with different extracts like almond or orange to create unique flavor variations.
- Prep Time: 15 minutes
- Cook Time: 10 minutes (per batch)
- Category: Desserts, Snacks
- Method: Baking
- Cuisine: American
Nutrition
- Serving Size: 24
- Calories: 146
- Sugar: 6 g
- Sodium: 64 mg
- Fat: 7 g
- Saturated Fat: 4 g
- Unsaturated Fat: 2 g
- Trans Fat: 0 g
- Carbohydrates: 20 g
- Fiber: 0.5 g
- Protein: 2 g
- Cholesterol: 30 mg
Angelina Wiles
Content Editor & Culinary Enthusiast
Expertise
Food Writing and Editing, Vegetarian and Vegan Cuisine, Baking and Pastry Arts, Sustainable Cooking Practices
Education
Portland Community College
Certificate in Culinary Arts
Focus: Emphasis on sustainable cooking practices, vegetarian cuisine, and food writing.
Oregon Culinary Institute
Diploma in Baking and Pastry Arts
Focus: Specialized training in artisanal baking, pastry techniques, and dessert presentation.
Angelina’s love for cooking started with handwritten family recipes and weekend trips to farmers’ markets around Portland. She followed her passion with a Certificate in Culinary Arts from Portland Community College, then perfected her sweet side with a Diploma in Baking and Pastry Arts at Oregon Culinary Institute.
Angelina believes recipes should feel like a conversation, not a science project. She’s all about helping readers trust themselves in the kitchen with simple steps, fresh ideas, and easy twists on classic meals.
When she’s not editing recipes, she’s baking bread, sipping coffee, or getting inspired by the changing seasons.