
Heavenly Red Velvet Cheesecake Balls Recipe for Sweet Moments
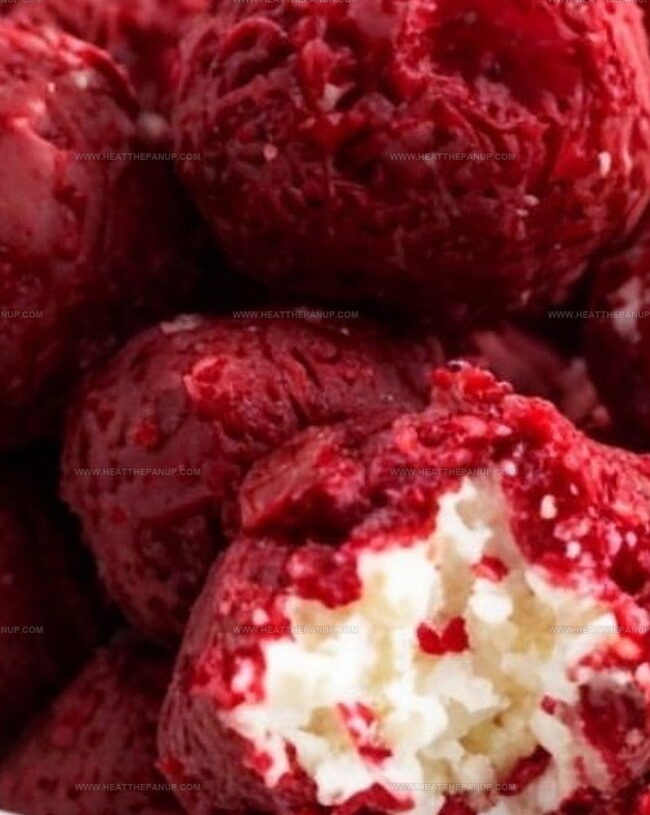
Creamy red velvet cheesecake balls dance between decadent dessert and irresistible bite-sized treat.
Sweet secrets unfold in every delectable morsel waiting to surprise you.
Richness meets playful texture through a clever combination of classic flavors.
Soft cream cheese mingles with cocoa-infused crumbs, creating magic in your kitchen.
Chocolate lovers and dessert enthusiasts will find themselves captivated by these elegant spheres.
Minimal effort transforms simple ingredients into an impressive confectionery masterpiece.
Roll up your sleeves and prepare to become the ultimate dessert hero.
Why Red Velvet Cheesecake Balls Win Hearts
What Goes In Red Velvet Cheesecake Balls
Cake Base:Filling Ingredients:Coating and Decoration:Easy Red Velvet Cheesecake Balls Method
Step 1: Prepare Red Velvet Cake Base
Whip up a delectable red velvet cake following the box mix directions.
Once baked, let the cake cool completely.
Gently crumble the cake into fine, delicate crumbs using your hands or a fork, creating a soft, textured base for your cheesecake balls.
Step 2: Craft Creamy Cheesecake Filling
In a spacious mixing bowl, combine the following ingredients:Blend these ingredients until you achieve a silky-smooth, luxurious mixture that’s perfectly creamy and indulgent.
Step 3: Shape Delightful Cheesecake Spheres
Use your hands to roll the cheesecake mixture into bite-sized balls.
Place these delicate spheres on a parchment-lined baking sheet.
Pop the tray into the freezer for about an hour, allowing the balls to firm up and become easier to handle.
Step 4: Chocolate Dipping Extravaganza
Melt the white chocolate using a double boiler or microwave, stirring until perfectly smooth and glossy.
Carefully dip each frozen cheesecake ball into the melted chocolate, ensuring a complete and even coating.
Allow excess chocolate to drip off.
Step 5: Add Decorative Finishing Touches
While the chocolate is still wet, sprinkle some reserved red velvet cake crumbs on top for a stunning visual appeal.
Alternatively, get creative with sprinkles, drizzles, or any decorative elements you desire.
Step 6: Chill and Serve
Transfer the decorated cheesecake balls to the refrigerator.
Let them sit until the chocolate sets completely and the treats are wonderfully chilled.
These delightful bites are now ready to impress and satisfy your sweet tooth!
Tricks For Red Velvet Cheesecake Balls
Storing Red Velvet Cheesecake Balls Well
What To Serve With Red Velvet Cheesecake Balls
Red Velvet Cheesecake Balls Flavor Swaps
FAQs
Ensure the cheesecake balls are thoroughly chilled and firm before dipping. Use a fork or dipping tool to gently coat each ball, allowing excess chocolate to drip off.
Yes, you can prepare them up to 3-4 days in advance. Keep them refrigerated in an airtight container, and they’ll maintain their texture and flavor.
Add a small amount of coconut oil or vegetable shortening to thin the chocolate, making it smoother and easier to coat the cheesecake balls evenly.
Absolutely! You can freeze them for up to 2 months. Wrap individually in plastic wrap and store in a freezer-safe container for best results.
Print
Red Velvet Cheesecake Balls Recipe
- Total Time: 2 hours 15 minutes
- Yield: 24 1x
Description
Chocolate lovers will adore these red velvet cheesecake balls, a delightful fusion of rich cream cheese and classic Southern dessert charm. Small bites pack big flavor, promising pure indulgence with each velvety, chocolate-dipped morsel you’ll savor.
Ingredients
Main Ingredients:
- 1 box red velvet cake mix (plus ingredients called for on the box)
- 16 ounces (454 grams) cream cheese, softened
- 1 cup (170 grams) white chocolate chips (for coating)
Sweeteners and Enhancers:
- 1/2 cup (60 grams) confectioners sugar
- 2 tablespoons (30 milliliters) heavy cream
- 1 teaspoon (5 milliliters) vanilla extract
Decorative Ingredients:
- Red velvet cake crumbs (for decoration)
- Optional: sprinkles
- Optional: edible glitter
- Optional: melted chocolate for drizzling
Instructions
- Prepare the red velvet cake according to package directions, ensuring a rich, moist texture. Cool completely on a wire rack.
- Gently crumble the cooled cake into fine, uniform pieces using your hands or a food processor.
- Whip the cream cheese mixture until velvety smooth, incorporating confectioner’s sugar, vanilla extract, and heavy cream with precise, gentle strokes.
- Craft uniform spheres by carefully rolling the cream cheese and cake crumb mixture between your palms, creating consistent, compact balls.
- Place the formed spheres on a parchment-lined tray and transfer to the freezer, allowing them to firm up for approximately 45-60 minutes.
- Carefully temper the white chocolate using a double boiler or microwave, ensuring a glossy, smooth consistency.
- Delicately dip each chilled cheesecake sphere into the melted white chocolate, using a fork to ensure complete, even coverage.
- Sprinkle reserved red velvet crumbs or decorative elements over the chocolate-coated balls while the coating remains wet.
- Return the decorated cheesecake balls to the refrigerator, allowing the chocolate shell to set and the flavors to meld for at least 30 minutes before serving.
Notes
- Crumble the cake while it’s slightly warm for easier, more uniform texture without large clumps.
- Mix cream cheese ingredients at room temperature to ensure silky, lump-free consistency.
- Chill cheesecake balls thoroughly before dipping in chocolate to prevent cracking and maintain shape.
- Roll balls gently and uniformly to create professional-looking dessert bites with consistent size.
- Prep Time: 1 hour 30 minutes
- Cook Time: 45 minutes
- Category: Desserts, Snacks
- Method: Baking
- Cuisine: American
Nutrition
- Serving Size: 24
- Calories: 150
- Sugar: 10 g
- Sodium: 180 mg
- Fat: 8 g
- Saturated Fat: 5 g
- Unsaturated Fat: 2 g
- Trans Fat: 0 g
- Carbohydrates: 18 g
- Fiber: 0 g
- Protein: 2 g
- Cholesterol: 20 mg
Angelina Wiles
Content Editor & Culinary Enthusiast
Expertise
Food Writing and Editing, Vegetarian and Vegan Cuisine, Baking and Pastry Arts, Sustainable Cooking Practices
Education
Portland Community College
Certificate in Culinary Arts
Focus: Emphasis on sustainable cooking practices, vegetarian cuisine, and food writing.
Oregon Culinary Institute
Diploma in Baking and Pastry Arts
Focus: Specialized training in artisanal baking, pastry techniques, and dessert presentation.
Angelina’s love for cooking started with handwritten family recipes and weekend trips to farmers’ markets around Portland. She followed her passion with a Certificate in Culinary Arts from Portland Community College, then perfected her sweet side with a Diploma in Baking and Pastry Arts at Oregon Culinary Institute.
Angelina believes recipes should feel like a conversation, not a science project. She’s all about helping readers trust themselves in the kitchen with simple steps, fresh ideas, and easy twists on classic meals.
When she’s not editing recipes, she’s baking bread, sipping coffee, or getting inspired by the changing seasons.