Sweet Pumpkin Oreo Balls Recipe: Bite-sized Fall Treats
Fall’s coolest dessert trend meets a creamy pumpkin oreo balls sensation that’ll make taste buds dance with delight.
Sweet and decadent treats emerge from a simple combination of classic ingredients.
Oreo cookies crumble perfectly into a smooth pumpkin-spiced mixture that screams autumn comfort.
Chocolate coating adds an irresistible layer of indulgence to these bite-sized delights.
No baking required means you can whip up these delectable morsels in minutes.
Prepare to impress everyone at your next gathering with these irresistible, melt-in-your-mouth pumpkin oreo balls that blend seasonal charm with nostalgic cookie goodness.
One bite will have everyone begging for the recipe.
Highlights Of Pumpkin Oreo Balls
What’s In Pumpkin Oreo Balls
Base Ingredients:Coating Ingredients:Decoration Ingredients:How To Assemble Pumpkin Oreo Balls

Step 1: Crumble Oreo Cookies
Use a food processor to break down Oreo cookies into fine, powdery crumbs.
Pulse the cookies until they reach a consistent, sandy texture that will help bind the balls together.
Step 2: Blend Cream Cheese
Add cream cheese to the Oreo crumbs and mix thoroughly until the mixture becomes a smooth, moldable consistency.
The cream cheese will help the balls hold their shape and create a creamy texture.
Step 3: Shape Pumpkin Spheres
Scoop out small portions of the mixture and roll between your palms to create perfect 1-inch round balls.
Place the formed balls on a parchment-lined baking sheet and chill in the refrigerator for 15 minutes to firm up.
Step 4: Carve Pumpkin Details
Remove the chilled balls and use a toothpick to gently score vertical lines into the surface, mimicking a pumpkin’s natural ridges.
Return the balls to the refrigerator for an additional 10 minutes to set the design.
Step 5: Prepare Orange Coating
Melt orange candy wafers using a double boiler or microwave, following the package instructions.
Stir occasionally to ensure a smooth, even consistency.
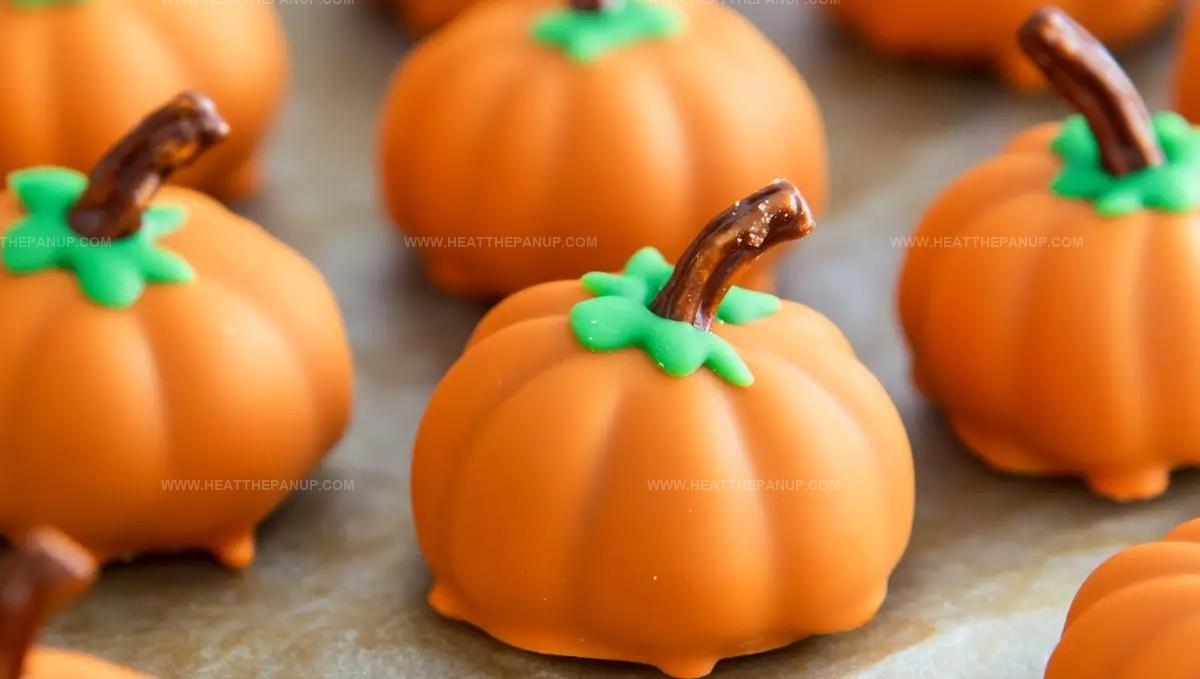
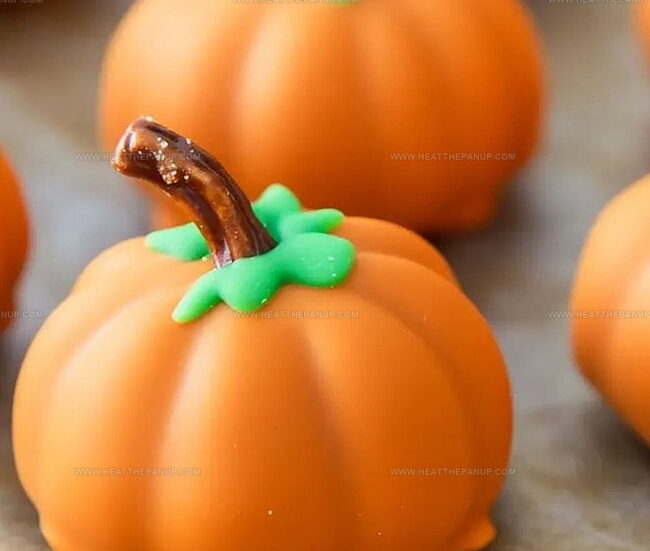
Step 6: Dip and Decorate
Carefully dip each chilled Oreo ball into the melted orange coating, allowing excess to drip off.
Place the coated balls back on the parchment-lined sheet.
Immediately add:Step 7: Chill and Serve
Refrigerate the decorated pumpkin Oreo balls until you’re ready to serve.
The cool temperature will help maintain their shape and enhance the flavors.
Smart Tips For Pumpkin Oreo Balls
How To Store Pumpkin Oreo Balls
Serve Pumpkin Oreo Balls With These
Fun Twists On Pumpkin Oreo Balls
FAQs
Not at all! These no-bake treats are super easy and require only a few simple ingredients. You’ll just need a food processor to crush the Oreos and mix with cream cheese, then shape and decorate.
Absolutely! Pumpkin Oreo Balls are perfect for preparing ahead. You can make them up to 3 days before your event and store them in the refrigerator. They actually taste better after the flavors have melded together.
No special skills required! This recipe is beginner-friendly. Anyone can make these cute pumpkin-shaped treats with basic kitchen tools like a food processor and some patience for shaping and decorating.
No worries! You can use white chocolate with orange food coloring or even orange-tinted white chocolate melts as an alternative. The key is getting that vibrant pumpkin color for your adorable Oreo balls.
Print
Pumpkin Oreo Balls Recipe
- Total Time: 30 minutes
- Yield: 12 1x
Description
Indulgent Pumpkin Oreo Balls bring autumn’s warmth to sweet treats, blending creamy pumpkin spice with classic cookie crunch. Chocolate-dipped spheres offer a delightful seasonal twist you can savor with friends and family.
Ingredients
Main Ingredients:
- 36 Oreo cookies
- 8 ounces (226 grams) cream cheese, softened
Coating/Topping:
- 1/2 ounce (14 grams) orange candy melts
Flavor/Color Enhancement:
- 1/2 teaspoon (2.5 milliliters) pumpkin pie spice
- 1/4 cup (59 milliliters) pumpkin puree
Instructions
- Crush Oreo cookies into fine crumbs using a food processor, ensuring a uniform texture.
- Incorporate softened cream cheese into the cookie crumbs, mixing thoroughly until a cohesive dough forms.
- Shape the mixture into compact, round balls approximately one inch in diameter.
- Chill the formed balls on a parchment-lined baking sheet for 15 minutes to firm up their structure.
- Carefully etch vertical lines across the chilled balls using a toothpick to create a pumpkin-like appearance.
- Return the scored balls to the refrigerator for an additional 10 minutes to set the design.
- Gently melt orange candy wafers using a double boiler or microwave, stirring occasionally to achieve a smooth consistency.
- Delicately submerge each chilled ball into the melted orange coating, allowing excess to drip off.
- Immediately insert a small pretzel stick at the top to mimic a pumpkin stem.
- Optionally accent with a tiny green leaf-shaped icing decoration for added detail.
- Place the decorated treats back on the parchment sheet and refrigerate until serving time.
- Store in a sealed container in the refrigerator to maintain their shape and flavor.
Notes
- Crumble Oreos thoroughly to ensure a smooth, consistent texture without large cookie chunks.
- Chill balls before coating to help them maintain shape and prevent cracking during chocolate dipping.
- Use a fork or dipping tool for more precise and cleaner chocolate coating than toothpicks.
- For a gluten-free version, swap regular Oreos with gluten-free chocolate sandwich cookies and ensure candy melts are also gluten-free.
- Prep Time: 30 minutes
- Cook Time: 0 minutes
- Category: Desserts, Snacks
- Method: Chilling
- Cuisine: American
Nutrition
- Serving Size: 12
- Calories: 146
- Sugar: 12 g
- Sodium: 70 mg
- Fat: 7 g
- Saturated Fat: 3.5 g
- Unsaturated Fat: 3.5 g
- Trans Fat: 0 g
- Carbohydrates: 19 g
- Fiber: 0.5 g
- Protein: 1.5 g
- Cholesterol: 10 mg
James Hambly
Founder & Recipe Creator
Expertise
Recipe Development, Culinary Education, Farm-to-Table Cooking, Southern Cuisine
Education
Asheville-Buncombe Technical Community College
Certificate in Culinary Arts
Focus: Hands-on training in professional cooking techniques, emphasizing farm-to-table practices and Southern cuisine.
The Chef’s Academy
Associate Degree in Culinary Arts
Focus: Comprehensive culinary education covering global cuisines, kitchen management, and food safety.
James grew up surrounded by the smells of cast-iron skillets and slow-cooked Southern meals in Asheville, North Carolina.
He sharpened his skills with a Certificate in Culinary Arts from Asheville-Buncombe Technical Community College, and later leveled up with an Associate Degree from The Chef’s Academy.
James’s philosophy is simple: the best meals don’t need fancy tricks, just fresh ingredients, a hot pan, and a little bit of heart. His favorite days are spent testing one-pan wonders, chasing bold flavors, and creating recipes that feel easy, even on a busy night.