
Fluffy Pink Whipped Jello Recipe – A Dreamy Homemade Treat
Whipped jello with a soft pink hue captures the playful essence of dessert creativity.
Delicate layers shimmer like pastel clouds waiting to melt on your tongue.
Creamy textures blend seamlessly with light, airy gelatin that dances across taste buds.
Childhood memories of sweet treats come rushing back with each delightful spoonful.
Pastel-colored desserts always spark joy and conversation around the table.
Simple ingredients transform into a magical confection that feels both nostalgic and elegant.
You’ll fall in love with this effortless recipe that promises to become a new favorite.
Dive into this delightful pink whipped jello and experience pure dessert bliss.
Pink Jello Fluff That’s Sweet and Whipped
Pink Whipped Jello What’s Inside
Base Ingredients:Creamy Components:Garnish and Serving:Pink Whipped Jello Assembly in Just a Few Minutes
Step 1: Dissolve the Gelatin Powder
Pour hot water over the gelatin powder in a mixing bowl.
Stir continuously until the powder completely dissolves, creating a smooth liquid base.
Make sure no clumps remain in the mixture.
Step 2: Cool Down the Mixture
Allow the gelatin mixture to rest and cool to room temperature.
This helps prevent the whipped topping from melting when you combine the ingredients.
Let it sit for about 10-15 minutes until it feels comfortable to touch.
Step 3: Create Creamy Clouds
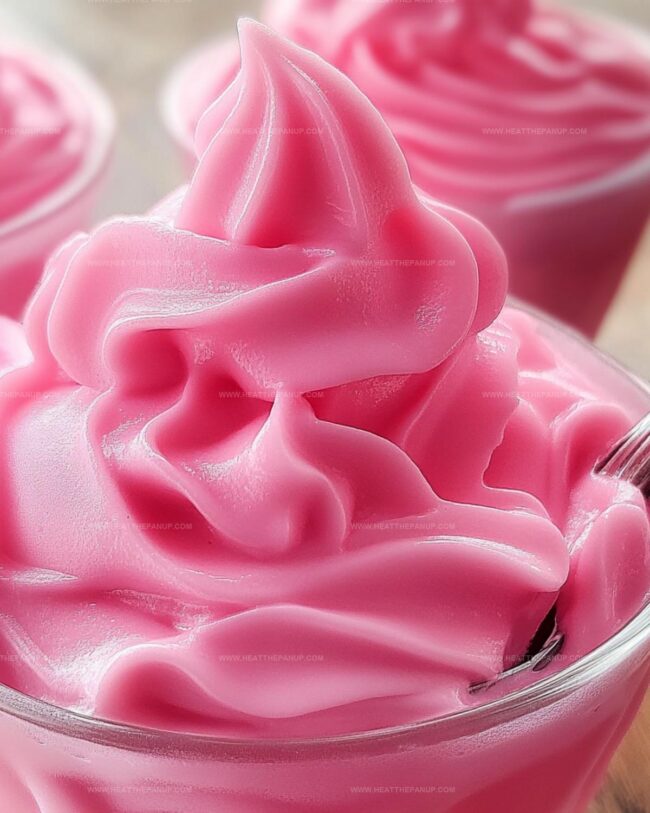
Gently fold the whipped topping into the cooled gelatin mixture.
Use a spatula to blend the ingredients carefully, creating a light and airy texture.
Stir with a soft, sweeping motion to maintain the fluffy consistency.
Step 4: Fill Elegant Containers
Select your favorite dessert glasses or mason jars.
Carefully transfer the pink fluffy mixture into the containers using a piping bag or large spoon.
Aim for smooth, even distribution to create an attractive presentation.
Step 5: Chill and Set
Place the filled containers in the refrigerator.
Allow the dessert to firm up and become completely set.
This process typically takes 2-3 hours, helping the mixture develop its signature mousse-like texture.
Step 6: Add Beautiful Finishing Touches
Remove the chilled desserts from the refrigerator.
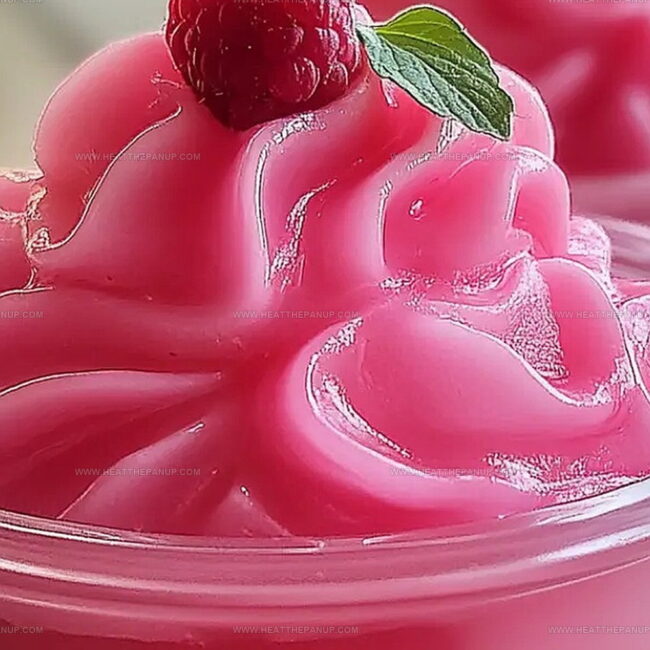
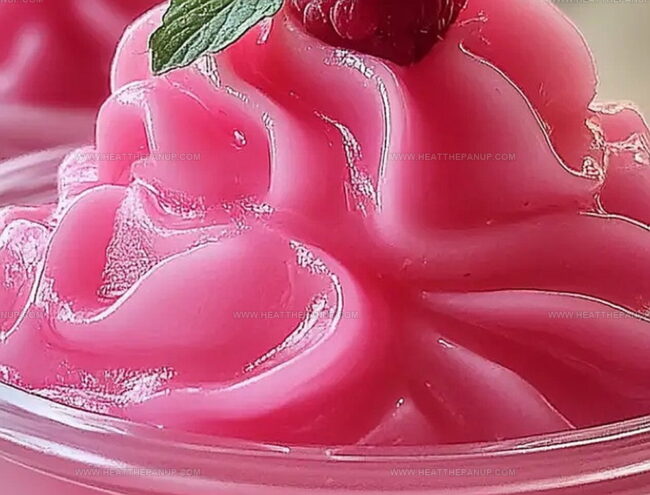
Top each serving with a fresh, vibrant strawberry.
For extra flair, you can add a light dusting of powdered sugar or a small mint leaf as a garnish.
Step 7: Serve and Enjoy
Present the desserts chilled and immediately enjoy the light, refreshing pink treat.
Perfect for summer gatherings or as a sweet end to any meal.
Jello Whip Tips with a Pink, Fluffy Finish
Chill Pink Whipped Jello for Later
Treats That Match Pink Whipped Jello
Savor Sweet Strawberry Companions: Delightful Pairings for Pink Whipped Jello
Whipped Jello in Fun Flavor Directions
FAQs
Add a few drops of pink food coloring or use strawberry-flavored gelatin mix to achieve the desired pink shade. Mix it in during the dissolving stage for even color distribution.
Yes, you can substitute store-bought whipped topping with homemade whipped cream. Just ensure it’s thick and stable enough to maintain the dessert’s fluffy texture.
Ensure you use hot water and stir thoroughly. If some granules remain, gently reheat the mixture while stirring to help them fully dissolve.
No, traditional gelatin is made from animal collagen. Vegetarians can use agar-agar or plant-based gelatin alternatives as a substitute.
Print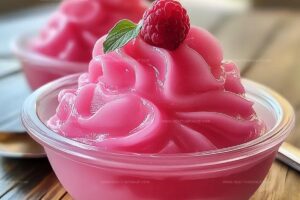
Pink Whipped Jello Recipe
- Total Time: 10 minutes
- Yield: 4 1x
Description
Sweet pink whipped jello brings carnival magic to dessert tables with minimal ingredients and maximum charm. Creamy clouds of raspberry-tinted delight promise a playful twist that delights guests from first spoonful to last bite.
Ingredients
Main Ingredients:
- 1 box flavored gelatin mix (strawberry, raspberry, or your choice)
- 1 cup hot water (240 milliliters)
- 1 tub whipped topping (Cool Whip or similar brand)
Garnish:
- Fresh strawberries (optional)
Serving Containers:
- Mason jars or small dessert cups
Instructions
- Activate the gelatin powder by cascading hot water over it, stirring meticulously until every granule completely dissolves into a smooth, translucent liquid.
- Allow the gelatin mixture to naturally cool and stabilize at ambient temperature, preventing premature setting and ensuring optimal texture.
- Integrate whipped topping into the cooled gelatin using gentle, sweeping folding motions, creating a billowy, cloud-like consistency that maintains its airy structure.
- Transfer the delicate pink mixture into serving vessels, using either a precision piping technique or a graceful spoon method to achieve elegant presentation.
- Carefully position the filled dessert containers into the refrigerator, permitting the delicate mixture to set and solidify for approximately two to three hours.
- Before serving, crown each dessert with a vibrant, ripe strawberry, adding a fresh and colorful final touch that enhances both visual appeal and flavor profile.
Notes
- Experiment with different Jello flavors like raspberry or strawberry to create vibrant color variations and unique taste profiles.
- Swap whipped topping with homemade whipped cream for a richer, fresher texture and more authentic dairy experience.
- Use sugar-free Jello and low-fat whipped topping to create a lighter, diet-friendly dessert option for health-conscious individuals.
- Add a sprinkle of crushed graham crackers or chocolate shavings on top for extra crunch and elevated presentation.
- Prep Time: 10 minutes
- Cook Time: 0 minutes
- Category: Desserts, Snacks
- Method: Chilling
- Cuisine: American
Nutrition
- Serving Size: 4
- Calories: 100
- Sugar: 10g
- Sodium: 50mg
- Fat: 3g
- Saturated Fat: 2g
- Unsaturated Fat: 1g
- Trans Fat: 0g
- Carbohydrates: 16g
- Fiber: 0g
- Protein: 1g
- Cholesterol: 5mg
Angelina Wiles
Content Editor & Culinary Enthusiast
Expertise
Food Writing and Editing, Vegetarian and Vegan Cuisine, Baking and Pastry Arts, Sustainable Cooking Practices
Education
Portland Community College
Certificate in Culinary Arts
Focus: Emphasis on sustainable cooking practices, vegetarian cuisine, and food writing.
Oregon Culinary Institute
Diploma in Baking and Pastry Arts
Focus: Specialized training in artisanal baking, pastry techniques, and dessert presentation.
Angelina’s love for cooking started with handwritten family recipes and weekend trips to farmers’ markets around Portland. She followed her passion with a Certificate in Culinary Arts from Portland Community College, then perfected her sweet side with a Diploma in Baking and Pastry Arts at Oregon Culinary Institute.
Angelina believes recipes should feel like a conversation, not a science project. She’s all about helping readers trust themselves in the kitchen with simple steps, fresh ideas, and easy twists on classic meals.
When she’s not editing recipes, she’s baking bread, sipping coffee, or getting inspired by the changing seasons.