Rich Peanut Butter Stuffed Brownies Recipe for Sweet Cravings
Chocolate and peanut butter make magic happen in these decadent stuffed brownies that promise pure indulgence.
Rich cocoa meets creamy peanut butter for an unexpected twist on classic desserts.
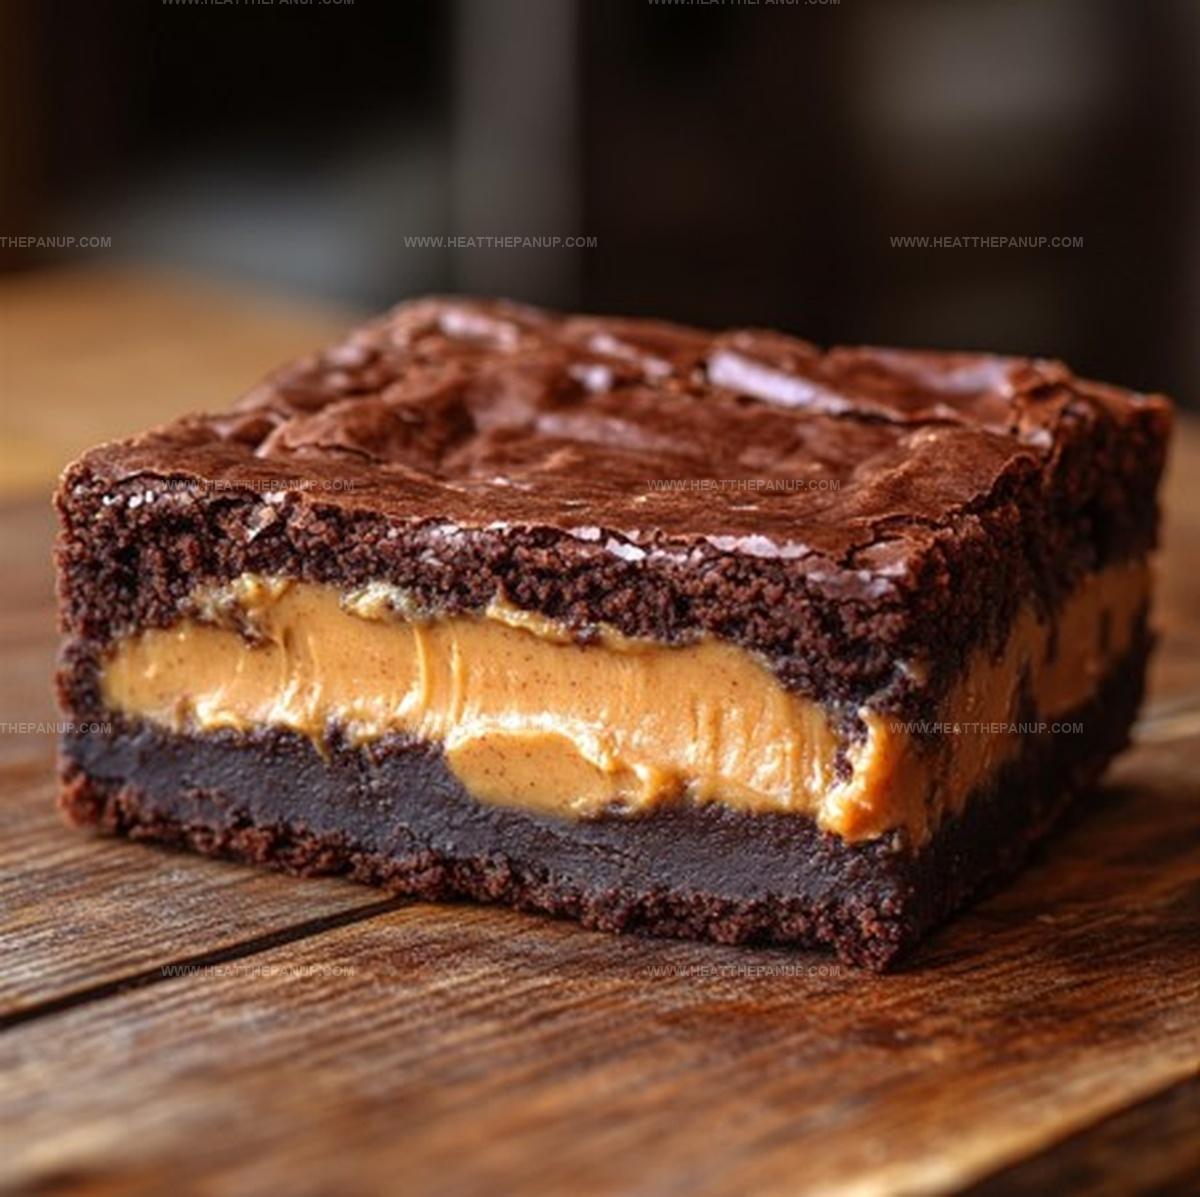
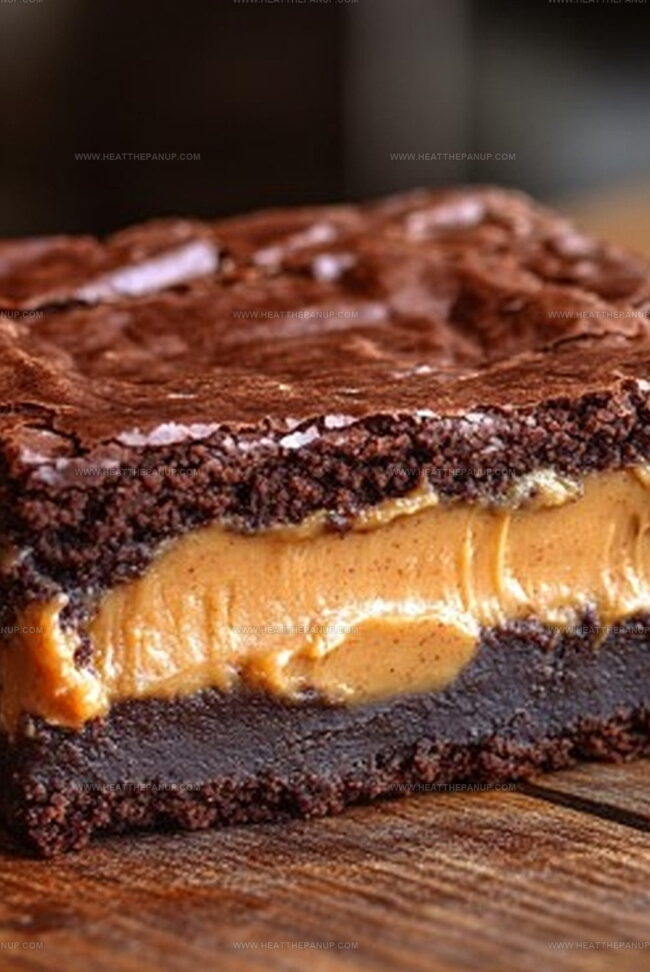
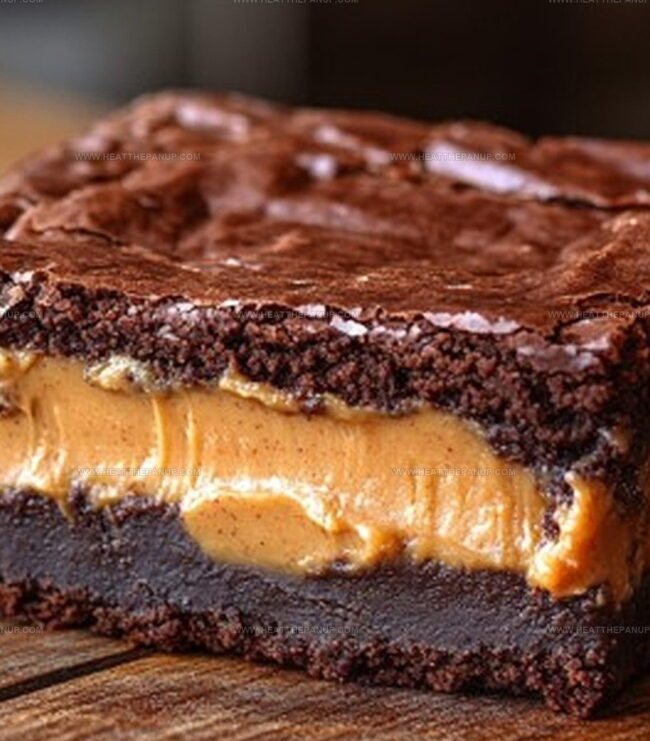
Swirls of nutty spread create stunning visual and flavor patterns inside each fudgy square.
Dense brownie layers conceal a luscious peanut butter center that melts perfectly with every bite.
Sweet and salty notes dance together, creating a sophisticated treat beyond simple dessert expectations.
Minimal ingredients and straightforward techniques mean you can craft these irresistible brownies without professional baking skills.
One taste will convince you these are the most memorable brownies you’ve ever experienced.
Why Peanut Butter Stuffed Brownies Are Irresistible
Ingredients for Peanut Butter Stuffed Brownies
Chocolate Base:Wet Ingredients:Dry Ingredients:Peanut Butter Layer:How to Make Stuffed Brownies
Step 1: Prepare Peanut Butter Filling
Grab your peanut butter and warm it in the microwave for 20-30 seconds until it becomes liquid-like but not scorching hot.
Take a metal 8-inch square pan and line it with parchment paper, allowing some overhang.
Spread the peanut butter evenly across the pan.
Pop it in the freezer for 1 hour until completely solid.
Once frozen, lift out the peanut butter sheet using the parchment and return it to the freezer while you prepare the brownie batter.
Step 2: Create Chocolate Brownie Base
Heat your oven to 350°F.
Grab a large microwave-safe bowl and combine:Microwave in 30-second intervals, stirring between each burst, until the mixture is smooth and fully melted.
Add sugar to the warm mixture and whisk energetically until well combined.
Let it cool down until just barely warm to the touch.
Step 3: Mix Wet Ingredients
Whisk in:Blend for about 1 minute until everything is thoroughly incorporated.
Step 4: Combine Dry Ingredients
Gently fold in:Mix until just combined, being careful not to overmix.
Step 5: Layer and Bake
Pour half the brownie batter into the prepared pan and smooth it out.
Carefully place the frozen peanut butter sheet on top.
Cover completely with remaining brownie batter.
Bake for approximately 30 minutes, aiming for a slightly gooey center.
Step 6: Cool and Serve
Let the brownies cool in the pan for 30 minutes.
Remove and allow to cool for another 30 minutes before slicing.
Pro Tips for Stuffed Brownies
Store and Reheat Brownies with Ease
What Pairs with Peanut Butter Brownies
Brownie Flavor Ideas and Twists
FAQs
Yes, you can substitute almond butter, cashew butter, or sunflower seed butter for a similar creamy filling effect.
Look for a slightly crackly top and edges that pull away from the pan. The center should still be slightly gooey when you insert a toothpick – it should come out with a few moist crumbs.
Freezing helps create a distinct peanut butter layer that stays separate from the brownie batter, making it easier to handle and ensuring a clean, defined filling when you slice the brownies.
Yes, simply replace the all-purpose flour with a gluten-free flour blend designed for baking to make these brownies suitable for those with gluten sensitivities.
Print
Peanut Butter Stuffed Brownies Recipe
- Total Time: 2 hours
- Yield: 12 1x
Description
Indulgent peanut butter stuffed brownies promise a delightful dance of rich chocolate and creamy peanut butter. Chocolate lovers will savor each fudgy, irresistible bite of this ultimate dessert that blends sweet and nutty flavors into pure bliss.
Ingredients
Main Ingredients (Chocolate and Peanut Butter):
- 1 1/4 cups (336 grams) creamy conventional peanut butter
- 1 box brownie mix
- 2 large eggs
- 1/3 cup vegetable oil
Binding and Flavor Enhancers:
- 1/4 cup water
- 1 teaspoon vanilla extract
Optional Toppings:
- 1/2 cup chocolate chips
- Sea salt (optional)
Instructions
- Prepare a smooth, pourable peanut butter layer by warming it in the microwave for a brief 20-30 seconds.
- Create a rectangular peanut butter sheet by spreading the warmed mixture evenly in a parchment-lined metal pan, then freeze for an hour until completely solidified.
- Remove the frozen peanut butter sheet using the parchment paper and return to the freezer while preparing the brownie batter.
- Preheat the oven to 350°F and re-line the same pan with fresh parchment paper, ensuring overhang for easy removal.
- Melt chocolate and butter together in a microwave-safe bowl, using 30-second intervals and stirring between each burst until smooth and fully combined.
- Whisk sugar into the warm chocolate mixture vigorously, then allow to cool slightly.
- Incorporate eggs, egg yolk, and vanilla extract into the chocolate mixture, whisking for approximately one minute until thoroughly blended.
- Gently fold in flour, cocoa powder, and salt using a rubber spatula, mixing just until ingredients are combined.
- Pour half the brownie batter into the prepared pan, creating an even base layer.
- Carefully position the frozen peanut butter sheet on top of the initial batter layer.
- Cover the peanut butter sheet completely with the remaining brownie batter, ensuring full coverage.
- Bake for around 30 minutes, aiming for a slightly gooey center while ensuring overall doneness.
- Allow brownies to cool in the pan for 30 minutes, then remove and let sit for an additional 30 minutes before slicing.
- Store in an airtight container at room temperature for up to 3 days or refrigerate for up to 5 days, noting that chilled brownies offer an extra fudgy texture.
Notes
- Freeze the peanut butter sheet completely to ensure clean layering and prevent mixing with the brownie batter during assembly.
- Use room temperature eggs for smoother batter integration and more consistent brownie texture.
- Avoid overmixing the brownie batter to prevent tough, dense brownies; stop stirring once ingredients are just combined.
- For gluten-free version, substitute all-purpose flour with almond flour or gluten-free flour blend, maintaining the same measurement.
- Prep Time: 1 hour 30 minutes
- Cook Time: 30 minutes
- Category: Desserts, Snacks
- Method: Baking
- Cuisine: American
Nutrition
- Serving Size: 12
- Calories: 280
- Sugar: 3 g
- Sodium: 150 mg
- Fat: 23 g
- Saturated Fat: 4.5 g
- Unsaturated Fat: 18 g
- Trans Fat: 0 g
- Carbohydrates: 8 g
- Fiber: 2 g
- Protein: 10 g
- Cholesterol: 0 mg
Angelina Wiles
Content Editor & Culinary Enthusiast
Expertise
Food Writing and Editing, Vegetarian and Vegan Cuisine, Baking and Pastry Arts, Sustainable Cooking Practices
Education
Portland Community College
Certificate in Culinary Arts
Focus: Emphasis on sustainable cooking practices, vegetarian cuisine, and food writing.
Oregon Culinary Institute
Diploma in Baking and Pastry Arts
Focus: Specialized training in artisanal baking, pastry techniques, and dessert presentation.
Angelina’s love for cooking started with handwritten family recipes and weekend trips to farmers’ markets around Portland. She followed her passion with a Certificate in Culinary Arts from Portland Community College, then perfected her sweet side with a Diploma in Baking and Pastry Arts at Oregon Culinary Institute.
Angelina believes recipes should feel like a conversation, not a science project. She’s all about helping readers trust themselves in the kitchen with simple steps, fresh ideas, and easy twists on classic meals.
When she’s not editing recipes, she’s baking bread, sipping coffee, or getting inspired by the changing seasons.