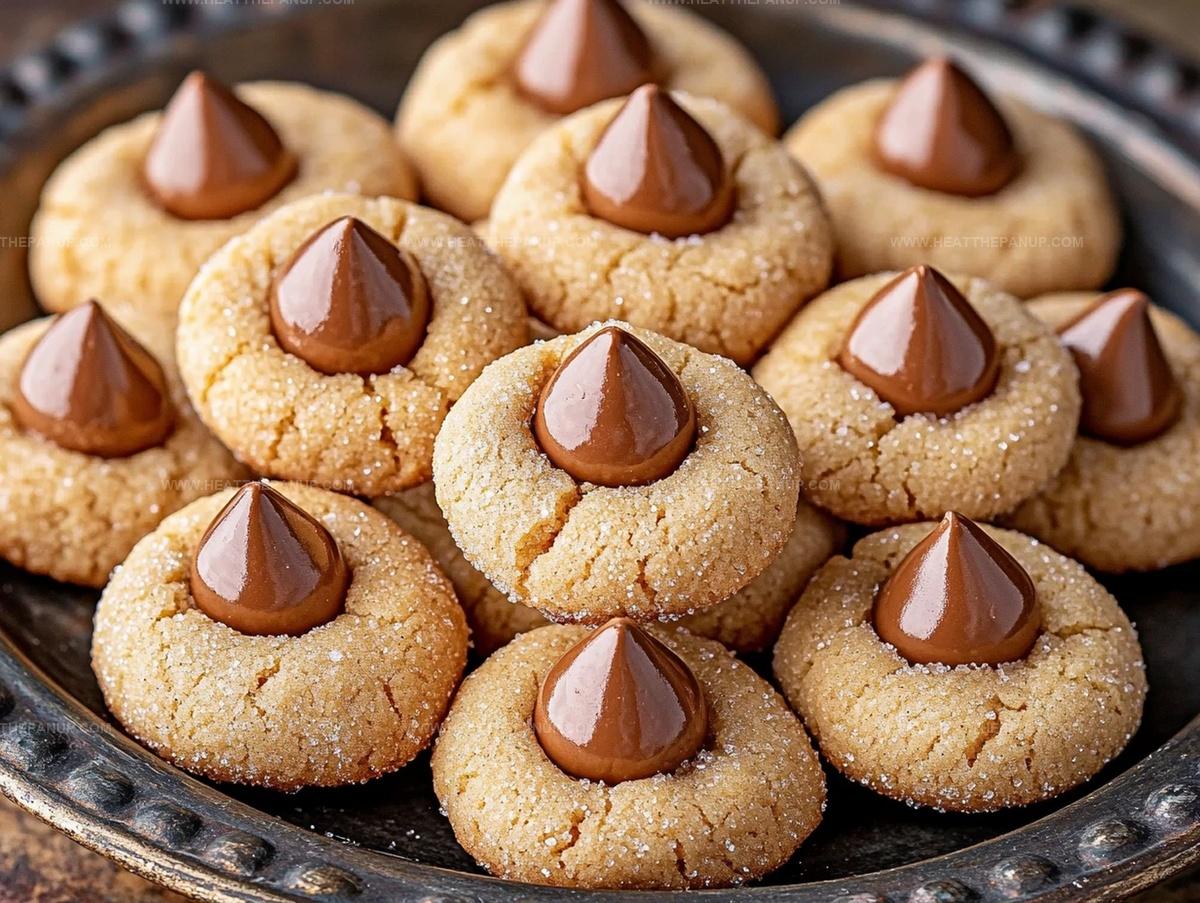
Heavenly Peanut Butter Blossoms Recipe: Sweet Love in Every Bite
Soft, chewy cookies dancing with a delightful peanut butter blossoms surprise nestle perfectly in every bite.
These classic treats bring comfort and nostalgia to any gathering.
Rich peanut butter dough forms the perfect base for the iconic chocolate kiss.
Baked to golden perfection, each cookie promises a delectable combination of textures and flavors.
Simple ingredients come together with minimal effort to create something truly special.
Chocolate and peanut butter lovers will absolutely adore these irresistible cookies that never fail to bring smiles.
Bake a batch and watch them disappear in moments.
Why Peanut Butter Blossoms Are Loved
Ingredients in Peanut Butter Blossoms
Main Ingredients:Eggs and Vanilla:Leavening and Seasoning:Topping and Decoration:How to Make Peanut Butter Blossoms
Step 1: Whip Creamy Wet Ingredients
Grab your stand mixer or electric hand mixer.
Blend together:Whip these ingredients on medium speed for 2-3 minutes until the mixture looks light and fluffy.
Pour in vanilla extract and mix until combined.
Step 2: Incorporate Eggs
Add eggs one at a time, mixing thoroughly after each addition.
Scrape down the bowl’s sides to ensure everything blends evenly.
Step 3: Prepare Dry Mixture
In a separate bowl, whisk together:Step 4: Create Cookie Dough
Slowly add dry ingredients to the wet mixture.
Mix until a soft, cohesive dough forms.
Step 5: Shape Cookie Balls
Roll dough into small 1-inch balls.
Roll each ball in granulated sugar.
Place on a parchment-lined baking sheet, leaving space between cookies.
Step 6: Chill Dough
Refrigerate cookie balls for 15 minutes.
While chilling, preheat oven to 375°F.
Step 7: Bake Cookies
Bake for 8 minutes.
Cookies should puff slightly but remain soft.
Step 8: Add Chocolate Kisses
Immediately after removing from oven, press a Hershey Kiss into the center of each warm cookie.
Step 9: Cool and Serve
Let cookies rest on baking sheet for 3 minutes.
Transfer to a wire rack to cool completely.
Cookie Tips for Better Blossoms
Store and Reheat Peanut Butter Blossoms
Good Matches for Peanut Butter Cookies
Pair Perfectly with Peanut Butter Blossoms:Flavor Variations for Blossom Cookies
FAQs
Natural peanut butter often separates and has different oil content, which might affect cookie texture. Stick to traditional creamy peanut butter like Jif or Skippy for best results.
You can use a hand mixer or even mix by hand with a wooden spoon. Just ensure you cream the butter and sugars thoroughly until light and fluffy.
Remove cookies from oven when they’re just set and still soft. Press Kiss gently into center immediately after baking. The residual heat helps kisses stick without breaking.
Yes, you can! Roll dough into balls, place on baking sheet, and freeze. Once frozen, transfer balls to freezer bag. Bake directly from frozen state, adding 1-2 extra minutes to baking time.
Print
Peanut Butter Blossoms Recipe
- Total Time: 38 minutes
- Yield: 48 1x
Description
Sweet chocolate kisses nestled atop classic peanut butter blossoms create an irresistible cookie that delivers comfort and nostalgia. Crisp edges, tender centers, and pure delight promise to make your gathering memorable with one delectable bite.
Ingredients
Main Ingredients:
- 1 cup creamy peanut butter (250 grams)
- 1 cup salted butter, room temperature (8 ounces)
- 3 large eggs
- 4 cups all-purpose flour (520 grams)
- 1 cup granulated sugar (200 grams)
- 1 cup light brown sugar, packed (210 grams)
Supplementary Ingredients:
- 1 teaspoon vanilla extract (5 grams)
- 2 teaspoons baking soda (1/2 grams)
- 1/4 teaspoon salt
Rolling and Topping:
- 1/2 cup granulated sugar
- 60 Hershey Kiss candies, unwrapped
Instructions
- Transform butter, peanut butter, and sugars into a creamy, aerated mixture using a stand mixer or electric hand mixer. Blend for 2-3 minutes until the texture becomes light and voluminous, ensuring complete sugar dissolution.
- Incorporate eggs individually, thoroughly mixing after each addition. Pause periodically to scrape down the bowl’s interior, guaranteeing uniform integration.
- In a separate vessel, delicately combine flour, baking soda, and salt through a gentle whisking motion, creating a uniform dry ingredient blend.
- Gradually introduce the dry ingredient mixture to the wet components, mixing until a cohesive, soft dough emerges. Avoid overmixing to maintain cookie tenderness.
- Craft uniform dough spheres approximately one inch in diameter. Elegantly roll each ball through granulated sugar, creating a delicate crystalline exterior.
- Chill prepared dough balls in the refrigerator for 15 minutes. Simultaneously, calibrate oven temperature to 375°F (190°C), allowing precise heat distribution.
- Position sugar-coated dough balls on parchment-lined baking sheets, maintaining generous spacing. Bake for 8 minutes, observing a subtle puffing without excessive browning.
- Immediately upon cookie removal, gently embed a Hershey Kiss into each cookie’s center. The residual warmth will slightly melt the chocolate’s base, securing its position.
- Permit cookies to rest on the baking sheet for three minutes, facilitating initial stabilization. Transfer to a wire cooling rack, allowing complete temperature equalization and texture refinement.
Notes
- Chill dough for consistent shape and prevent spreading during baking, ensuring perfectly round cookies every time.
- Use room temperature ingredients like butter and eggs to create smoother, more evenly mixed dough that blends seamlessly.
- Press Hershey Kisses gently into warm cookies to prevent cracking and maintain a smooth chocolate surface.
- For gluten-free version, substitute all-purpose flour with a 1:1 gluten-free baking blend, maintaining the same delicious texture and flavor.
- Prep Time: 30 minutes
- Cook Time: 8 minutes
- Category: Desserts, Snacks
- Method: Baking
- Cuisine: American
Nutrition
- Serving Size: 48
- Calories: 155
- Sugar: 12 g
- Sodium: 90 mg
- Fat: 7 g
- Saturated Fat: 3 g
- Unsaturated Fat: 4 g
- Trans Fat: 0 g
- Carbohydrates: 20 g
- Fiber: 1 g
- Protein: 3 g
- Cholesterol: 25 mg
James Hambly
Founder & Recipe Creator
Expertise
Recipe Development, Culinary Education, Farm-to-Table Cooking, Southern Cuisine
Education
Asheville-Buncombe Technical Community College
Certificate in Culinary Arts
Focus: Hands-on training in professional cooking techniques, emphasizing farm-to-table practices and Southern cuisine.
The Chef’s Academy
Associate Degree in Culinary Arts
Focus: Comprehensive culinary education covering global cuisines, kitchen management, and food safety.
James grew up surrounded by the smells of cast-iron skillets and slow-cooked Southern meals in Asheville, North Carolina.
He sharpened his skills with a Certificate in Culinary Arts from Asheville-Buncombe Technical Community College, and later leveled up with an Associate Degree from The Chef’s Academy.
James’s philosophy is simple: the best meals don’t need fancy tricks, just fresh ingredients, a hot pan, and a little bit of heart. His favorite days are spent testing one-pan wonders, chasing bold flavors, and creating recipes that feel easy, even on a busy night.