
The Best Peanut Butter Blossom Bars Recipe for Sweet Tooth Joy
Crafting delectable peanut butter blossom bars brings pure joy to any kitchen adventure.
Sweet memories flood back with each bite of this nostalgic treat.
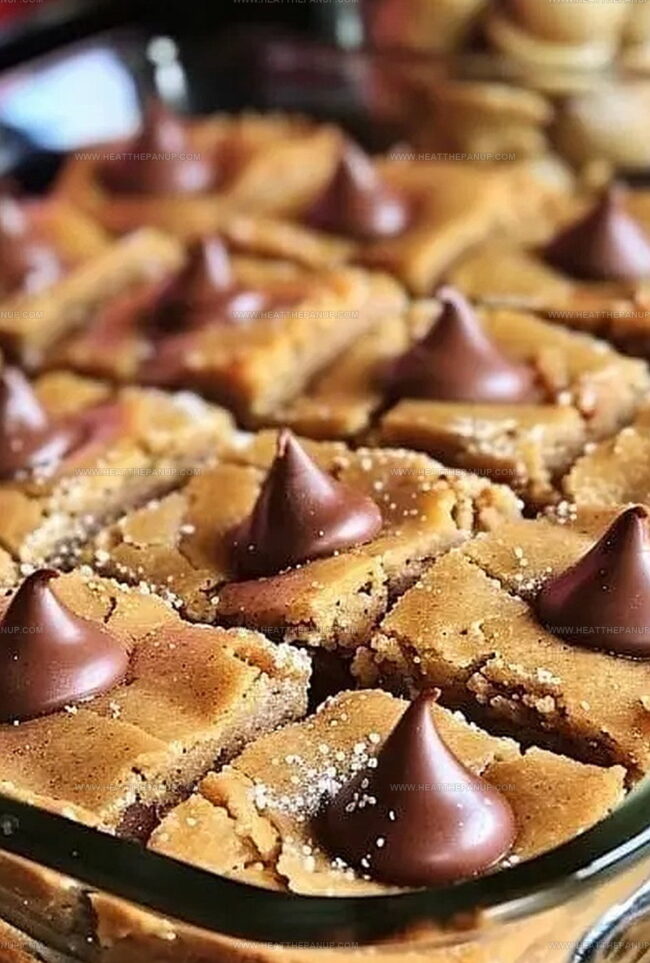
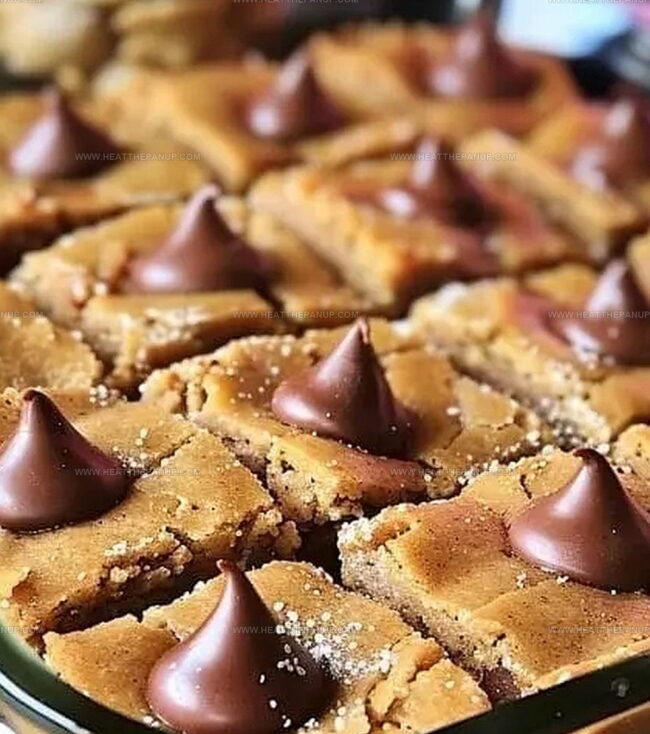
Chocolate kisses nestled atop rich, buttery squares create an irresistible combination.
Soft, chewy textures mingle with a perfect balance of nutty and sweet flavors.
Home bakers adore how simple ingredients transform into something magical.
Crumbly edges and tender centers promise a delightful experience for everyone.
Why Peanut Butter Blossom Bars Shine
What You Need For Blossom Bars
Base Ingredients:Dry Ingredients:Topping and Mix-In Ingredients:Steps To Make Blossom Bars
Step 1: Warm Up the Oven
Get your oven ready by setting the temperature to 350°F.
Grab a 9×13-inch baking pan and give it a light coating of grease to prevent sticking.
Step 2: Create the Magical Dough
In a large mixing bowl, combine these ingredients:Whip these together until they’re smooth and perfectly blended.
Gently fold in:Mix until a soft dough forms.
Sprinkle in milk chocolate chips and stir them throughout the dough.
Step 3: Spread the Happiness
Press the dough evenly into your prepared baking pan.
Sprinkle a bit of sparkling sugar across the top for extra shimmer and crunch.
Step 4: Bake to Golden Perfection
Slide the pan into the preheated oven.
Bake for 22-24 minutes until the top turns a beautiful golden brown and the surface looks puffy and inviting.
Step 5: Add the Chocolate Kiss Surprise
Right after pulling the pan from the oven, quickly press Hershey’s Kisses into the warm surface.
Arrange them in a neat 4×6 grid pattern.
Dust the top with remaining sparkling sugar for a final touch of magic.
Step 6: Cool and Slice
Let the bars cool completely in the pan.
Once cooled, slice into squares, making sure each piece has a chocolate kiss nestled in its center.
Enjoy your homemade treat!
Pro Tips For Peanut Butter Bars
Storing Blossom Bars Right
What To Pair With Peanut Bars
Peanut Blossom Variations
FAQs
These bars combine the classic peanut butter cookie flavor with the convenience of a bar dessert, allowing you to skip individual cookie shaping and enjoy a faster baking process with the same delicious taste.
Absolutely! While Hershey’s Kisses are traditional, you can experiment with different flavored Kisses like caramel, dark chocolate, or hugs for a unique twist on the classic recipe.
Sparkling sugar isn’t mandatory but adds a nice crunch and decorative touch to the bars. If you don’t have it, you can skip it or use regular granulated sugar as an alternative.
Look for golden brown edges and a puffed-up surface. The bars should be set but still slightly soft in the center, which takes about 22-24 minutes at 350°F.
Print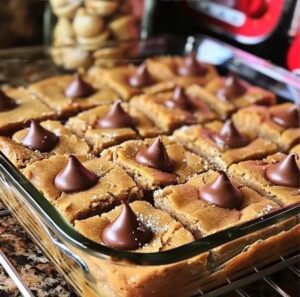
Peanut Butter Blossom Bars Recipe
- Total Time: 39 minutes
- Yield: 16 1x
Description
Sweet, nostalgic memories of classic peanut butter blossom bars dance across familiar flavor profiles in this delightful dessert. Rich chocolate kisses nestled atop buttery peanut butter squares create a perfect marriage of comforting childhood treats you’ll savor to the last crumb.
Ingredients
Main Ingredients:
- 1/2 cup (113 grams) unsalted butter, softened
- 1/2 cup (100 grams) granulated sugar
- 1/2 cup (110 grams) brown sugar
- 1/2 cup creamy peanut butter
- 1 egg
Dry Ingredients:
- 1 1/2 cups (180 grams) all-purpose flour
- 3/4 teaspoon baking soda
- 1/2 teaspoon baking powder
- 1/8 teaspoon salt
Toppings and Extras:
- 2/3 cup milk chocolate chips
- 24 Hershey’s Kisses, unwrapped
- 3 teaspoons white sparkling sugar (or granulated sugar)
Instructions
- Preheat the oven to 350°F and prepare a 9×13-inch baking pan with a light grease coating to prevent sticking.
- In a spacious mixing bowl, thoroughly cream together butter, granulated sugar, brown sugar, peanut butter, and egg until the mixture becomes smooth and homogeneous.
- Gently incorporate flour, baking soda, baking powder, and salt into the wet mixture, stirring until a cohesive dough forms without overmixing.
- Fold milk chocolate chips into the dough, distributing them evenly throughout the mixture.
- Transfer the dough into the prepared pan, using gentle pressure to create an uniform layer that reaches all corners and edges.
- Delicately sprinkle sparkling sugar across the surface of the unbaked dough.
- Place the pan in the preheated oven and bake for 22-24 minutes, watching for a golden-brown color and consistent puffing across the entire surface.
- Immediately after removing from the oven, carefully press Hershey’s Kisses into the warm bars, arranging them in a precise 4×6 grid pattern.
- Dust the remaining sparkling sugar over the freshly decorated bars for added texture and visual appeal.
- Allow the bars to cool completely within the pan, which helps them set and develop a stable structure.
- Once thoroughly cooled, slice into individual squares, ensuring each piece contains a centered Hershey’s Kiss.
Notes
- Swap peanut butter with almond or sunflower seed butter for nut-free alternatives that maintain the creamy texture and rich flavor profile.
- Reduce baking time by 2-3 minutes if you prefer softer, chewier bars with a slightly underbaked center for extra moisture.
- Use dark chocolate kisses or dairy-free chocolate chips to create a more intense chocolate experience and accommodate different taste preferences.
- Chill the dough for 30 minutes before baking to prevent excessive spreading and create a more structured, compact bar texture.
- Prep Time: 15 minutes
- Cook Time: 24 minutes
- Category: Desserts, Snacks
- Method: Baking
- Cuisine: American
Nutrition
- Serving Size: 16
- Calories: 220
- Sugar: 14g
- Sodium: 150mg
- Fat: 10g
- Saturated Fat: 4g
- Unsaturated Fat: 6g
- Trans Fat: 0g
- Carbohydrates: 29g
- Fiber: 1g
- Protein: 3g
- Cholesterol: 20mg
Angelina Wiles
Content Editor & Culinary Enthusiast
Expertise
Food Writing and Editing, Vegetarian and Vegan Cuisine, Baking and Pastry Arts, Sustainable Cooking Practices
Education
Portland Community College
Certificate in Culinary Arts
Focus: Emphasis on sustainable cooking practices, vegetarian cuisine, and food writing.
Oregon Culinary Institute
Diploma in Baking and Pastry Arts
Focus: Specialized training in artisanal baking, pastry techniques, and dessert presentation.
Angelina’s love for cooking started with handwritten family recipes and weekend trips to farmers’ markets around Portland. She followed her passion with a Certificate in Culinary Arts from Portland Community College, then perfected her sweet side with a Diploma in Baking and Pastry Arts at Oregon Culinary Institute.
Angelina believes recipes should feel like a conversation, not a science project. She’s all about helping readers trust themselves in the kitchen with simple steps, fresh ideas, and easy twists on classic meals.
When she’s not editing recipes, she’s baking bread, sipping coffee, or getting inspired by the changing seasons.