
Irresistible Peanut Butter and Jelly Cookies Recipe for All Ages
Growing up, my favorite after-school snack always involved a classic peanut butter and jelly combination that sparked pure childhood joy.
Memories of sticky fingers and crumbled sandwich corners inspired these delightful cookies.
Sweet nostalgia meets delectable baking in this simple recipe that captures comfort and warmth.
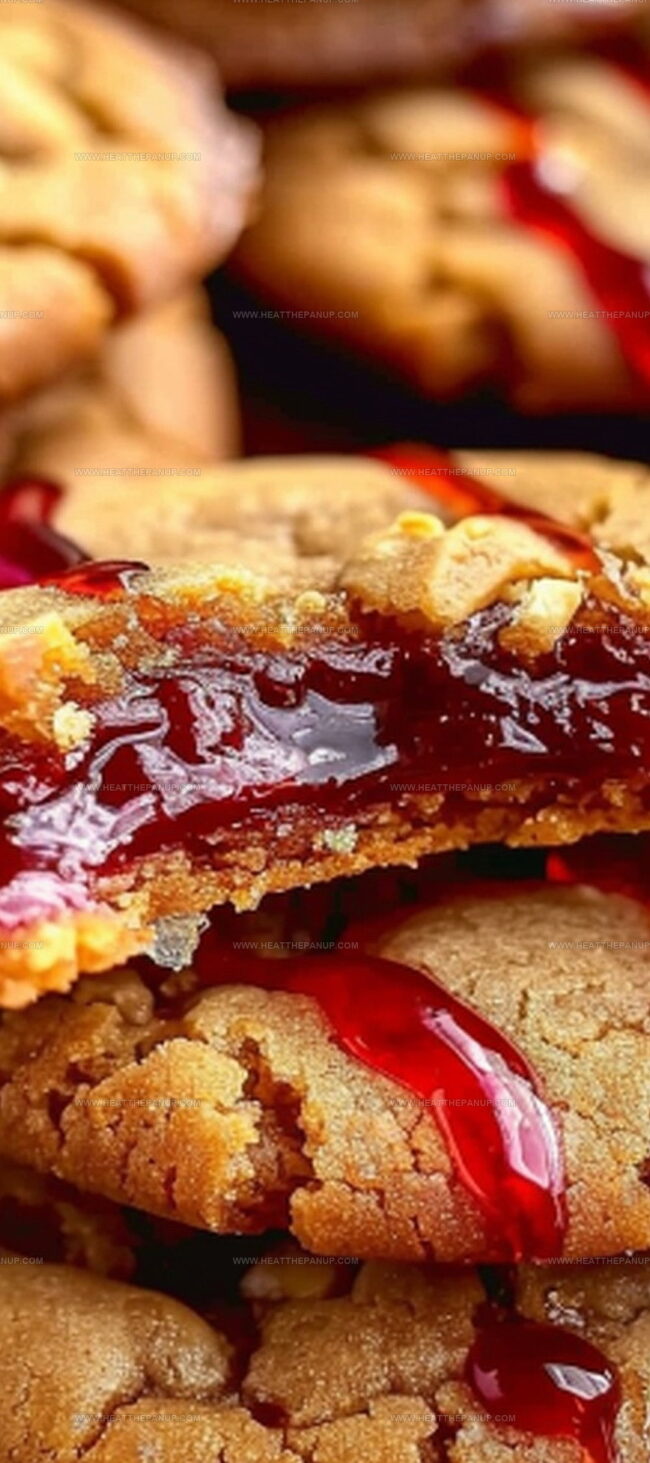
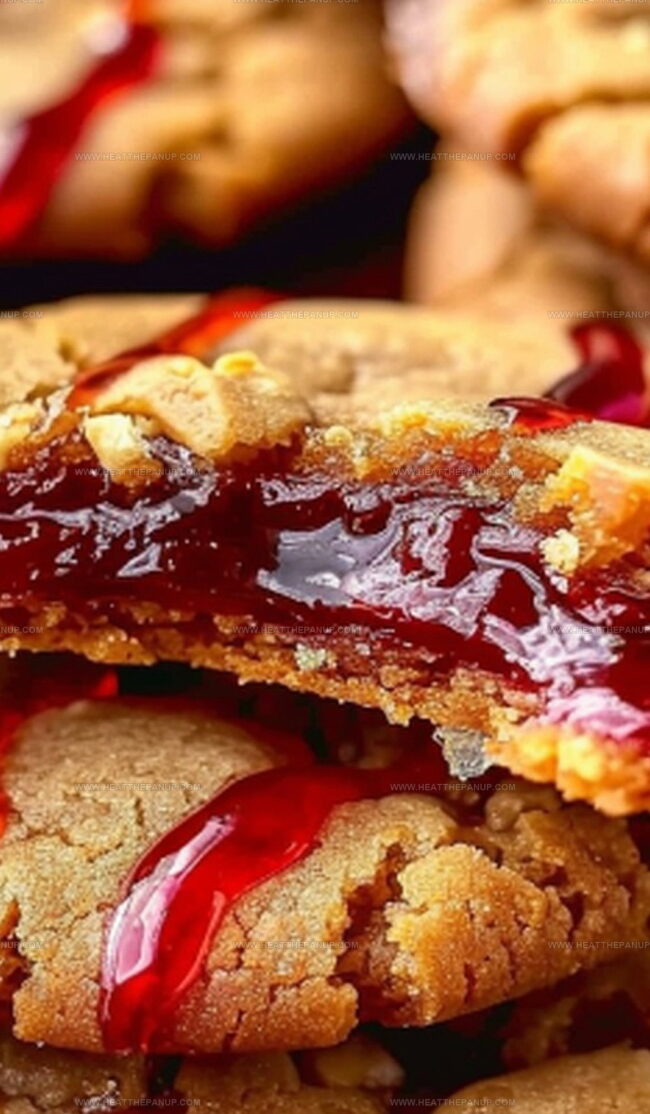
Each bite promises a magical blend of familiar flavors wrapped in a crisp, tender cookie.
Soft centers and slightly crunchy edges make these treats irresistible for both kids and adults.
Nobody can resist the playful marriage of smooth peanut butter and sweet fruity jam nestled in a perfect cookie form.
Bake these and watch smiles light up around your kitchen.
PB&J Gets a Cookie Makeover Worth Trying
Peanut Butter and Jelly Cookies Essentials
Main Ingredients:Leavening Agents:Flavor Enhancers:PB&J Cookies Baking Method
Step 1: Warm Up the Oven
Crank your oven to a toasty 350°F (175°C). Grab a baking sheet and line it with parchment paper to prevent any sticky situations.
Step 2: Whip Up the Butter Base
In a spacious mixing bowl, blend butter, white sugar, and brown sugar until the mixture looks fluffy and light as a cloud. This should take around 2-3 minutes of mixing magic.
Step 3: Add Creamy Goodness
Toss in peanut butter, a cracked egg, and a splash of vanilla extract. Beat everything together until the ingredients become best friends and fully combine.
Step 4: Create the Dry Mixture
In a separate bowl, whisk together flour, baking soda, baking powder, and salt. This dry blend will give your cookies perfect texture and flavor.
Step 5: Merge Wet and Dry Ingredients
Slowly fold the dry ingredients into the wet mixture. Mix gently until everything just comes together – don’t overwork the dough.
Step 6: Shape Cookie Dough Balls
Scoop out tablespoon-sized dough balls and place them on the prepared baking sheet. Keep them about 2 inches apart to give them room to spread.
Step 7: Make Jelly Pockets
Using your thumb or the back of a spoon, create a small indentation in the center of each cookie dough ball.
Step 8: Fill with Fruity Surprise
Carefully drop a dollop of jelly or jam into each little pocket you’ve created.
Step 9: Bake to Golden Perfection
Slide the baking sheet into the oven and bake for 10-12 minutes. Look for edges that turn a beautiful light golden color. Don’t let them get too dark!
Step 10: Cool and Enjoy
Let the cookies hang out on the baking sheet for 5 minutes. Then transfer them to a wire rack to cool completely. Get ready to bite into a nostalgic treat that combines childhood sandwich flavors into a delightful cookie.
PB&J Cookie Guidance That Works
Peanut Butter And Jelly Cookies How To Keep Them Fresh
PB&J Cookies Match Guide
Peanut Butter and Jelly Cookies: Classic Combo Variants
FAQs
Absolutely! You can experiment with various flavors like strawberry, raspberry, grape, or apricot to create unique taste combinations.
Yes, simply substitute the all-purpose flour with a gluten-free flour blend that contains xanthan gum for the best texture and consistency.
Make a smaller, deeper indentation in the cookie dough and use a thick, high-quality jam or jelly that has less moisture content.
Definitely! Almond butter or cashew butter work great as alternatives and can provide a different flavor profile to the classic peanut butter cookie.
Print
Peanut Butter And Jelly Cookies Recipe
- Total Time: 32 minutes
- Yield: 12 1x
Description
Classic peanut butter and jelly cookies merge childhood nostalgia with sweet bakery magic. Crisp edges, jammy centers, and nostalgic flavors invite home bakers to savor comfort in every delightful crumb.
Ingredients
Main Ingredients:
- 1/2 cup creamy peanut butter
- 1/2 cup unsalted butter, room temperature
- 1 large egg
Sweeteners:
- 1/2 cup granulated sugar
- 1/2 cup packed brown sugar
Dry Ingredients and Seasonings:
- 1 1/4 cups all-purpose flour
- 1/2 teaspoon baking soda
- 1/2 teaspoon baking powder
- 1/4 teaspoon salt
- 1 teaspoon vanilla extract
- 1/2 cup jelly or jam (strawberry, grape, or your favorite flavor)
Instructions
- Prepare the baking workspace by positioning oven racks in the center and warming the oven to 350°F. Cover baking sheets with parchment paper for smooth cookie release.
- In a spacious mixing bowl, transform butter and sugars into a creamy, aerated mixture by vigorously blending until the texture becomes light and fluffy.
- Incorporate peanut butter, egg, and vanilla extract into the sugar mixture, whisking thoroughly to create a uniform, glossy base.
- Create a separate container for dry ingredients, carefully combining flour, baking soda, baking powder, and salt through gentle whisking.
- Merge dry ingredients with the wet mixture, folding gently until ingredients are just integrated – avoiding overmixing which can toughen the dough.
- Craft uniform dough balls using a tablespoon, strategically placing them across the prepared baking sheets with adequate spacing to prevent merging.
- Using your thumb or a rounded utensil, delicately craft a small depression in the center of each cookie dough sphere.
- Carefully spoon jelly or jam into the created wells, ensuring precise and even distribution across each cookie.
- Slide the trays into the preheated oven, monitoring cookies until edges transform to a delicate golden hue – approximately 10-12 minutes.
- Remove cookies and allow them to rest momentarily on the baking sheet, then transfer to a cooling rack, permitting complete temperature reduction before serving.
Notes
- Swap traditional peanut butter with almond or sunflower seed butter for nut-free alternatives, making these cookies perfect for school lunches and allergy-sensitive gatherings.
- Use low-sugar or sugar-free jelly to reduce overall sweetness and create a more health-conscious version of the classic cookie.
- Chill the dough for 30 minutes before baking to prevent spreading and ensure a more uniform, perfectly shaped cookie with crisp edges.
- Create a gluten-free version by replacing all-purpose flour with a 1:1 gluten-free baking blend, maintaining the same delicious texture and flavor profile.
- Prep Time: 20 minutes
- Cook Time: 12 minutes
- Category: Desserts, Snacks
- Method: Baking
- Cuisine: American
Nutrition
- Serving Size: 12
- Calories: 190
- Sugar: 14 g
- Sodium: 90 mg
- Fat: 8 g
- Saturated Fat: 4 g
- Unsaturated Fat: 3 g
- Trans Fat: 0 g
- Carbohydrates: 26 g
- Fiber: 1 g
- Protein: 3 g
- Cholesterol: 20 mg
James Hambly
Founder & Recipe Creator
Expertise
Recipe Development, Culinary Education, Farm-to-Table Cooking, Southern Cuisine
Education
Asheville-Buncombe Technical Community College
Certificate in Culinary Arts
Focus: Hands-on training in professional cooking techniques, emphasizing farm-to-table practices and Southern cuisine.
The Chef’s Academy
Associate Degree in Culinary Arts
Focus: Comprehensive culinary education covering global cuisines, kitchen management, and food safety.
James grew up surrounded by the smells of cast-iron skillets and slow-cooked Southern meals in Asheville, North Carolina.
He sharpened his skills with a Certificate in Culinary Arts from Asheville-Buncombe Technical Community College, and later leveled up with an Associate Degree from The Chef’s Academy.
James’s philosophy is simple: the best meals don’t need fancy tricks, just fresh ingredients, a hot pan, and a little bit of heart. His favorite days are spent testing one-pan wonders, chasing bold flavors, and creating recipes that feel easy, even on a busy night.