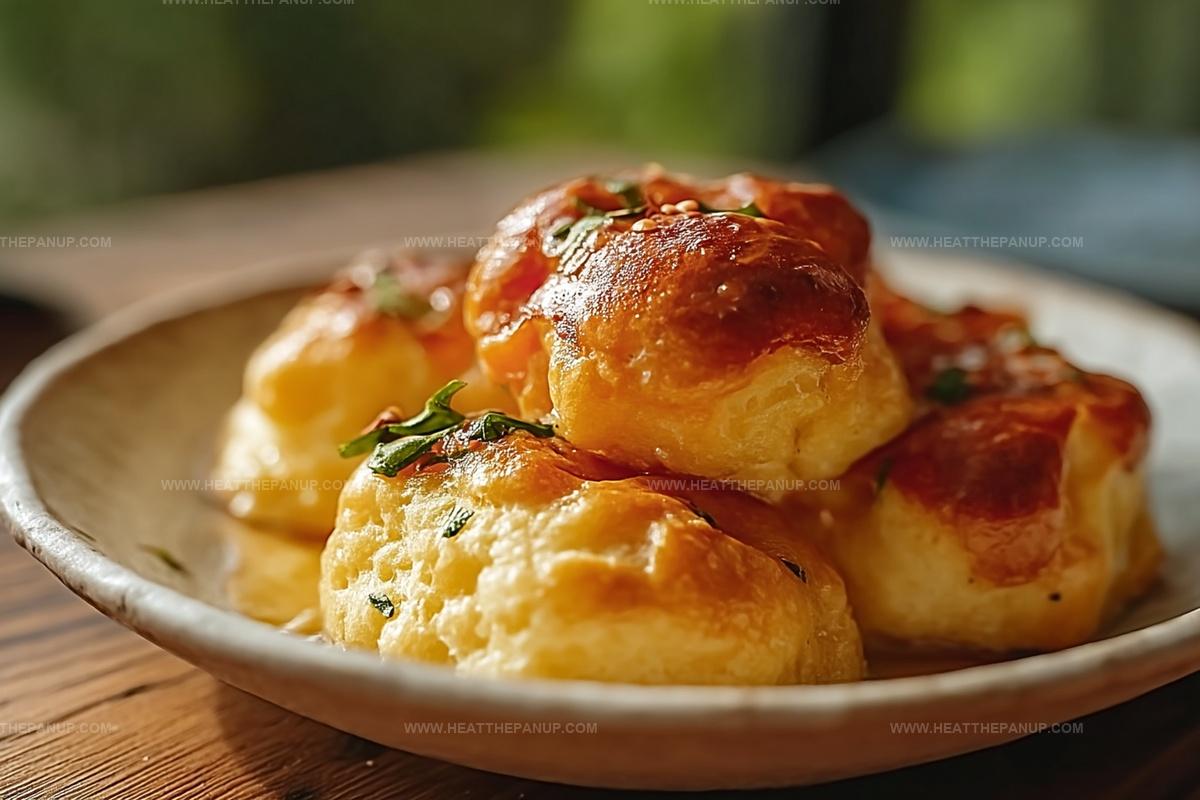
Heavenly Nun’s Puffs Recipe: Fluffy Sweet Bites from Above
Crispy nuns puffs have been my secret weapon for impressing guests at weekend brunches.
Soft clouds of pastry melt into buttery layers that dance across your palate.
My grandmother first shared this delightful recipe during a cozy afternoon in her warm kitchen.
Each bite carries whispers of delicate sweetness and traditional European baking techniques.
Delicate yet indulgent, these pastries offer a perfect balance between elegant presentation and comforting flavors.
Flour, eggs, and a pinch of culinary magic combine to create something truly special.
You’ll find yourself falling in love with every golden, pillowy morsel that emerges from the oven.
Step into this delectable adventure and let your taste buds celebrate!
Nuns Puffs That Are Light, Airy, and Easy to Love
Nuns Puffs Ingredient List
Main Ingredients:
Butter, Milk, Flour, and Eggs: Essential components for creating the classic choux pastry base, providing structure and rich flavor to the pastry.
Topping and Finishing Ingredients:
Sugar, Honey, Whipped Cream, Fresh Fruit: Add sweetness and enhance the presentation of the pastry.
Preparation Ingredients:
Cooking Spray or Butter: Ensures the puffs don’t stick to the pan.
Bake Nun’s Puffs
Step 1: Fire Up the Oven
Crank the oven to a toasty 375°F.
Grab your muffin pan and give it a generous layer of butter or cooking spray so nothing sticks.
Step 2: Create Liquid Magic
Grab a medium saucepan and melt the butter over medium heat.
Pour in milk and let it bubble gently into a soft boil.
Step 3: Introduce the Flour Bomb
Dump flour into the bubbling mixture all at once.
Stir like crazy until the ingredients transform into a perfect dough ball that pulls away from the pan’s sides.
Step 4: Cool Down the Dough
Take the pan off the heat and let the dough chill and cool down for about 5 minutes.
This helps prevent scrambling the eggs in the next step.
Step 5: Egg Incorporation Celebration
Add eggs one by one, mixing thoroughly after each addition.
Keep stirring until the dough looks glossy and smooth like a silky dream.
Step 6: Fill the Muffin Cups
Spoon the fluffy dough into each muffin cup, filling them about halfway.
Sprinkle a delightful layer of sugar on top for extra sweetness.
Step 7: Bake to Golden Perfection
Slide the pan into the oven and bake for 30 minutes.
Watch for gorgeous golden-brown puffs that rise up like magical clouds.
Step 8: Serve with Delicious Flair
Pull out the puffs and serve them warm.
Drizzle with honey and top with whipped cream or fresh berries for a spectacular finish.
Puff Pastry Tips for Light and Airy Nuns’ Bakes
Store Nuns Puffs for Later
Nuns Puffs Accompaniments
Nuns Puffs with Delicate Pastry Versions
FAQs
No, they’re surprisingly simple. The recipe requires basic ingredients and straightforward techniques like mixing dough and beating eggs, making it easy for home bakers of all skill levels.
The combination of beating eggs into the dough and high oven temperature creates steam that helps the pastry puff up and become light and airy.
Yes, you can make the dough mixture earlier and refrigerate it. Just bring it to room temperature before baking to ensure proper rising and texture.
They have a delicate, slightly sweet flavor. The sugar sprinkled on top and optional honey drizzle give them a mild sweetness that’s not overpowering.
Print
Nuns Puffs Recipe
- Total Time: 40 minutes
- Yield: 8 1x
Description
Delightful Nuns Puffs bring Wisconsin’s sweet culinary heritage to life with cloud-like pastry perfection. Crisp exterior and pillowy interior promise an irresistible indulgence that delights senses and connects you to cherished traditional baking.
Ingredients
Main Ingredients:
- 1 stick (1/2 cup) butter
- 1 cup milk
- 3/4 cup all-purpose flour
- 4 large eggs
Sweeteners:
- 1 tablespoon sugar (optional)
- Granulated sugar, for sprinkling
Serving Suggestions:
- Honey, for serving
- Whipped cream or fruit, for serving (optional)
Instructions
- Heat the oven to 375°F and thoroughly coat a muffin tin with butter or cooking spray to prevent sticking.
- Create a butter and milk mixture in a saucepan, gently heating until it reaches a soft bubbling point.
- Swiftly incorporate flour into the liquid, stirring continuously until the mixture transforms into a cohesive, smooth dough that separates cleanly from the pan’s sides.
- Allow the dough to rest and cool for approximately 5 minutes, which helps stabilize its structure.
- Gradually introduce eggs into the mixture, thoroughly blending after each addition to ensure a silky, uniform texture that appears glossy and elastic.
- Carefully distribute the dough into prepared muffin cups, filling each compartment halfway, and dust the surfaces with a light sprinkle of granulated sugar for a delicate caramelized finish.
- Transfer the muffin tin to the preheated oven and bake for 30 minutes, monitoring until the puffs develop a rich golden-brown exterior and rise dramatically.
- Serve immediately while warm, enhancing the pastries with a delicate honey drizzle and optional accompaniments like softly whipped cream or seasonal fresh fruits.
Notes
- Create a smooth dough by stirring vigorously when adding flour to prevent lumps and ensure a consistent texture.
- Cool the dough slightly before adding eggs to prevent scrambling and maintain a silky, glossy appearance.
- Generously grease the muffin pan to prevent sticking and ensure easy removal of delicate puffs.
- Experiment with flavor variations by adding cinnamon, vanilla extract, or citrus zest to the dough for a personalized touch.
- Prep Time: 10 minutes
- Cook Time: 30 minutes
- Category: Desserts, Snacks
- Method: Baking
- Cuisine: French
Nutrition
- Serving Size: 8
- Calories: 150
- Sugar: 1 g
- Sodium: 90 mg
- Fat: 8 g
- Saturated Fat: 5 g
- Unsaturated Fat: 3 g
- Trans Fat: 0 g
- Carbohydrates: 16 g
- Fiber: 0 g
- Protein: 4 g
- Cholesterol: 90 mg
Angelina Wiles
Content Editor & Culinary Enthusiast
Expertise
Food Writing and Editing, Vegetarian and Vegan Cuisine, Baking and Pastry Arts, Sustainable Cooking Practices
Education
Portland Community College
Certificate in Culinary Arts
Focus: Emphasis on sustainable cooking practices, vegetarian cuisine, and food writing.
Oregon Culinary Institute
Diploma in Baking and Pastry Arts
Focus: Specialized training in artisanal baking, pastry techniques, and dessert presentation.
Angelina’s love for cooking started with handwritten family recipes and weekend trips to farmers’ markets around Portland. She followed her passion with a Certificate in Culinary Arts from Portland Community College, then perfected her sweet side with a Diploma in Baking and Pastry Arts at Oregon Culinary Institute.
Angelina believes recipes should feel like a conversation, not a science project. She’s all about helping readers trust themselves in the kitchen with simple steps, fresh ideas, and easy twists on classic meals.
When she’s not editing recipes, she’s baking bread, sipping coffee, or getting inspired by the changing seasons.