
Citrusy Bliss: No-Bake Lemonade Pie Recipe for Summer Delight
Summer heat calls for a zesty no-bake lemonade pie that promises instant refreshment.
Cool citrus flavors dance across your palate with every creamy bite.
Minimal ingredients create maximum impact in this simple dessert.
Sweet and tangy notes blend perfectly without requiring complex techniques.
Chilling replaces traditional baking, making this treat quick and effortless.
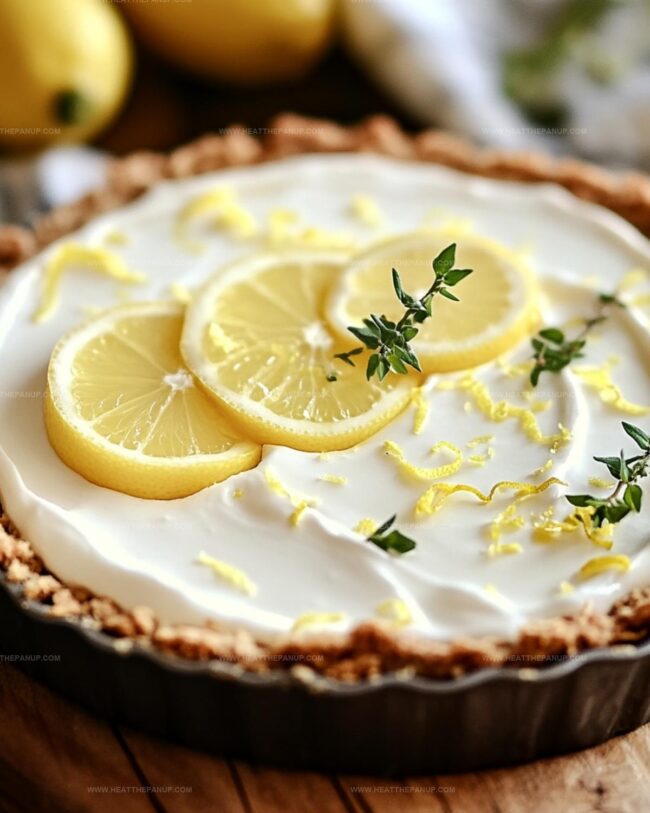
Crisp graham cracker crust provides the ideal foundation for bright lemon goodness.
Whip up this delightful pie and watch everyone reach for seconds.
Lemonade Pie That’s No-Bake and Bursting With Citrus
No-Bake Lemonade Pie Ingredient Breakdown
Base Ingredients:Filling Ingredients:Garnish:Lemonade Pie Instructions with No Baking Needed
Step 1: Whip Up Creamy Pudding Base
In a spacious mixing bowl, pour the milk and sprinkle in the pudding mix.
Grab a wire whisk and beat the ingredients together until they’re smoothly combined and start to thicken.
Step 2: Stir in Zesty Lemonade
Pour the completely thawed lemonade concentrate into the pudding mixture.
Whisk energetically for about two minutes until the mixture becomes thick and well blended.
Step 3: Fold in Fluffy Topping
Gently fold the Cool Whip into the lemonade pudding mixture.
Use smooth, sweeping motions to create a light and airy filling that looks silky and inviting.
Step 4: Fill Graham Cracker Crust
Transfer the luscious filling into the prepared graham cracker crust.
Use a spatula to spread the mixture evenly, making sure it reaches all corners and creates a smooth surface.
Step 5: Chill and Set
Cover the pie with plastic wrap and place it in the refrigerator.
Let it rest for a minimum of four hours, though overnight chilling will give you the most incredible texture and flavor.
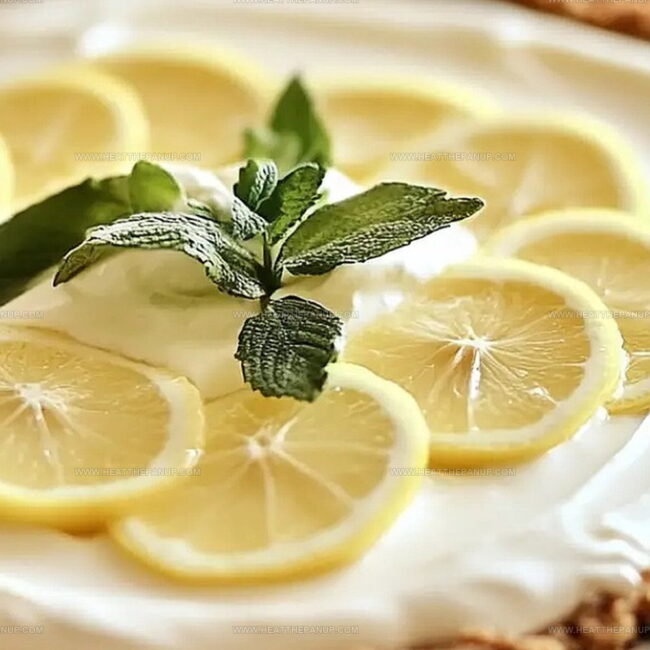
Step 6: Garnish with Citrus Flair
Just before serving, decorate the pie with delicate fresh lemon slices.
These bright, sunny accents will make your dessert look as delightful as it tastes.
Step 7: Serve and Savor
Slice the chilled pie and serve immediately.
Each bite promises a refreshing burst of lemony sweetness that’ll make taste buds dance with joy.
No-Bake Lemonade Pie Tricks That Work Like Magic

Chill No-Bake Lemonade Pie Leftovers
No-Bake Lemonade Pie Pairings
No-Bake Lemonade Pie Adjustments
FAQs
The lemonade concentrate and pudding mix create a tangy, sweet combination that makes this pie refreshing and delicious.
No, it’s extremely easy! The recipe requires no baking and uses simple ingredients that can be mixed quickly with just a whisk.
While the recipe calls for graham cracker crust, you can substitute with a vanilla wafer or shortbread crust for variety.
The pie will stay fresh for 3-4 days when covered and stored properly in the refrigerator.
Print
No-Bake Lemonade Pie Recipe
- Total Time: 15 minutes
- Yield: 8 1x
Description
Refreshing summer nights come alive with this no-bake lemonade pie, blending zesty citrus and creamy sweetness into a delightful dessert. Cool graham cracker crust and tangy filling make you crave a slice of pure sunshine on a plate.
Ingredients
Primary Ingredients:
- 1 6-ounce (170 grams) frozen lemonade concentrate, thawed
- 2 4-serving size boxes Vanilla Instant Pudding mix
- 1 3/4 cups milk
Dairy/Creamy Ingredients:
- 1 8-ounce (226 grams) Cool Whip
Crust Ingredient:
- 1 Graham cracker crust (store-bought or homemade)
Instructions
- Whisk together milk and pudding mix in a spacious mixing bowl until fully incorporated and smooth.
- Pour in the thawed lemonade concentrate and continue whisking vigorously until the mixture develops a creamy, thickened consistency.
- Gently fold the Cool Whip into the lemonade pudding blend, ensuring a uniform texture without deflating the whipped topping.
- Transfer the silky filling into the prepared graham cracker crust, using a spatula to distribute evenly and create a level surface.
- Securely cover the pie with plastic wrap or a fitted lid to prevent moisture absorption.
- Refrigerate the pie for a minimum of 4 hours, though allowing it to rest overnight will enhance the flavor and texture.
- Prior to serving, decorate the pie’s surface with delicate, thinly sliced fresh lemon rounds for a vibrant and appetizing presentation.
- Slice and serve the chilled pie, savoring the refreshing blend of tangy lemonade and creamy pudding.
Notes
- Chill the pudding mix and milk before whisking to help the mixture thicken faster and create a smoother consistency.
- Use freshly squeezed lemonade concentrate for a more vibrant, authentic citrus flavor that elevates the pie’s taste profile.
- For a gluten-free version, swap the graham cracker crust with a nut-based or gluten-free cookie crust to accommodate dietary restrictions.
- To enhance presentation, zest a lemon over the pie before serving to add a bright, aromatic touch and create a more visually appealing dessert.
- Prep Time: 15 minutes
- Cook Time: 0 minutes
- Category: Desserts, Snacks
- Method: Chilling
- Cuisine: American
Nutrition
- Serving Size: 8
- Calories: 210
- Sugar: 18 g
- Sodium: 150 mg
- Fat: 8 g
- Saturated Fat: 5 g
- Unsaturated Fat: 3 g
- Trans Fat: 0 g
- Carbohydrates: 31 g
- Fiber: 1 g
- Protein: 2 g
- Cholesterol: 15 mg
Angelina Wiles
Content Editor & Culinary Enthusiast
Expertise
Food Writing and Editing, Vegetarian and Vegan Cuisine, Baking and Pastry Arts, Sustainable Cooking Practices
Education
Portland Community College
Certificate in Culinary Arts
Focus: Emphasis on sustainable cooking practices, vegetarian cuisine, and food writing.
Oregon Culinary Institute
Diploma in Baking and Pastry Arts
Focus: Specialized training in artisanal baking, pastry techniques, and dessert presentation.
Angelina’s love for cooking started with handwritten family recipes and weekend trips to farmers’ markets around Portland. She followed her passion with a Certificate in Culinary Arts from Portland Community College, then perfected her sweet side with a Diploma in Baking and Pastry Arts at Oregon Culinary Institute.
Angelina believes recipes should feel like a conversation, not a science project. She’s all about helping readers trust themselves in the kitchen with simple steps, fresh ideas, and easy twists on classic meals.
When she’s not editing recipes, she’s baking bread, sipping coffee, or getting inspired by the changing seasons.