The Best Mexican Fried Ice Cream Recipe For Sweet Tooths
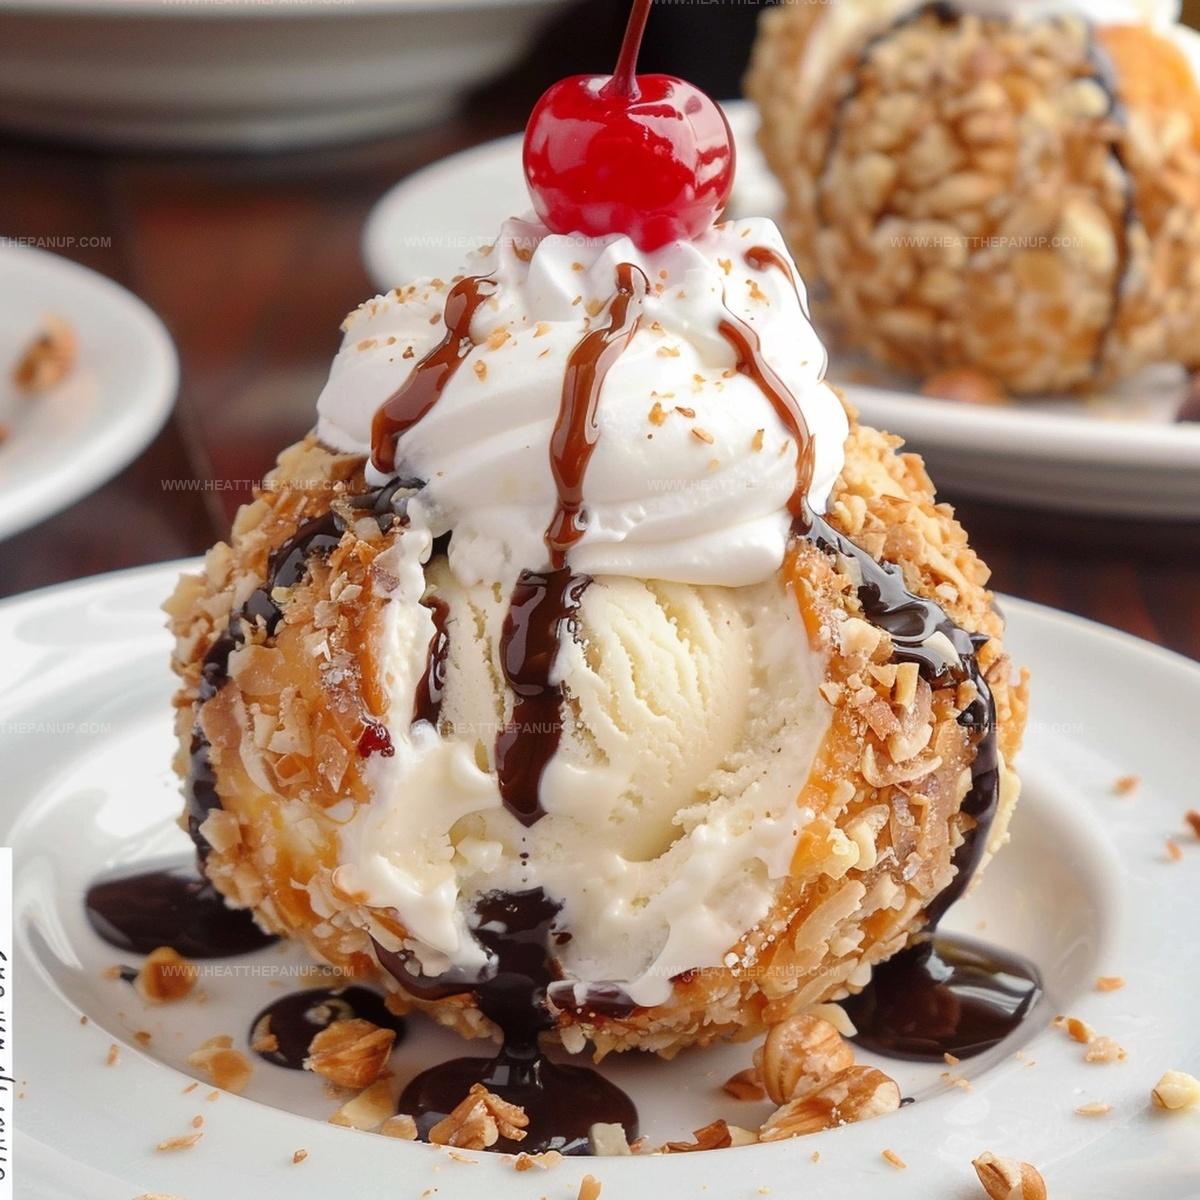
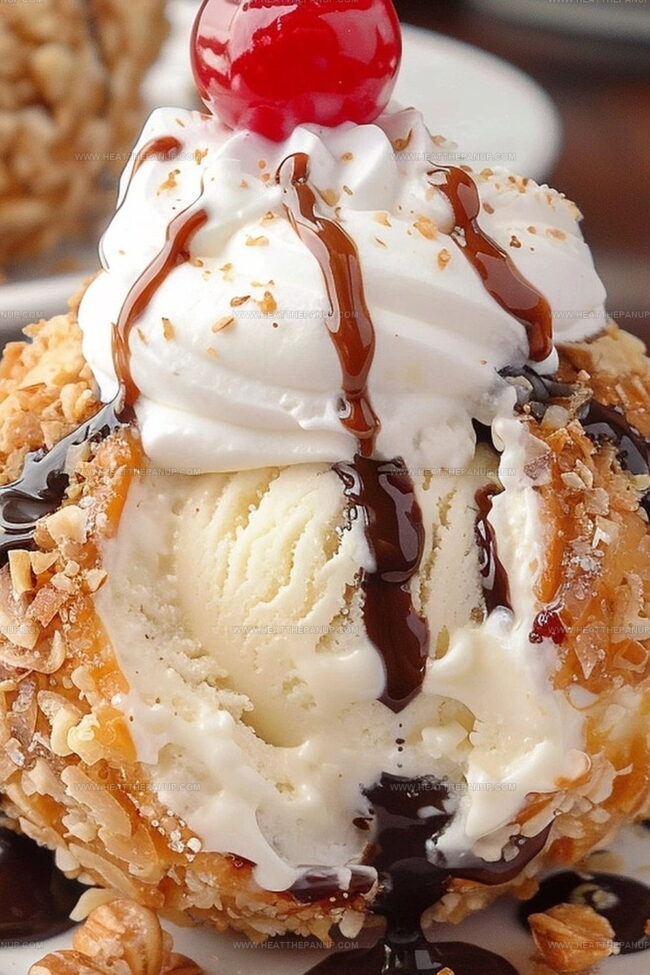
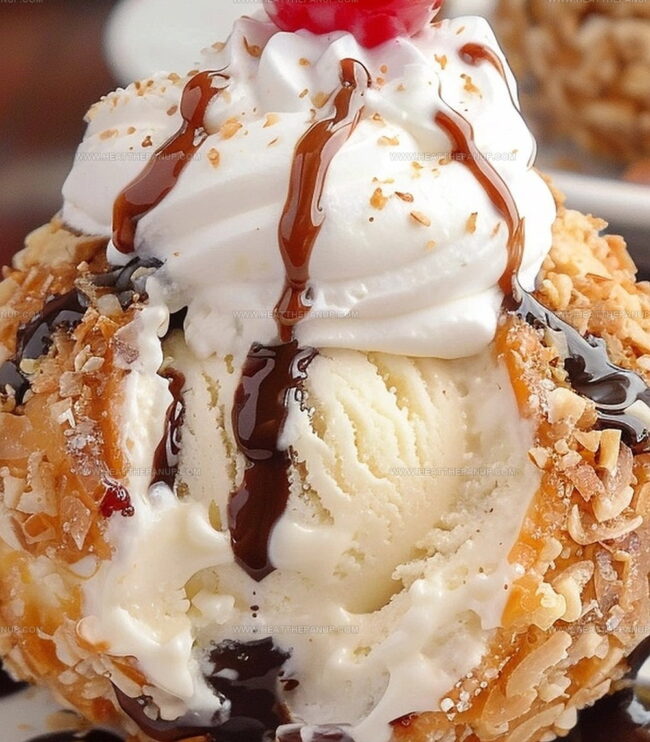
Creamy vanilla ice cream wrapped in a crispy, golden-brown crunch defines this irresistible Mexican fried ice cream that sends taste buds on a delightful adventure.
Originating from traditional Mexican dessert techniques, this treat blends sweet and crunchy textures in one amazing bite.
The magic happens when cold ice cream meets hot, crackling coating, creating a sensational contrast that delights everyone.
Cinnamon and cornflake breading adds a perfect layer of warmth and texture to the cool, smooth center.
Drizzled with honey or chocolate sauce, this dessert transforms an ordinary moment into something extraordinary.
You’ll fall in love with every spoonful of this classic Mexican dessert that offers pure culinary bliss.
Grab a spoon and dive into a world of delectable indulgence.
Why Mexican Fried Ice Cream Is a Fun Dessert
What You Need for Mexican Fried Ice Cream
Main Ingredients:
Ice Cream Base:Coating:Garnish and Topping Ingredients:
Drizzle and Sweet Toppings:Decorative Toppings:Supporting Ingredients:
Preparation Essentials:Steps to Make Mexican Fried Ice Cream
Step 1: Prep Freezing Surface
Line a baking sheet with parchment paper and set aside.
Step 2: Form Ice Cream Balls
Scoop vanilla ice cream into round balls and place on the prepared baking sheet.
Freeze for one hour to firm up.
Step 3: Create Crunchy Coating
Mix together:Step 4: Roll and Shape Ice Cream
Remove ice cream from freezer and roll each scoop in the crunchy mixture.
Press and shape into a compact ball, ensuring complete coverage.
Step 5: Secondary Freezing
Place coated ice cream balls back on parchment paper and return to freezer for two additional hours.
Step 6: Final Garnishing
Just before serving, drizzle each ice cream ball with:Top with:Step 7: Serve Immediately
Transfer decorated ice cream balls to serving plates and enjoy the crispy, sweet Mexican-style dessert right away.
Tips for Crispy Mexican Fried Ice Cream Shell
Storing and Serving Mexican Fried Ice Cream
Great Pairings for Mexican Fried Ice Cream
Sweet Twists on Fried Ice Cream
FAQs
Yes, you can substitute frosted flakes with cornflakes, graham crackers, or even crushed pecans for a unique crunch and flavor profile.
You can prepare the coated ice cream balls up to 24 hours before serving. Keep them tightly covered in the freezer until ready to serve.
Yes, freezing helps the ice cream maintain its shape and prevents melting during the coating process. The initial freezing and second freezing are crucial for creating the perfect texture.
Absolutely! You can prepare the coated ice cream balls a day in advance and keep them in the freezer. Just add the honey, whipped cream, and toppings right before serving to keep everything fresh and crisp.
Print
Mexican Fried Ice Cream Recipe
- Total Time: 3 hours
- Yield: 4 1x
Description
Creamy Mexican fried ice cream delivers a delightful fusion of crispy, cinnamon-coated vanilla goodness. Sweet, golden-brown exteriors give way to cool, smooth centers that will transport taste buds to a festive flavor celebration.
Ingredients
Main Ingredients:
- 4 (1 cup) scoops of vanilla ice cream
- 3 cups of crushed frosted cornflakes
- 1 teaspoon of ground cinnamon
Optional Toppings and Drizzles:
- 3 tablespoons of honey
- Canned whipped topping
- Chocolate syrup
- 4 maraschino cherries
Instructions
- Prepare a parchment-lined baking sheet and carefully form four generous scoops of vanilla ice cream, positioning them neatly on the surface.
- Transfer the baking sheet to the freezer and allow the ice cream to firm up for approximately one hour.
- Create a crispy coating mixture by thoroughly blending ground cinnamon with crushed frosted flakes, ensuring even distribution of the spice.
- Extract the chilled ice cream scoops from the freezer and meticulously roll each scoop through the cinnamon-frosted flakes mixture.
- While coating, gently compress and reshape the ice cream into compact, uniform spheres to ensure complete coverage.
- After each scoop is entirely enrobed in the crunchy mixture, return them to the parchment-lined sheet.
- Return the coated ice cream balls to the freezer and allow them to solidify for an additional two hours.
- Moments before serving, remove the frozen treat from the freezer and delicately drizzle honey over each crisp-coated sphere.
- Enhance the presentation by adding a dollop of whipped topping, a graceful swirl of chocolate syrup, and crown with a vibrant maraschino cherry.
- Serve the Mexican fried ice cream immediately to preserve its perfect temperature and textural contrast.
Notes
- Freeze the ice cream scoops beforehand to help them maintain shape during coating, preventing quick melting.
- Use slightly softened ice cream for easier coating, but ensure it’s not too soft to lose its structure.
- Crush frosted flakes finely and evenly for a consistent, crispy exterior that adheres well to the ice cream.
- Alternative coating options include crushed graham crackers, cornflakes, or toasted coconut for varied textures and flavors.
- Make this dessert gluten-free by using gluten-free cereal or crushed nuts as a coating alternative.
- Prepare the coated ice cream balls in advance and store in the freezer for up to 3 days before serving.
- Skip honey for a vegan version or replace with agave syrup for similar sweetness.
- Prep Time: 1 hour
- Cook Time: 2 hours
- Category: Desserts, Snacks
- Method: Frying
- Cuisine: Mexican
Nutrition
- Serving Size: 4
- Calories: 350
- Sugar: 20 g
- Sodium: 150 mg
- Fat: 15 g
- Saturated Fat: 8 g
- Unsaturated Fat: 5 g
- Trans Fat: 0 g
- Carbohydrates: 50 g
- Fiber: 1 g
- Protein: 4 g
- Cholesterol: 40 mg
James Hambly
Founder & Recipe Creator
Expertise
Recipe Development, Culinary Education, Farm-to-Table Cooking, Southern Cuisine
Education
Asheville-Buncombe Technical Community College
Certificate in Culinary Arts
Focus: Hands-on training in professional cooking techniques, emphasizing farm-to-table practices and Southern cuisine.
The Chef’s Academy
Associate Degree in Culinary Arts
Focus: Comprehensive culinary education covering global cuisines, kitchen management, and food safety.
James grew up surrounded by the smells of cast-iron skillets and slow-cooked Southern meals in Asheville, North Carolina.
He sharpened his skills with a Certificate in Culinary Arts from Asheville-Buncombe Technical Community College, and later leveled up with an Associate Degree from The Chef’s Academy.
James’s philosophy is simple: the best meals don’t need fancy tricks, just fresh ingredients, a hot pan, and a little bit of heart. His favorite days are spent testing one-pan wonders, chasing bold flavors, and creating recipes that feel easy, even on a busy night.