Festive Grinch Oreo Balls Recipe: Jolly Holiday Treats
Christmas spirit meets playful dessert with these whimsical grinch oreo balls that sparkle with festive charm.
Sweet treats can capture holiday magic in unexpected ways.
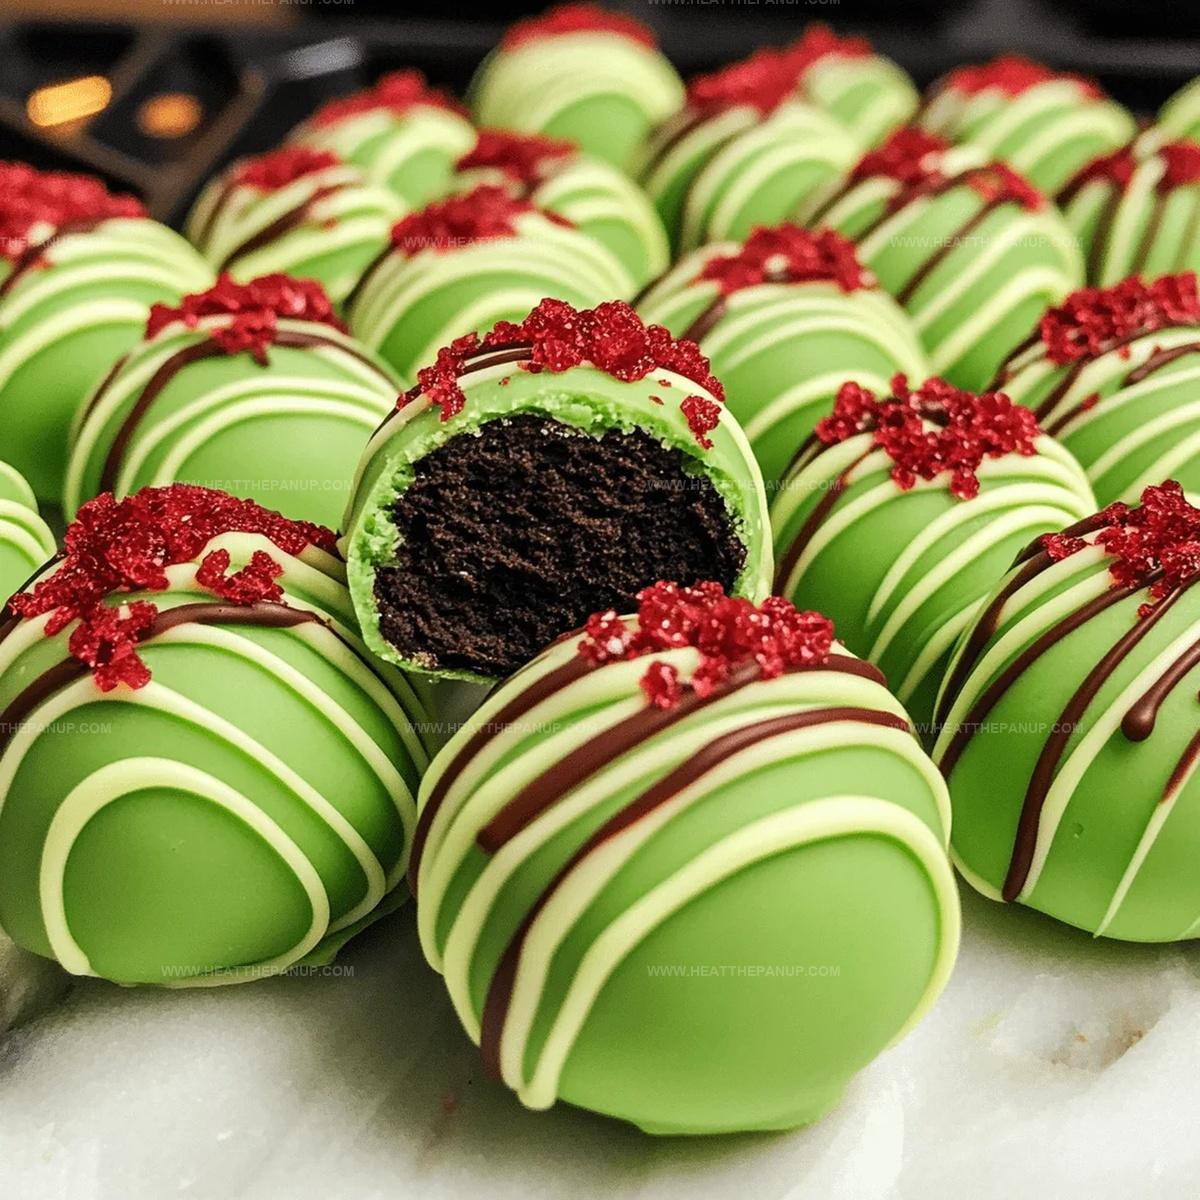
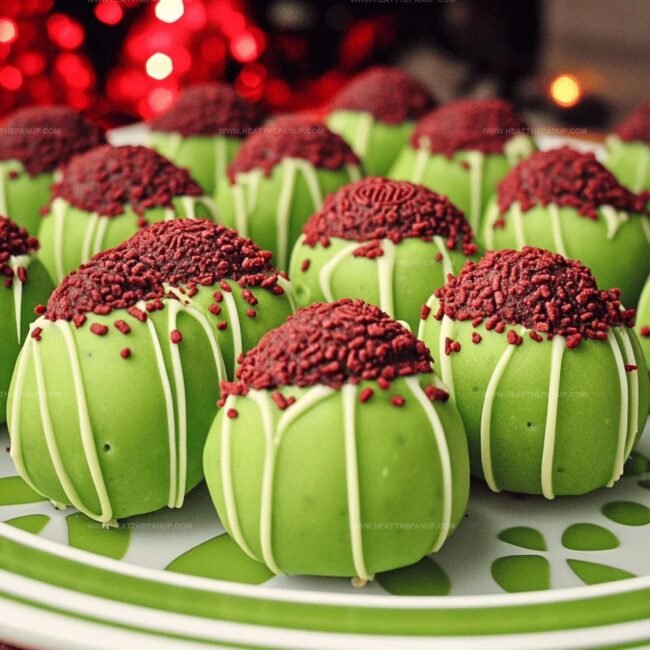
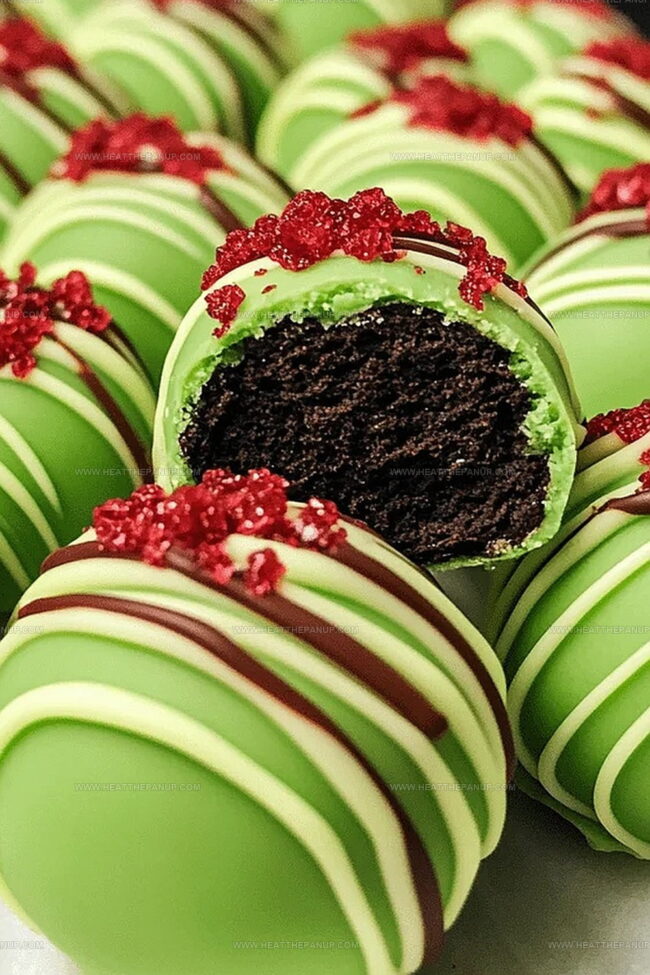
Green-tinted chocolate coatings give these bite-sized delights a mischievous personality reminiscent of the beloved character.
Small gatherings or large parties will adore these cute confections.
Kids especially love helping create these simple no-bake goodies with minimal kitchen skills required.
Decorative heart sprinkles add a perfect touch of Whoville cheer.
An easy recipe guaranteed to spread smiles faster than the grinch sliding down a chimney awaits you.
What Makes Grinch Oreo Balls So Festive

Ingredients for Fun Grinch Oreo Balls
Main Ingredients:
Oreo Cookies:Cream Cheese Base:Coating:Decorative Elements:Preparation Tools:Optional Drizzle Tools:Easy Steps to Make Grinch-Themed Oreo Balls
Step 1: Crush Oreo Cookies
Grab your Red Velvet Oreos and transform them into fine crumbs.
You can use a food processor, blender, or place cookies in a plastic bag and crush with a rolling pin until they become a powdery texture.
Step 2: Blend Cream Cheese
In a large mixing bowl, whip the softened cream cheese with an electric hand mixer until it becomes silky smooth and creamy.
Step 3: Combine Cookie Crumbs and Cream Cheese
Fold the Oreo crumbs into the cream cheese mixture, stirring until completely integrated and creating a consistent dough.
Step 4: Shape Delightful Balls
Use a cookie scoop to portion out the mixture, then roll each portion between your palms to create perfectly round, smooth balls.
Arrange these on a parchment-lined baking sheet.
Step 5: Chill the Balls
Refrigerate the Oreo balls for at least two hours, allowing them to firm up and maintain their shape during the coating process.
Step 6: Melt Candy Coating
In a double boiler, gently melt the light green candy melts over low heat.
Stir frequently and avoid overheating to prevent seizing.
Step 7: Dip and Coat
Using a fork or toothpick, carefully dip each chilled ball into the melted green candy coating.
Tap off excess coating and return to the baking sheet.
Step 8: Decorative Drizzle
Melt the reserved candy melts in a microwave-safe piping bag.
Snip a small tip and drizzle over the coated balls.
Top each with a festive red candy heart before the drizzle sets.
Step 9: Final Chill
Return the decorated Oreo balls to the refrigerator to set completely, allowing the coating to harden and create a smooth, glossy finish.
Tips to Get That Perfect Green Coating
Store and Serve Grinch Oreo Balls with Style

Snacks That Pair with Oreo Balls
Fun Ways to Decorate Oreo Balls Differently
FAQs
Chill the Oreo balls in the refrigerator for at least 2 hours before dipping. This helps them hold their shape and prevents them from falling apart when coated in candy melts.
Yes, you can use regular Oreo cookies. The Red Velvet Oreos just add a festive color and slight flavor variation to the Grinch Oreo Balls.
Use a double boiler or low heat, stirring often. Avoid getting water in the melts and don’t overheat. If using a microwave, use the defrost setting and melt in short 30-second intervals, stirring between each interval.
Use a fork or toothpick to dip the chilled balls, then tap the fork on the pot’s edge to remove excess candy melt. This helps create a smooth, even coating on each Oreo ball.
Print
Jolly Grinch Oreo Balls Recipe
- Total Time: 30 minutes
- Yield: 24 1x
Description
Festive holiday cheer meets playful dessert in these whimsical Grinch Oreo Balls, capturing the mischievous spirit of Dr. Seuss’s beloved character. Creamy green-tinted chocolate and heart-shaped sprinkles make these cute treats a delightful addition to your Christmas celebration you won’t want to miss.
Ingredients
Main Ingredients:
- 24.4 ounces (692 grams) red velvet oreos
- 8 ounces (227 grams) cream cheese, softened to room temperature
Coating Ingredients:
- 15 ounces (425 grams) light green candy melts
Decoration:
- Red candy hearts
Instructions
- Crush Red Velvet Oreos into fine crumbs using a food processor, blender, or rolling pin method on a sealed plastic bag.
- In a large mixing bowl, whip softened cream cheese with an electric mixer until completely smooth.
- Incorporate Oreo crumbs into the cream cheese mixture, blending thoroughly until fully combined.
- Utilize a cookie scoop to portion the mixture, then roll each portion into uniform spherical shapes by hand.
- Transfer the formed balls onto a parchment-lined baking sheet and refrigerate for minimum two hours to firm up.
- Melt light green candy wafers in a double boiler over low heat, stirring consistently to maintain smooth consistency.
- Carefully dip each chilled ball into melted candy coating using a fork, allowing excess to drip off before placing back on baking sheet.
- For decorative drizzle, microwave reserved candy wafers in a piping bag on low setting, massaging until completely melted.
- Snip a small opening in piping bag and create delicate zigzag patterns across coated balls.
- Immediately garnish each ball with a red candy heart before drizzle sets.
- Return decorated Grinch Oreo Balls to refrigerator to allow complete setting and hardening of coating.
Notes
- Crush Oreos finely for smooth, consistent texture without large cookie chunks.
- Use room temperature cream cheese to ensure easy blending and prevent lumps.
- Chill balls thoroughly before dipping to maintain perfect spherical shape during coating.
- Handle candy melts carefully by using low heat and avoiding moisture to prevent seizing.
- Work quickly when dipping to keep candy coating smooth and prevent clumping.
- For dietary modifications, substitute cream cheese with vegan alternatives like cashew cream.
- Add festive red candy hearts immediately after drizzling to ensure they stick properly.
- Store in refrigerator to maintain firmness and prevent melting of candy coating.
- Consider using gel food coloring for more vibrant green color if desired intensity is not achieved.
- Use a digital kitchen scale for precise ingredient measurements to guarantee consistent results.
- Prep Time: 30 minutes
- Cook Time: 0 minutes
- Category: Desserts, Snacks
- Method: None
- Cuisine: American
Nutrition
- Serving Size: 24
- Calories: 200
- Sugar: 12 g
- Sodium: 150 mg
- Fat: 9 g
- Saturated Fat: 4 g
- Unsaturated Fat: 3 g
- Trans Fat: 0 g
- Carbohydrates: 28 g
- Fiber: 1 g
- Protein: 2 g
- Cholesterol: 10 mg
Angelina Wiles
Content Editor & Culinary Enthusiast
Expertise
Food Writing and Editing, Vegetarian and Vegan Cuisine, Baking and Pastry Arts, Sustainable Cooking Practices
Education
Portland Community College
Certificate in Culinary Arts
Focus: Emphasis on sustainable cooking practices, vegetarian cuisine, and food writing.
Oregon Culinary Institute
Diploma in Baking and Pastry Arts
Focus: Specialized training in artisanal baking, pastry techniques, and dessert presentation.
Angelina’s love for cooking started with handwritten family recipes and weekend trips to farmers’ markets around Portland. She followed her passion with a Certificate in Culinary Arts from Portland Community College, then perfected her sweet side with a Diploma in Baking and Pastry Arts at Oregon Culinary Institute.
Angelina believes recipes should feel like a conversation, not a science project. She’s all about helping readers trust themselves in the kitchen with simple steps, fresh ideas, and easy twists on classic meals.
When she’s not editing recipes, she’s baking bread, sipping coffee, or getting inspired by the changing seasons.