Rustic Irish Soda Bread Recipe: A Cozy Baking Adventure
Every baker knows that crafting authentic irish soda bread requires precision and passion.
Wheat fields whisper stories of generations perfecting this rustic loaf.
Simple ingredients dance together in a harmonious blend of tradition and flavor.
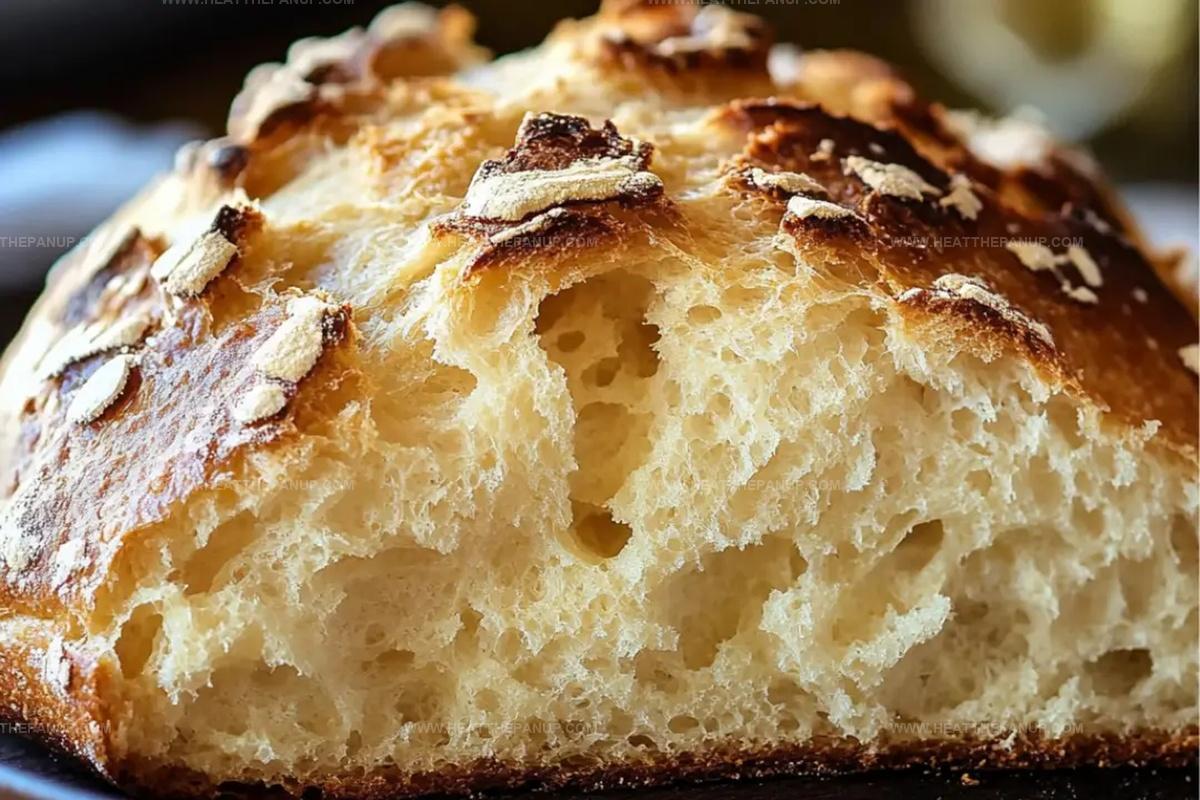
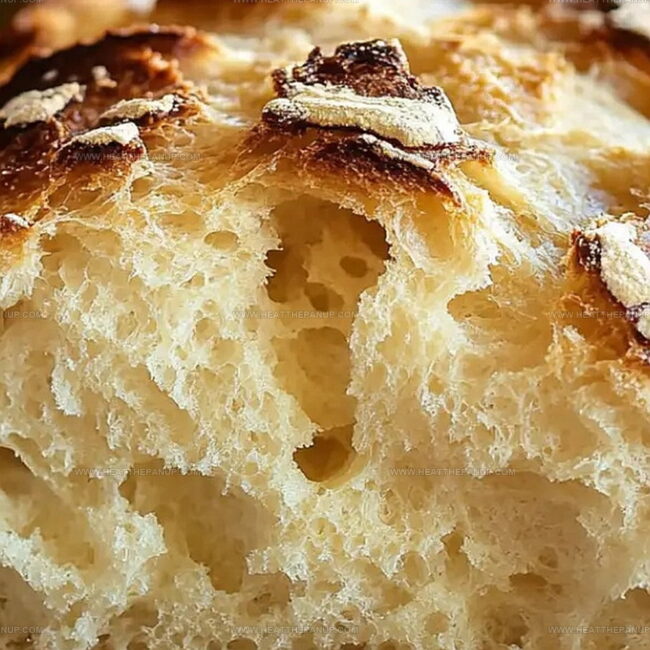
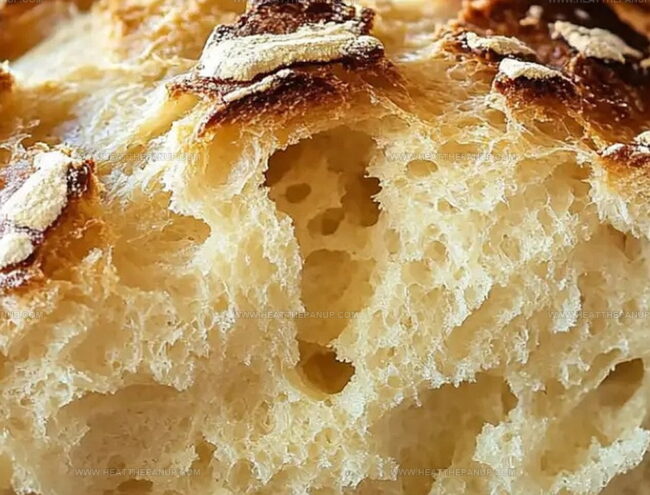
Crusty exteriors give way to soft, tender interiors that comfort and delight.
Minimal effort produces maximum satisfaction with this classic Irish staple.
Warm slices beckon you to savor each crumbly, hearty bite.
Let’s unlock the secrets of this beloved bread and create something truly memorable.
Irish Soda Bread That’s Rustic and Reliable
Quick and Easy Baking: Whip up this Irish soda bread in under an hour with minimal prep work and simple ingredients everyone has in their kitchen.
Beginner-Friendly Recipe: Perfect for novice bakers who want to try traditional bread making without complex techniques or advanced skills required.
Versatile Comfort Food: Enjoy as a breakfast treat, afternoon snack, or alongside soups and stews – this bread pairs wonderfully with multiple meals and occasions.
Family Crowd-Pleaser: Sweet raisins and soft texture make this bread appealing to both kids and adults, creating a delightful shared eating experience.
Irish Soda Bread Ingredient List
Dry Ingredients:Wet Ingredients:Add-Ins:Irish Soda Bread Baking Making Steps
Step 1: Prepare Baking Space
Heat the oven to 425°F.
Lightly coat a baking sheet with cooking spray or butter to prevent sticking.
Step 2: Combine Dry Ingredients
Whisk flour, baking soda, sugar, and salt together in a spacious mixing bowl until fully blended and no lumps remain.
Step 3: Create Bread Mixture
Create a small hollow in the center of the dry ingredients.
Pour buttermilk into the well, crack the egg, and sprinkle raisins around the mixture.
Step 4: Form Soft Dough
Use your hands or a wooden spoon to gently combine all ingredients.
Mix until a soft, slightly sticky dough develops.
Do not overmix.
Step 5: Knead and Shape Bread
Transfer dough onto a lightly floured surface.
Knead gently for about 30 seconds, just enough to bring the dough together smoothly.
Step 6: Create Bread Loaf
Shape the dough into a round, slightly flat circular loaf.
Place the loaf carefully onto the prepared baking sheet.
Step 7: Score Bread Surface
Using a sharp knife, cut a deep cross on the top of the loaf.
This traditional marking helps the bread cook evenly and allows steam to escape.
Step 8: Bake to Golden Perfection
Slide the baking sheet into the preheated oven.
Bake for 25-30 minutes until the bread turns a beautiful golden brown color.
Check doneness by tapping the bottom of the loaf – it should sound hollow.
Soda Bread Tips for Irish Loaves That Stay Soft
Store Irish Soda Bread Properly
Irish Soda Bread Accompaniments
Savor Traditional Irish Flavors: Perfectly Paired Companions
Irish Soda Bread in Traditional and New Takes
FAQs
Buttermilk and baking soda react to create a tangy flavor and help the bread rise without using yeast, giving it a distinctive texture and slightly sour taste.
The cross has both practical and traditional significance. It helps the bread cook evenly by allowing steam to escape and has historical folklore connections to warding off evil spirits in Irish culture.
Absolutely! Traditional Irish soda bread can be made plain or with various add-ins like caraway seeds, dried currants, or nuts depending on personal preference.
Irish soda bread is relatively nutritious, containing whole wheat flour which provides fiber, and buttermilk which offers calcium and protein. It’s less processed compared to many commercial breads.
Print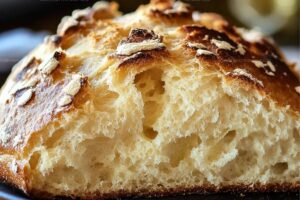
Irish Soda Bread Recipe
- Total Time: 35 minutes
- Yield: 8 1x
Description
Rustic Irish soda bread brings hearty warmth from traditional Irish kitchens, blending simple ingredients into a crusty, comforting loaf. Dense crumb and rich flavor invite you to savor a slice of Ireland’s culinary heritage.
Ingredients
Main Ingredients:
- 4 cups (960 milliliters) all-purpose flour
- 1 cup (240 milliliters) raisins
- 1 and 3/4 cups (420 milliliters) buttermilk
- 1 egg
Dry Seasonings:
- 1 teaspoon (5 milliliters) baking soda
- 1 teaspoon (5 milliliters) salt
- 1/4 cup (60 milliliters) sugar
Instructions
- Combine dry ingredients in a spacious mixing vessel, thoroughly blending flour, baking soda, sugar, and salt until uniformly distributed.
- Create a central depression in the dry mixture, forming a welcoming crater for liquid and egg additions.
- Gently introduce beaten egg and plump raisins into the flour crater, then gradually pour buttermilk into the mixture.
- Use hands or wooden utensil to merge ingredients, transforming them into a cohesive, slightly tacky dough with minimal handling.
- Transfer dough onto a lightly dusted work surface, executing a brief, tender kneading technique to maintain softness.
- Mold the dough into a rounded, rustic loaf with smooth, gentle movements.
- Carefully position the shaped loaf onto a prepared baking sheet, ensuring even placement.
- Utilize a sharp knife to carve a pronounced cross atop the loaf, allowing steam to escape during baking.
- Slide the baking sheet into a preheated oven, maintaining a consistent 425°F temperature.
- Monitor bread’s transformation, watching for a rich golden exterior and listening for a hollow acoustic signature when tapped, typically requiring 25-30 minutes of baking time.
Notes
- Flour selection matters most for texture, so choose an unbleached all-purpose flour for authentic results.
- Raisins can be swapped with dried cranberries or currants for varied flavor profiles and dietary preferences.
- Kneading gently prevents tough bread, ensuring a soft and tender crumb that melts in your mouth.
- Room temperature buttermilk helps ingredients blend smoothly and creates a more consistent dough consistency.
- Prep Time: 10 minutes
- Cook Time: 25 minutes
- Category: Breakfast, Snacks
- Method: Baking
- Cuisine: Irish
Nutrition
- Serving Size: 8
- Calories: 210
- Sugar: 4 g
- Sodium: 150 mg
- Fat: 3 g
- Saturated Fat: 1 g
- Unsaturated Fat: 2 g
- Trans Fat: 0 g
- Carbohydrates: 40 g
- Fiber: 1 g
- Protein: 6 g
- Cholesterol: 20 mg
Angelina Wiles
Content Editor & Culinary Enthusiast
Expertise
Food Writing and Editing, Vegetarian and Vegan Cuisine, Baking and Pastry Arts, Sustainable Cooking Practices
Education
Portland Community College
Certificate in Culinary Arts
Focus: Emphasis on sustainable cooking practices, vegetarian cuisine, and food writing.
Oregon Culinary Institute
Diploma in Baking and Pastry Arts
Focus: Specialized training in artisanal baking, pastry techniques, and dessert presentation.
Angelina’s love for cooking started with handwritten family recipes and weekend trips to farmers’ markets around Portland. She followed her passion with a Certificate in Culinary Arts from Portland Community College, then perfected her sweet side with a Diploma in Baking and Pastry Arts at Oregon Culinary Institute.
Angelina believes recipes should feel like a conversation, not a science project. She’s all about helping readers trust themselves in the kitchen with simple steps, fresh ideas, and easy twists on classic meals.
When she’s not editing recipes, she’s baking bread, sipping coffee, or getting inspired by the changing seasons.