
Dreamy Homemade Red Velvet Brownie Dippers Recipe for Dessert Lovers
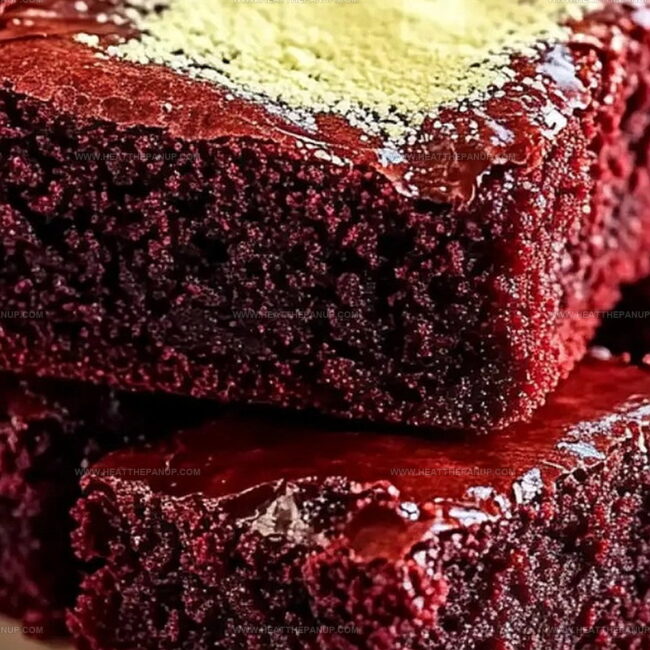
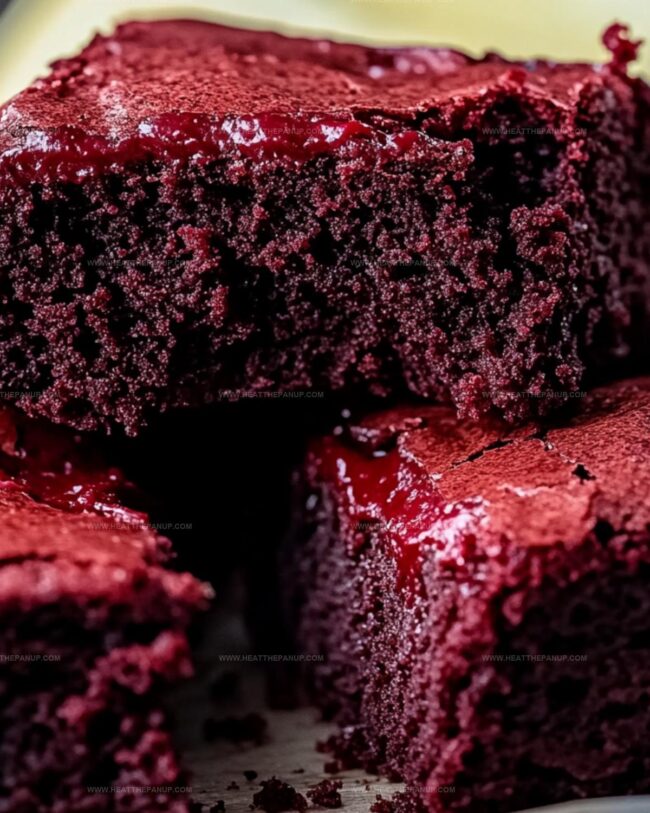
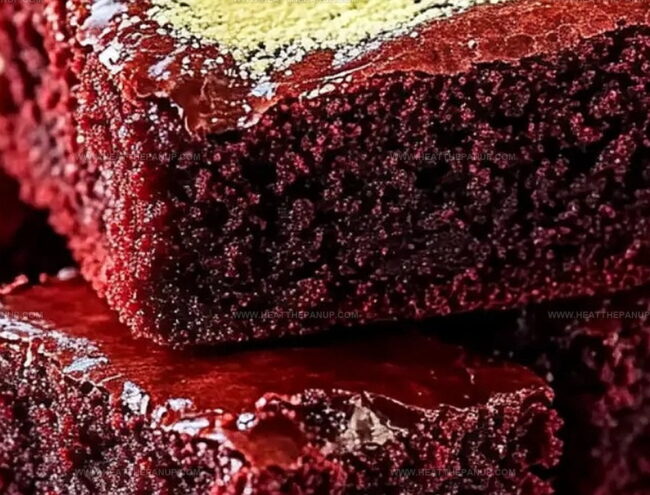
Red velvet brownie dippers pack a delightful punch of sweet, chocolatey goodness.
Velvet-smooth textures meld perfectly with rich cocoa notes.
Chocolate lovers rejoice at this decadent treat that screams indulgence.
Crisp edges and soft centers create an irresistible contrast in every bite.
Dessert enthusiasts will find themselves captivated by these elegant, bite-sized delights.
Simple ingredients come together to craft a memorable snack that impresses without complicated techniques.
Whip up these delectable morsels and watch everyone’s eyes light up with pure culinary excitement.
Red Velvet Dippers That Are Sweet and Shareable
Red Velvet Brownie Dippers Homemade Style Ingredients
Main Ingredients:
Flour Group:Wet Ingredient Group:Flavor Enhancers:Leavening and Seasoning Group:Dipping and Coating Options:
Chocolate Group:Cream Cheese Group:Decorative Group:Red Velvet Brownie Dippers Instructions
Step 1: Fire Up The Oven
Crank your oven to 350°F.
Grab an 8×8-inch pan and line it with parchment paper or give it a quick spray of cooking oil so your brownies will slide out easily.
Step 2: Whisking Dry Ingredients
Grab a medium bowl and blend together flour, cocoa powder, baking powder, and salt.
Use a whisk to combine everything smoothly and set the mixture aside.
Step 3: Mixing Wet Components
In a large bowl, whisk melted butter and sugar until they become super smooth.
Add eggs one at a time, giving each a good mix.
Pour in vanilla extract, red food coloring, and white vinegar.
Stir until the batter transforms into a gorgeous red shade.
Step 4: Marry Wet and Dry Mixtures
Slowly add dry ingredients into wet ingredients.
Mix gently until just combined.
Don’t go crazy with mixing – you want tender brownies, not tough ones.
Step 5: Baking Magic
Pour batter into your prepared pan.
Smooth the top with a spatula.
Slide into the oven and bake for 20-25 minutes.
Check doneness with a toothpick – it should have a few moist crumbs but no wet batter.
Step 6: Cool and Slice
Let brownies cool completely in the pan.
Once cool, lift them out using parchment paper.
Transfer to a cutting board and slice into small rectangles or squares.
Step 7: Create Dipping Station
Set up bowls with:Dip each brownie piece halfway into your favorite coating.
Place on a parchment-lined tray and sprinkle if desired.
Step 8: Chill and Devour
Pop the dipped brownies in the refrigerator for 10-15 minutes to set the coatings.
Serve chilled or at room temperature and enjoy these delectable treats!
Dipper Tips for Rich Red Velvet Brownie Bites
Store Red Velvet Brownie Dippers
Red Velvet Brownie Dippers Sweet Companions
Red Velvet Dippers with Brownie Texture Ideas
FAQs
White vinegar helps activate the cocoa powder’s color and provides a subtle tanginess that enhances the red velvet flavor. It also helps create a softer, more tender texture in the brownies.
Yes, you can use natural alternatives like beetroot powder or omit it entirely. However, the vibrant red color is a signature characteristic of red velvet desserts.
Look for a toothpick with a few moist crumbs when inserted into the center. The edges should be slightly pulled away from the pan, and the top should look set but not completely dry.
Use a sharp knife and clean it between cuts. Measure and mark guidelines lightly with the knife tip before cutting to ensure uniform sizes. Chilling the brownies briefly can also help create cleaner cuts.
Print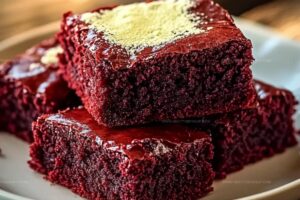
Homemade Red Velvet Brownie Dippers Recipe
- Total Time: 35 minutes
- Yield: 12 1x
Description
Red velvet brownie dippers invite chocolate lovers into a world of indulgent dessert magic. Luxurious cocoa-infused squares paired with creamy cream cheese dip create an irresistible treat you won’t want to miss.
Ingredients
Main Ingredients:
- 1 cup all-purpose flour
- 1/2 cup unsweetened cocoa powder
- 1 cup granulated sugar
- 2 large eggs
- 1/2 cup unsalted butter (melted)
Flavoring and Coloring Ingredients:
- 2 tablespoons red food coloring (gel or liquid)
- 1 teaspoon vanilla extract
- 1/4 teaspoon white vinegar
Dry Ingredients and Seasonings:
- 1/2 teaspoon baking powder
- 1/4 teaspoon salt
Dipping and Decoration Ingredients:
- Cream cheese frosting (store-bought or homemade)
- Melted white chocolate
- Melted dark chocolate
- Sprinkles (optional, for decoration)
Instructions
- Warm the oven to 350°F and prepare an 8×8-inch pan with parchment paper or a light grease coating for effortless removal.
- Sift together flour, cocoa powder, baking powder, and salt in a medium mixing vessel, then set aside for later incorporation.
- Whisk melted butter and sugar in a large bowl until thoroughly integrated. Incorporate eggs individually, ensuring complete blending after each addition.
- Introduce vanilla extract, red food coloring, and white vinegar to the wet mixture, stirring until the batter transforms into a rich, vibrant crimson hue.
- Gently fold dry ingredients into the colored mixture, stirring minimally to prevent toughening the brownie texture.
- Transfer the batter into the prepared pan, smoothing the surface with a spatula for even distribution.
- Bake for 20-25 minutes, checking doneness by inserting a toothpick that should emerge with minimal moist crumbs.
- Allow brownies to cool completely within the pan before extracting using parchment paper.
- Slice the cooled brownie block into bite-sized rectangles or squares, creating perfect dipping portions.
- Arrange dipping stations with cream cheese frosting, melted white and dark chocolate, and optional decorative sprinkles.
- Dunk each brownie piece halfway into preferred coating, placing carefully on a parchment-lined tray.
- Refrigerate dipped treats for 10-15 minutes to solidify coatings, then serve chilled or at ambient temperature for maximum enjoyment.
Notes
- Check cocoa powder quality for rich, deep chocolate flavor that enhances the red velvet essence.
- Ensure room temperature eggs blend smoothly, creating a more uniform brownie texture without lumps.
- Use gel food coloring for more vibrant red color without altering the batter’s consistency.
- Add cream cheese frosting as a dipping option for traditional red velvet cake lovers seeking familiar tangy sweetness.
- Experiment with gluten-free flour blend to make recipe celiac-friendly without compromising brownie’s fudgy texture.
- Replace white sugar with coconut sugar for lower glycemic index and subtle caramel undertones.
- Chill brownies before cutting for cleaner, more precise edges and easier handling during dipping process.
- Store dipped brownies in airtight container between parchment layers to maintain crisp chocolate coating.
- Prep Time: 15 minutes
- Cook Time: 20 minutes
- Category: Desserts, Snacks
- Method: Baking
- Cuisine: American
Nutrition
- Serving Size: 12
- Calories: 230
- Sugar: 18 g
- Sodium: 150 mg
- Fat: 10 g
- Saturated Fat: 6 g
- Unsaturated Fat: 4 g
- Trans Fat: 0 g
- Carbohydrates: 31 g
- Fiber: 1 g
- Protein: 3 g
- Cholesterol: 30 mg
Angelina Wiles
Content Editor & Culinary Enthusiast
Expertise
Food Writing and Editing, Vegetarian and Vegan Cuisine, Baking and Pastry Arts, Sustainable Cooking Practices
Education
Portland Community College
Certificate in Culinary Arts
Focus: Emphasis on sustainable cooking practices, vegetarian cuisine, and food writing.
Oregon Culinary Institute
Diploma in Baking and Pastry Arts
Focus: Specialized training in artisanal baking, pastry techniques, and dessert presentation.
Angelina’s love for cooking started with handwritten family recipes and weekend trips to farmers’ markets around Portland. She followed her passion with a Certificate in Culinary Arts from Portland Community College, then perfected her sweet side with a Diploma in Baking and Pastry Arts at Oregon Culinary Institute.
Angelina believes recipes should feel like a conversation, not a science project. She’s all about helping readers trust themselves in the kitchen with simple steps, fresh ideas, and easy twists on classic meals.
When she’s not editing recipes, she’s baking bread, sipping coffee, or getting inspired by the changing seasons.