Zesty Homemade Garlic Herb Butter Recipe for Flavor Magic
Crafting a sublime garlic herb butter can elevate your culinary game in just minutes.
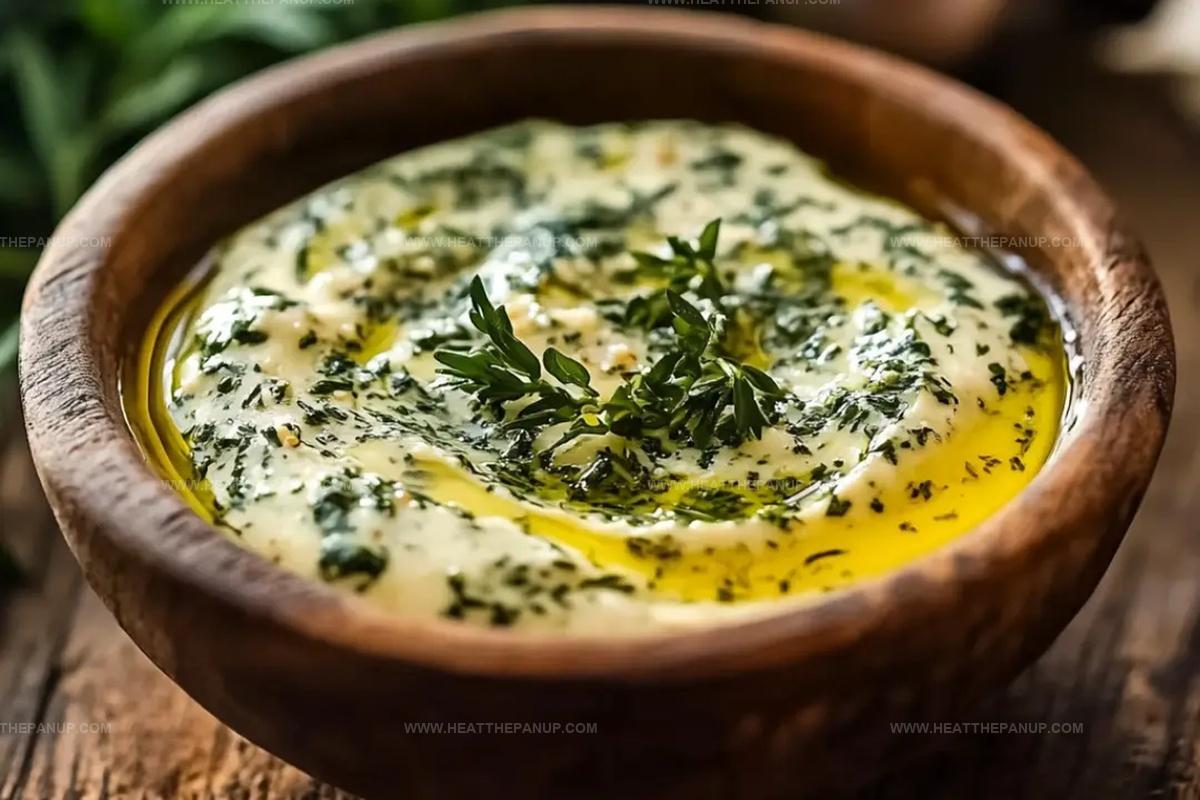
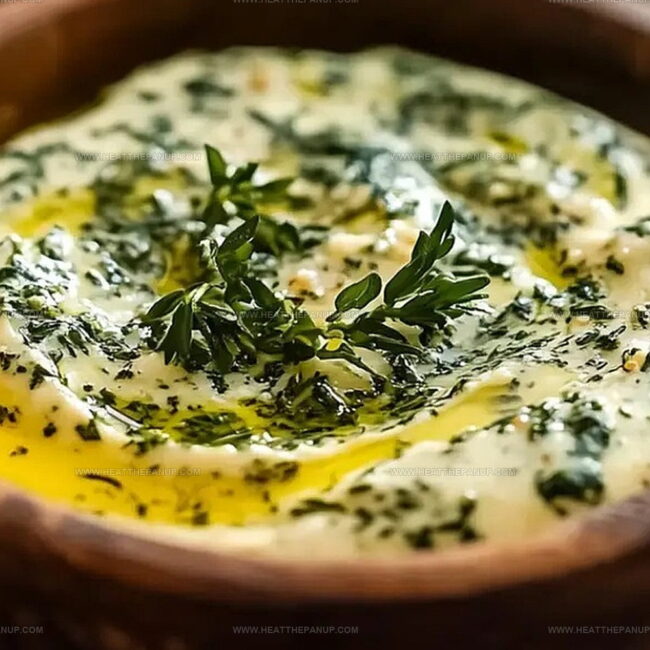
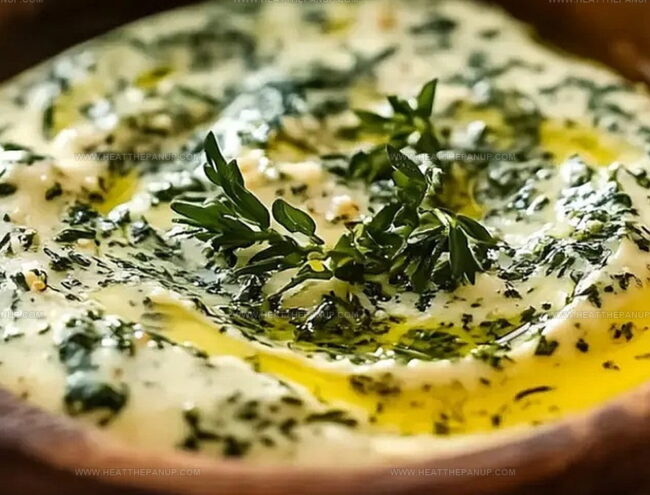
Creamy and aromatic, this spread brings restaurant-quality flavor right to your kitchen counter.
Rich European traditions inspire this simple yet magnificent condiment that melts beautifully across warm bread or sizzling meats.
Fresh herbs like parsley and thyme dance alongside minced garlic, creating a symphony of robust flavors.
Each ingredient contributes its unique character to this delectable blend.
Salt and softened butter provide the perfect canvas for herb-infused magic.
You’ll want to spread this delightful mixture on everything from crusty baguettes to grilled salmon, so grab your mixing bowl and let’s get started!
Garlic Herb Butter That Makes Every Bread Better
Garlic Herb Butter: What You’ll Need
Main Dairy Base:Herb Blend:Flavor Enhancers:Garlic Herb Butter Blending Instructions
Step 1: Blend Creamy Ingredients
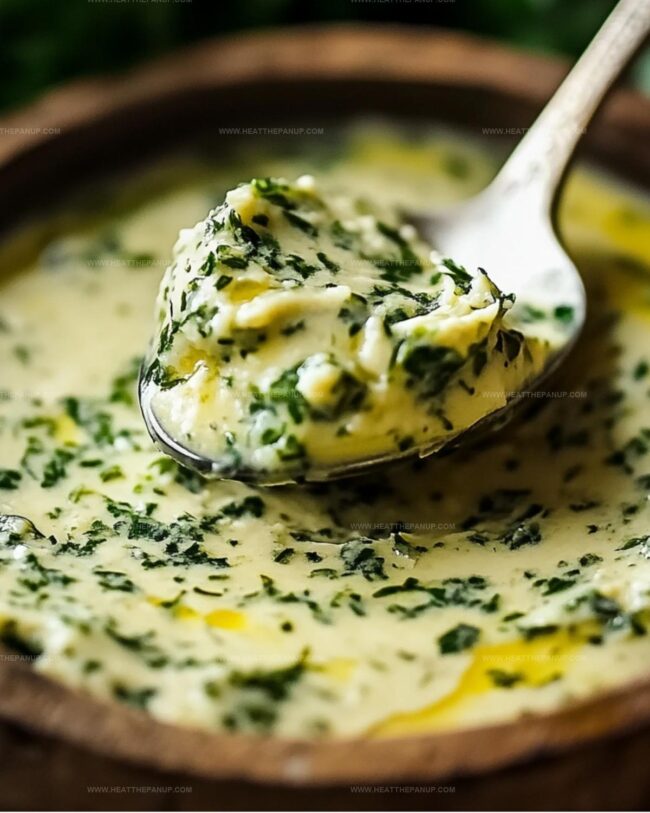
In a spacious mixing bowl, combine room temperature butter with freshly minced garlic, finely chopped herbs including:Sprinkle in a pinch of freshly ground black pepper.
Use a spatula or fork to thoroughly mix the ingredients until they create a smooth, well-integrated blend.
Step 2: Shape Butter Log
Spread a sheet of plastic wrap on your countertop.
Transfer the herbed butter mixture onto the center of the wrap.
Carefully roll the butter into a compact, cylindrical log, twisting the ends of the plastic wrap to secure the shape.
Ensure the log is tightly wrapped to maintain its form.
Step 3: Chill and Develop Flavors
Place the wrapped butter log in the refrigerator.
Allow it to rest and cool for at least one hour.
This chilling time helps the herbs infuse their aromatic essence throughout the butter and allows the mixture to firm up.
Step 4: Slice and Serve
Remove the butter from the refrigerator and unwrap.
Using a sharp knife, slice the log into beautiful round medallions.
Serve the herbed butter alongside warm bread, grilled steaks, roasted vegetables, or freshly toasted bagels.
The butter will melt deliciously, adding a burst of herbal richness to your favorite dishes.
Best Tips for Homemade Garlic Herb Butter
Storing Homemade Garlic Herb Butter
Garlic Herb Butter Serving Uses
Garlic Herb Butter with Fresh Mix-In Ideas
FAQs
Leave butter at room temperature for 30-45 minutes. Butter should be soft enough to easily mix but not melted. Press gently with a finger – it should leave an indentation without breaking apart.
Yes, but reduce the quantity by half. Fresh herbs provide more vibrant flavor, while dried herbs are more concentrated. Use 1 teaspoon of dried herbs for every 1 tablespoon of fresh herbs.
Use unsalted butter for better flavor control. High-quality butter with higher butterfat content like European-style butter creates richer, creamier results. Avoid margarine or low-fat alternatives.
Store in the refrigerator for up to 7-10 days in an airtight container or wrapped tightly in plastic wrap. For longer storage, freeze for up to 3 months. Always keep refrigerated to maintain freshness and prevent bacterial growth.
Print
Homemade Garlic Herb Butter Recipe
- Total Time: 10 minutes
- Yield: 1 1x
Description
Elevate simple spreads with this homemade garlic herb butter, blending fresh herbs and creamy richness into a culinary masterpiece. Rich, aromatic, and irresistibly smooth, this butter will make you the star of any kitchen gathering.
Ingredients
Dairy:
- 1 cup (227 grams) butter (softened)
Herbs:
- 1/4 cup (15 grams) chopped fresh parsley
- 1 tablespoon (3 grams) fresh thyme (chopped)
- 1 tablespoon (3 grams) fresh basil (chopped)
Seasonings:
- 3 cloves garlic, finely minced
- 1/4 teaspoon black pepper
Instructions
- Prepare a spacious mixing vessel and allow butter to reach room temperature for effortless blending.
- Finely mince fresh garlic cloves and chop fragrant herbs including parsley, thyme, and basil with precision.
- Transfer softened butter into the mixing bowl and incorporate minced garlic and herbs thoroughly, ensuring even distribution of ingredients.
- Sprinkle freshly ground black pepper across the herbed butter mixture, gently folding to integrate complementary flavors.
- Unroll a sheet of plastic wrap and carefully transfer the seasoned butter mixture onto its surface.
- Skillfully roll the butter into a cylindrical shape, twisting the wrap’s ends to create a compact log configuration.
- Place the wrapped butter log into the refrigerator, allowing it to solidify and permit herb essences to harmonize for approximately one hour.
- Once chilled, unwrap the butter and slice into elegant rounds using a sharp knife.
- Serve the aromatic garlic herb butter alongside warm bread, atop sizzling steaks, spread on crisp bagels, or melted over roasted vegetables for a delectable culinary enhancement.
Notes
- Soften butter completely at room temperature to ensure smooth, effortless mixing without lumps.
- Choose fresh herbs for maximum flavor intensity and vibrant green color in your butter blend.
- Experiment with herb combinations like rosemary, dill, or chives to create unique flavor profiles for different dishes.
- Store homemade herb butter in the refrigerator for up to two weeks or freeze for longer preservation, wrapped tightly in plastic wrap or an airtight container.
- Prep Time: 10 minutes
- Cook Time: 0 minutes
- Category: Snacks, Dinner
- Method: None
- Cuisine: American
Nutrition
- Serving Size: 1
- Calories: 162
- Sugar: 0.1 g
- Sodium: 2 mg
- Fat: 18 g
- Saturated Fat: 11 g
- Unsaturated Fat: 7 g
- Trans Fat: 0 g
- Carbohydrates: 1 g
- Fiber: 0.1 g
- Protein: 0.2 g
- Cholesterol: 31 mg
Angelina Wiles
Content Editor & Culinary Enthusiast
Expertise
Food Writing and Editing, Vegetarian and Vegan Cuisine, Baking and Pastry Arts, Sustainable Cooking Practices
Education
Portland Community College
Certificate in Culinary Arts
Focus: Emphasis on sustainable cooking practices, vegetarian cuisine, and food writing.
Oregon Culinary Institute
Diploma in Baking and Pastry Arts
Focus: Specialized training in artisanal baking, pastry techniques, and dessert presentation.
Angelina’s love for cooking started with handwritten family recipes and weekend trips to farmers’ markets around Portland. She followed her passion with a Certificate in Culinary Arts from Portland Community College, then perfected her sweet side with a Diploma in Baking and Pastry Arts at Oregon Culinary Institute.
Angelina believes recipes should feel like a conversation, not a science project. She’s all about helping readers trust themselves in the kitchen with simple steps, fresh ideas, and easy twists on classic meals.
When she’s not editing recipes, she’s baking bread, sipping coffee, or getting inspired by the changing seasons.