
Warm & Sweet Homemade Fruit Bread Recipe – Family Joy
Sweet memories of childhood weekends flood back with this delightful homemade fruit bread that brings comfort and warmth to any kitchen.
Bursting with juicy dried fruits and a hint of warm spices, this bread creates an irresistible aroma that fills every corner of your home.
Seasonal fruits meld perfectly with soft, tender dough, creating a delectable treat that speaks directly to the soul.
Each slice promises a delightful balance of sweetness and texture that makes this bread more than just a simple recipe.
Bakers of all skill levels can master this straightforward and forgiving technique with ease.
The combination of simple ingredients transforms into a magical loaf that begs to be shared with loved ones.
Enjoy this heartwarming bread as a breakfast delight or a cozy afternoon snack that connects you to cherished culinary traditions.
Why Homemade Fruit Bread Is a Cozy Favorite
What You’ll Need for Fresh Fruit Bread
Bread Base:Fruit and Spice Mix:Finishing Touches:How to Bake This Moist and Fruity Bread
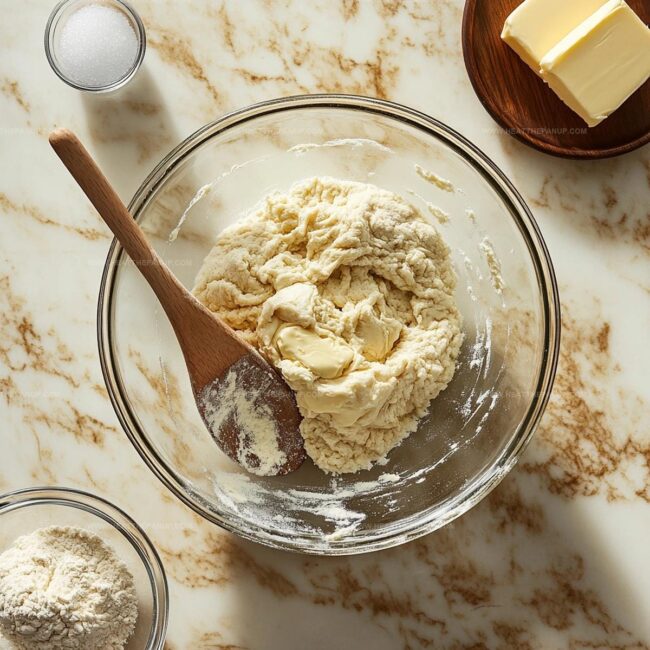
Step 1: Kickstart the Dough
In a spacious mixing bowl, combine warm water, sugar, salt, and yeast.
Whisk until everything dissolves completely.
Pour in melted butter and stir smoothly.
Gradually add flour, mixing until a soft, slightly shaggy dough forms with no dry spots visible.
Step 2: Let the Dough Bloom
Cover the bowl with plastic wrap and place in a cozy, draft-free spot.
Allow the dough to rise and expand for about 60-90 minutes.
You’ll know it’s ready when the volume has doubled and looks puffy and light.
Step 3: Add Fruity Goodness
Prepare your fruit mixture in a separate bowl.
Options include:Gently fold these fruits into the risen dough, being careful not to deflate the beautiful air bubbles you’ve created.
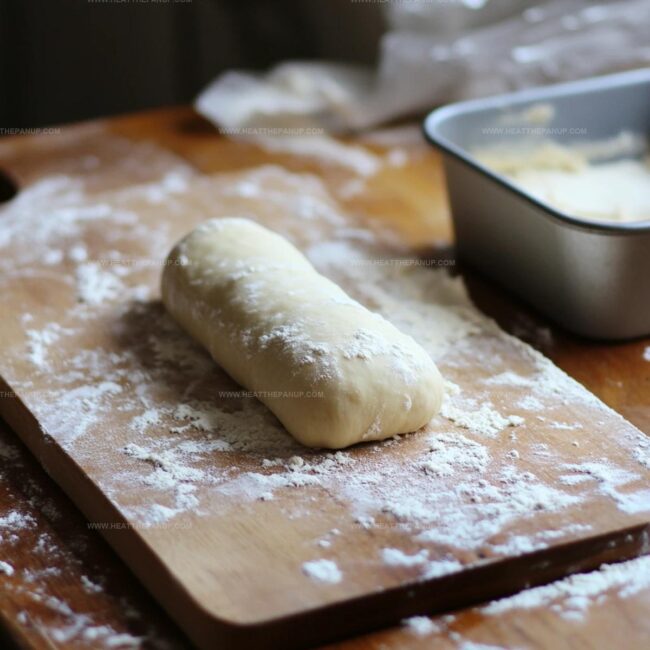
Step 4: Shape with Care
Transfer the dough onto a lightly floured surface.
Gently press it into a rectangular shape matching your loaf pan’s width.
Roll the dough into a neat log, ensuring smooth edges.
Place seam-side down in a greased loaf pan.
Step 5: Final Rising Adventure
Cover the shaped dough and let it rise again in a warm location.
This second rise typically takes about 90 minutes.
The dough should look beautifully puffy and almost overflowing the pan.
Step 6: Prepare for Baking
Preheat the oven to 350°F.
Brush the dough’s surface with a beaten egg for a gorgeous golden shine.
This creates a stunning glossy exterior that’ll make your bread look professionally crafted.
Step 7: Bake to Perfection
Slide the pan into the preheated oven.
Bake for approximately 35-40 minutes.
If the top browns too quickly, loosely tent with aluminum foil.
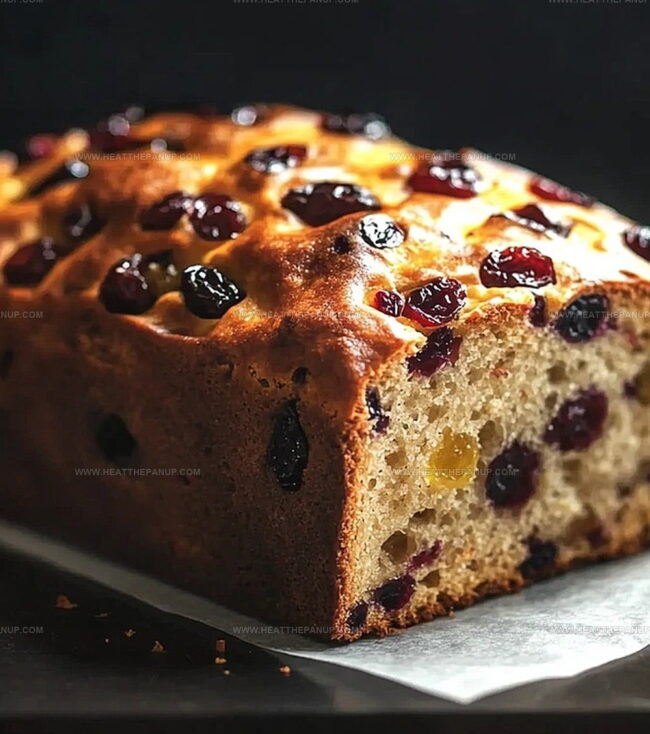
The bread is done when it sounds hollow when tapped and displays a rich golden-brown color.
Step 8: Cool and Slice
Remove the bread from the oven and let it rest in the pan for just a few minutes.
Carefully transfer to a wire rack.
Allow complete cooling for 2-3 hours.
This patience ensures perfect slicing and ideal texture.
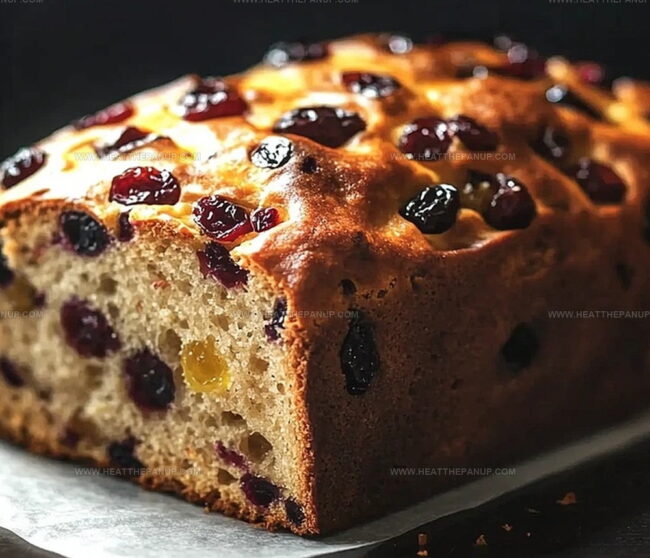
Step 9: Serving Suggestions
Slice the bread when fully cooled.
Enjoy it plain, toasted with butter, or transform into decadent French toast.
Store in an airtight container to maintain freshness for several days.
Smart Tips for Flavorful Homemade Fruit Bread
How to Store and Enjoy Fruit Bread Later
Tasty Pairings for Fruity Bread Loaves
Easy Swaps and Styles for Fruit Bread
FAQs
Yeast helps the dough rise, creating a soft, fluffy texture and developing rich flavor by converting sugars into carbon dioxide, which creates air pockets in the bread.
Fresh fruits contain more moisture and might make the dough too wet. Stick to dried fruits like raisins, cranberries, or chopped dried apricots for the best results.
Dissolve yeast in warm water with sugar. If it becomes foamy and bubbly within 5-10 minutes, your yeast is alive and ready to use. If nothing happens, the yeast is likely dead and should be replaced.
All-purpose flour is ideal for this recipe. It provides the right protein content for a tender crumb and good structure, ensuring your fruit bread rises properly and has a consistent texture.
Print
Homemade Fruit Bread Recipe
- Total Time: 3 hours
- Yield: 12 1x
Description
Delightful homemade fruit bread brings warmth from grandma’s kitchen to your table. Rich with sweet dried fruits and a tender crumb, this classic recipe connects comfort and tradition in one irresistible slice you’ll cherish.
Ingredients
Flour and Leavening Agents:
- 357 g (2 3/4 cups) all-purpose flour
- 1 teaspoon instant yeast (or 1 1/4 teaspoons active dry yeast)
Liquid and Fat:
- 210 ml (1 cup minus 2 tablespoons) warm water
- 42.6 g (3 tablespoons) butter, melted
Sweeteners and Seasoning:
- 32 g (2 1/2 tablespoons) sugar
- 1 teaspoon (5.9 g) salt
Instructions
- Activate the yeast by combining warm water, sugar, and yeast in a spacious mixing bowl. Allow the mixture to become frothy and fragrant, indicating the yeast is alive and ready.
- Incorporate melted butter into the yeast mixture, stirring gently to create a smooth liquid base.
- Gradually introduce flour to the wet ingredients, mixing consistently until a cohesive, slightly tacky dough forms. Ensure no dry flour remains unincorporated.
- Knead the dough on a lightly floured surface for 5-7 minutes, developing gluten and creating a smooth, elastic texture.
- Transfer the dough to a lightly oiled bowl, covering it with a damp cloth. Let it rest in a warm, draft-free area until it doubles in volume, approximately 60-90 minutes.
- Prepare the fruit mixture by combining dried fruits and spices in a separate bowl, ensuring even distribution of ingredients.
- Gently fold the fruit mixture into the risen dough, using a light touch to maintain the dough’s delicate structure.
- Shape the dough into a rectangular log, carefully pressing out any large air pockets while preserving the dough’s volume.
- Place the shaped dough into a greased loaf pan, ensuring it sits evenly and has room to expand.
- Allow the dough to undergo a second rising, covering it loosely with plastic wrap. The bread should look puffy and increased in size.
- Preheat the oven to 350°F (175°C), creating an ideal baking environment for the bread.
- Brush the surface with a beaten egg, creating a golden, glossy finish that will enhance the bread’s appearance.
- Bake the bread, rotating the pan halfway through to ensure even browning. If the top darkens too quickly, tent with aluminum foil.
- Test the bread’s doneness by tapping the bottom – it should sound hollow and have a rich, golden-brown exterior.
- Remove from the oven and let it rest in the pan for a brief moment before transferring to a wire rack.
- Allow the bread to cool completely, which helps set the crumb and develop full flavor complexity.
- Slice and serve, enjoying the bread at room temperature or lightly toasted with a spread of butter or jam.
Notes
- Ensure yeast is fresh and active by checking the expiration date and proofing it in warm water before mixing.
- Use room temperature ingredients to help the dough rise evenly and develop a consistent texture.
- Select a mix of dried fruits like raisins, cranberries, and apricots for a vibrant and complex flavor profile.
- Adjust spices according to personal preference, experimenting with cinnamon, nutmeg, or cardamom for unique taste variations.
- Prep Time: 2 hours 15 minutes
- Cook Time: 45 minutes
- Category: Breakfast, Snacks, Desserts
- Method: Baking
- Cuisine: American
Nutrition
- Serving Size: 12
- Calories: 149
- Sugar: 2.7 g
- Sodium: 0.5 g
- Fat: 3.6 g
- Saturated Fat: 2.4 g
- Unsaturated Fat: 1.2 g
- Trans Fat: 0 g
- Carbohydrates: 25.9 g
- Fiber: 0.8 g
- Protein: 3.6 g
- Cholesterol: 7 mg
James Hambly
Founder & Recipe Creator
Expertise
Recipe Development, Culinary Education, Farm-to-Table Cooking, Southern Cuisine
Education
Asheville-Buncombe Technical Community College
Certificate in Culinary Arts
Focus: Hands-on training in professional cooking techniques, emphasizing farm-to-table practices and Southern cuisine.
The Chef’s Academy
Associate Degree in Culinary Arts
Focus: Comprehensive culinary education covering global cuisines, kitchen management, and food safety.
James grew up surrounded by the smells of cast-iron skillets and slow-cooked Southern meals in Asheville, North Carolina.
He sharpened his skills with a Certificate in Culinary Arts from Asheville-Buncombe Technical Community College, and later leveled up with an Associate Degree from The Chef’s Academy.
James’s philosophy is simple: the best meals don’t need fancy tricks, just fresh ingredients, a hot pan, and a little bit of heart. His favorite days are spent testing one-pan wonders, chasing bold flavors, and creating recipes that feel easy, even on a busy night.