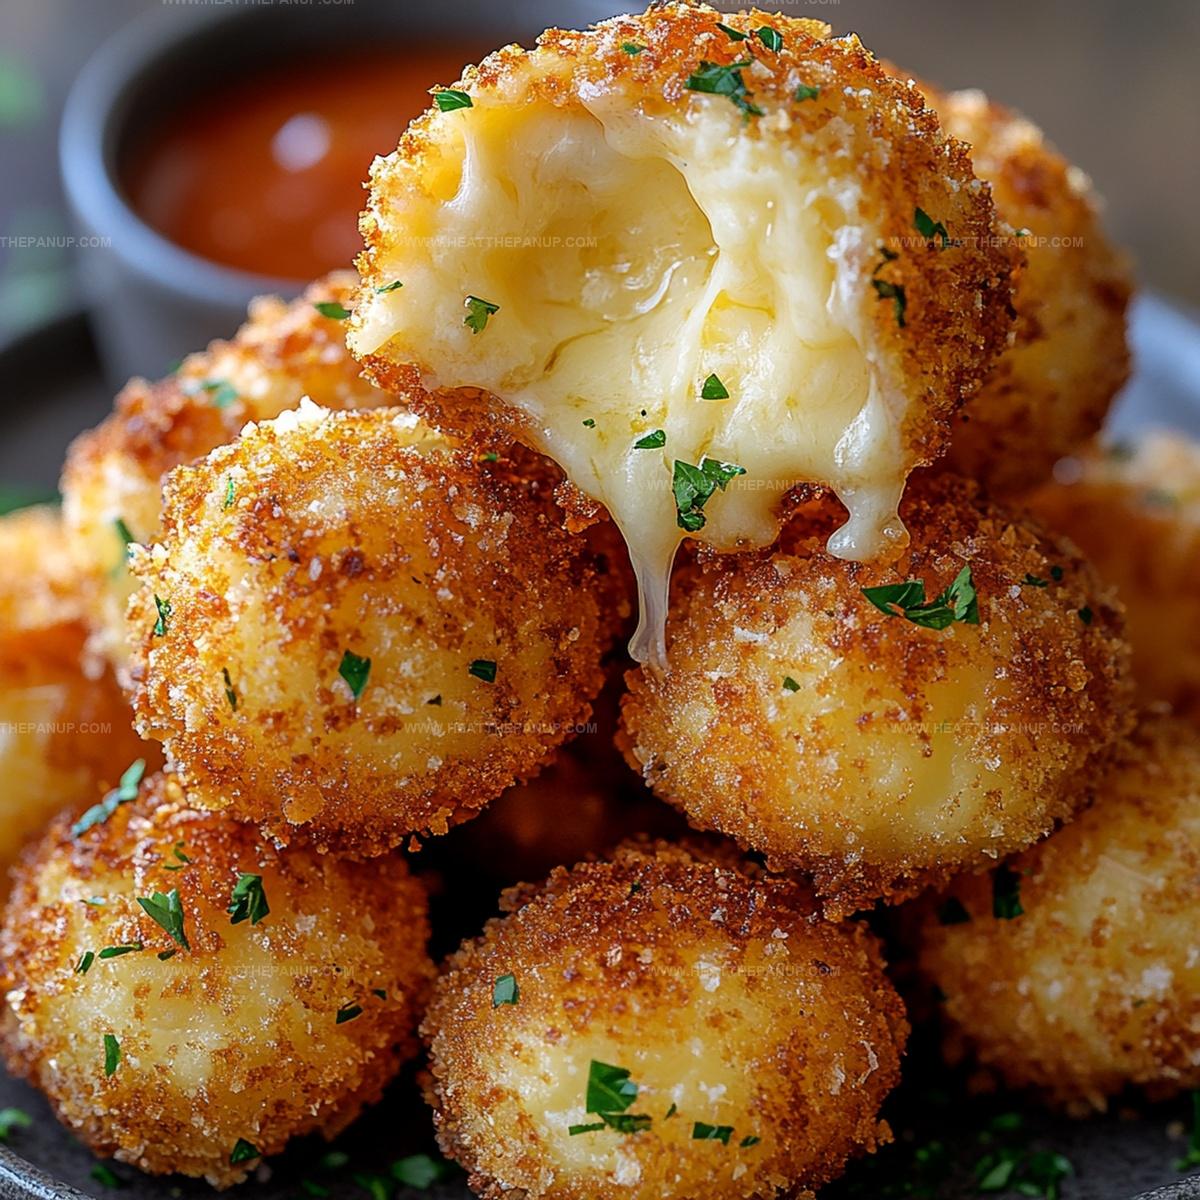
Crispy Homemade Fried Cheese Bites Recipe: Golden Comfort Joy
Crispy golden cheese bites spark joy in every kitchen gathering.
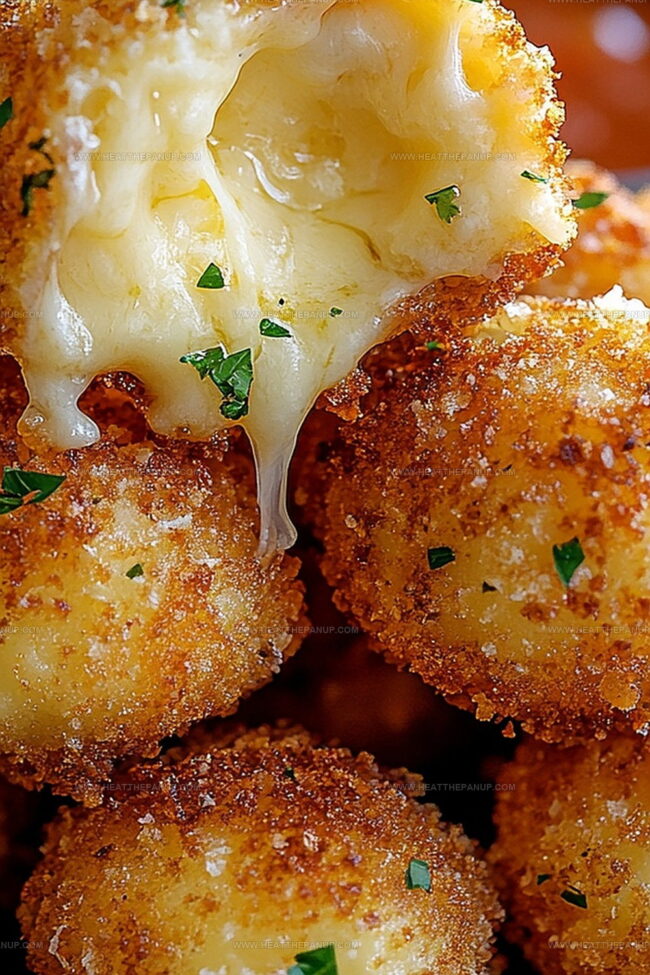
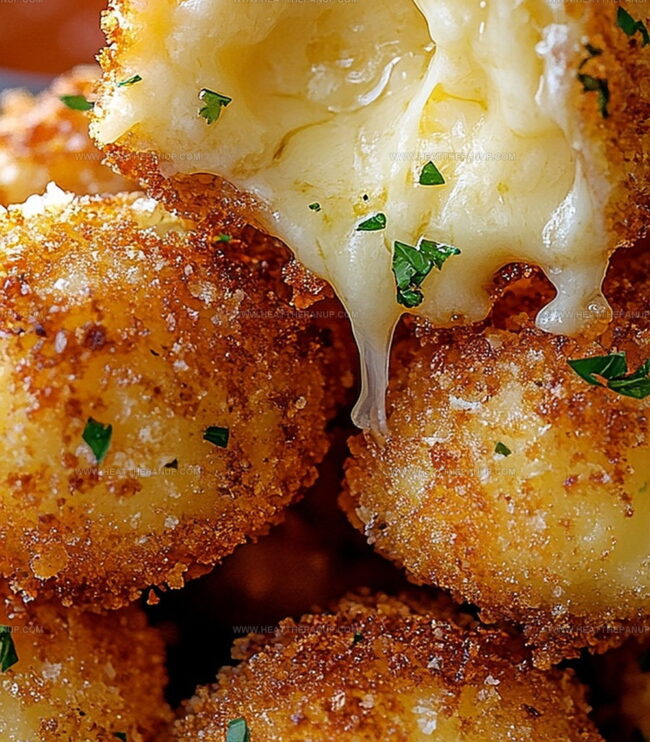
Melted centers burst with unexpected flavor profiles waiting to surprise you.
Crafting these delectable morsels becomes a playful culinary adventure anyone can master.
Simple ingredients transform into irresistible snacks that vanish quickly from serving platters.
Bubbling hot and expertly seasoned, these delightful bites promise pure satisfaction.
Professional chefs and home cooks alike celebrate these addictive little treasures.
Nothing compares to watching friends devour these deliciously crunchy cheese morsels.
Jump into this recipe and create magic that will have everyone asking for more.
What Makes Fried Cheese Bites Great
Fried Cheese Bites Ingredient List
Main Ingredients:
Cheese:Coating Ingredients:Seasoning Ingredients:Frying Ingredients:Serving Ingredients:Frying Cheese Bites at Home
Step 1: Prepare Cheese Cubes
Select a firm cheese like cheddar or mozzarella.
Slice the cheese into neat, consistent 1-inch cubes or slender sticks to ensure even cooking and a beautiful golden exterior.
Step 2: Create Coating Stations
Set up three separate shallow dishes for your coating process:Step 3: Season Breadcrumb Coating
Blend breadcrumbs with an exciting mix of seasonings:Mix thoroughly to distribute flavors evenly.
Step 4: Coat Cheese Pieces
Carefully coat each cheese piece through a three-stage process:Step 5: Chill Coated Cheese
Place breaded cheese bites on a parchment-lined baking sheet.
Freeze for 30-45 minutes to help coating stick and prevent cheese from melting too quickly during frying.
Step 6: Heat Cooking Oil
Pour vegetable or canola oil into a deep fryer or heavy-bottomed pot.
Heat oil to 350°F, ensuring consistent temperature for perfect golden color.
Step 7: Fry Cheese Bites
Gently lower frozen cheese bites into hot oil.
Fry in small batches for 2-3 minutes until exterior turns a beautiful crispy golden brown.
Step 8: Drain and Serve
Remove cheese bites using a slotted spoon.
Place on paper towels to absorb excess oil.
Helpful Fried Cheese Bites Tips
Store & Reheat Cheese Bites Right
Fried Cheese Bites Pairing Ideas
Fun Twists on Fried Cheese Bites
FAQs
Mozzarella, cheddar, and pepper jack are excellent choices because they melt smoothly and create a great crispy exterior when fried.
Yes, you can prepare and freeze the coated cheese bites up to 2 days in advance. Keep them in a single layer in an airtight container to maintain their crispy coating.
Freezing the coated cheese bites for at least 30 minutes is crucial. This helps the breading stay intact and prevents the cheese from melting too quickly in the hot oil.
Maintain the oil at 350°F (175°C). This specific temperature guarantees a crispy golden exterior while ensuring the cheese inside melts perfectly without burning the coating.
Print
Homemade Fried Cheese Bites Recipe
- Total Time: 38 minutes
- Yield: 4 1x
Description
Crispy, golden Homemade Fried Cheese Bites deliver a mouthwatering explosion of flavor that delights cheese enthusiasts. Melted interior and crunchy exterior promise a delectable snack you cannot resist.
Ingredients
Main Ingredients:
- 8 ounces (226 grams) cheese (cheddar, mozzarella, or pepper jack), cut into 1-inch cubes
- 1 cup all-purpose flour
- 1 cup breadcrumbs
- 2 large eggs, beaten
Seasonings:
- 1 teaspoon garlic powder
- 1/2 teaspoon paprika
- Salt to taste
- Pepper to taste
Cooking Liquid:
- Vegetable oil for frying
Instructions
- Meticulously prepare cheese cubes or sticks to ensure uniform size and optimal frying potential.
- Create three distinct coating stations using separate shallow containers: one for flour, another for whisked eggs, and the final for seasoned breadcrumb mixture.
- Carefully dredge each cheese piece first in flour, ensuring complete and even coverage.
- Gently submerge floured cheese into beaten eggs, allowing excess liquid to gracefully cascade back into the bowl.
- Roll the egg-coated cheese thoroughly in seasoned breadcrumbs, pressing lightly to guarantee a robust, crispy exterior.
- Arrange coated cheese pieces on a parchment-lined baking sheet, maintaining space between each morsel.
- Transfer the baking sheet to the freezer, allowing cheese bites to solidify for approximately 25-35 minutes, which prevents rapid melting during frying.
- Prepare cooking oil in a deep fryer or heavy-bottomed pot, heating to precise temperature around 350°F.
- Carefully lower frozen cheese bites into hot oil, working in small batches to maintain consistent oil temperature.
- Fry until exterior transforms into a rich, golden-brown color, typically requiring 2-3 minutes of cooking time.
- Extract fried cheese bites using a slotted spoon, transferring to paper towel-lined plate to absorb excess oil.
- Serve immediately alongside preferred dipping sauces, ensuring maximum crispiness and temperature.
Notes
- Chill cheese thoroughly before coating to maintain shape during frying and prevent rapid melting.
- Choose firm cheeses like mozzarella, cheddar, or halloumi that hold structure when heated for best results.
- Use panko breadcrumbs for extra crispiness and lighter texture compared to traditional breadcrumbs.
- Experiment with alternative coating options like crushed nuts or gluten-free breadcrumbs for dietary variations.
- Prep Time: 35 minutes
- Cook Time: 3 minutes
- Category: Appetizer, Snacks
- Method: Frying
- Cuisine: American
Nutrition
- Serving Size: 4
- Calories: 300
- Sugar: 1 g
- Sodium: 400 mg
- Fat: 20 g
- Saturated Fat: 10 g
- Unsaturated Fat: 8 g
- Trans Fat: 0 g
- Carbohydrates: 25 g
- Fiber: 2 g
- Protein: 12 g
- Cholesterol: 100 mg
Angelina Wiles
Content Editor & Culinary Enthusiast
Expertise
Food Writing and Editing, Vegetarian and Vegan Cuisine, Baking and Pastry Arts, Sustainable Cooking Practices
Education
Portland Community College
Certificate in Culinary Arts
Focus: Emphasis on sustainable cooking practices, vegetarian cuisine, and food writing.
Oregon Culinary Institute
Diploma in Baking and Pastry Arts
Focus: Specialized training in artisanal baking, pastry techniques, and dessert presentation.
Angelina’s love for cooking started with handwritten family recipes and weekend trips to farmers’ markets around Portland. She followed her passion with a Certificate in Culinary Arts from Portland Community College, then perfected her sweet side with a Diploma in Baking and Pastry Arts at Oregon Culinary Institute.
Angelina believes recipes should feel like a conversation, not a science project. She’s all about helping readers trust themselves in the kitchen with simple steps, fresh ideas, and easy twists on classic meals.
When she’s not editing recipes, she’s baking bread, sipping coffee, or getting inspired by the changing seasons.