
Irresistible Homemade Crunch Bars Recipe for Sweet Snackers
Crafting these delectable homemade crunch bars always sparks joy in my kitchen adventures.
Sweet memories flood back with every batch I create.
Chocolate lovers understand the magic of a perfectly crispy treat.
My childhood nostalgia drives this simple yet irresistible recipe.
Kids and adults alike cannot resist these crunchy delights.
Minimal ingredients come together in minutes for a seriously addictive snack.
You’ll find yourself making these again and again once you try them.
Let’s dive into creating a chocolate masterpiece that will become your new favorite indulgence.
Crunch Bars That Are Easy and Chocolatey
Crunch Bars Made at Home Ingredient Breakdown
Chocolate Base:Crunchy Element:Finishing Touches:Homemade Crunch Bars How-To
Step 1: Prepare Baking Surface
Line an 8×8 square baking dish with parchment paper, allowing some overhang for easy lifting later.
This will help you remove the bars smoothly without any hassle.
Step 2: Create Chocolate Mixture
Grab a microwave-safe bowl and combine:Microwave the ingredients in 30-second bursts, stirring thoroughly between each interval.
Continue until the mixture transforms into a silky, smooth liquid with no lumps remaining.
Step 3: Fold in Crispy Cereal
Pour the rice krispies into the melted chocolate-peanut butter blend.
Gently fold and stir until every single cereal piece gets completely coated with the decadent mixture.
Make sure no dry spots remain.
Step 4: Spread and Decorate
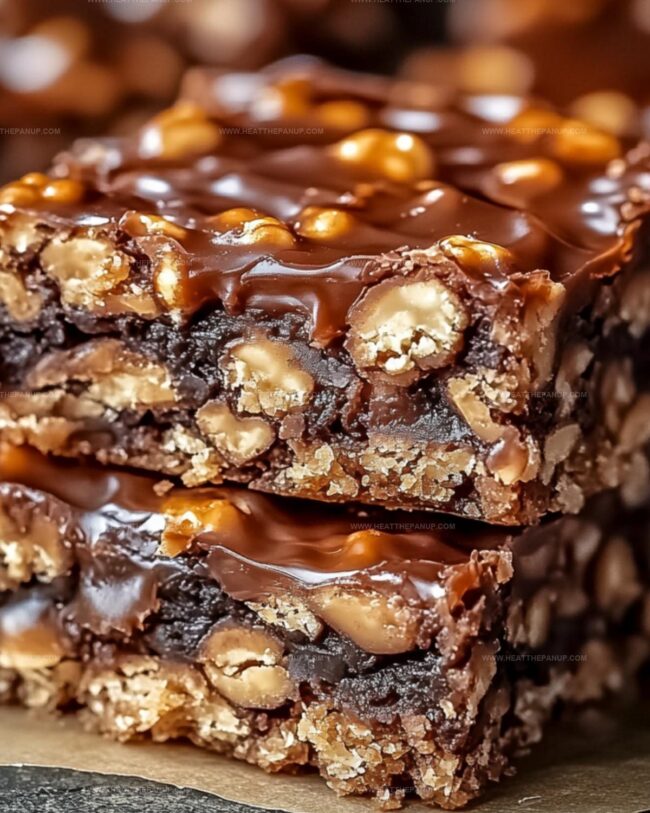
Transfer the chocolatey mixture into the prepared baking dish.
Use a spatula to distribute it evenly across the surface.
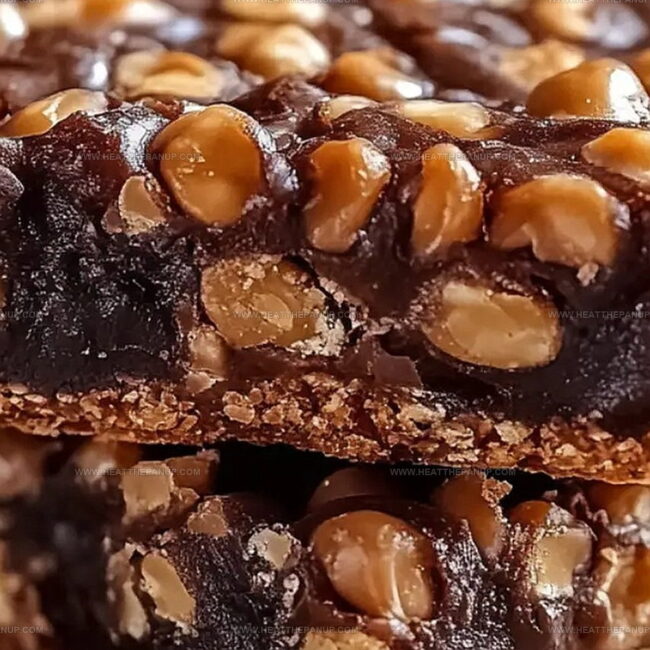
For an elevated flavor profile, sprinkle a light dusting of flaky sea salt on top.
Step 5: Chill and Slice
Place the baking dish in the freezer for 15 minutes.
Once the bars have set firmly, lift them out using the parchment paper overhang.
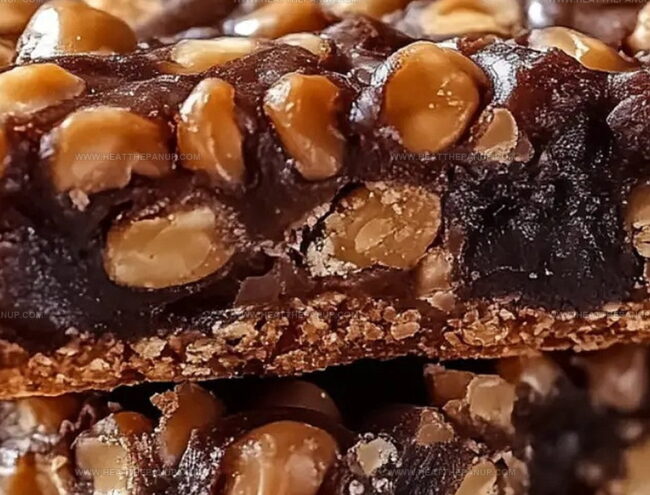
Slice into 8 perfect, mouth-watering bars using a sharp knife.
Crunch Bar Tips That Snap Just Right
Keep Homemade Crunch Bars Fresh
Homemade Crunch Bars Go-Withs
Crunch Bars with Homemade Chocolate Versions
FAQs
Yes, you can substitute milk, dark, or semi-sweet chocolate chips based on your preference. Just ensure the chocolate melts smoothly and complements the peanut butter flavor.
You can use similar crispy cereals like Rice Chex or corn flakes. The key is choosing a crunchy cereal that will provide texture and bind well with the chocolate-peanut butter mixture.
Select gluten-free rice krispies or a gluten-free crispy cereal. Also, verify that your chocolate chips and peanut butter are certified gluten-free to ensure the entire recipe meets gluten-free requirements.
Absolutely! Chopped peanuts, almonds, or even mini marshmallows can be added to the mixture for extra texture and flavor. Just fold them in when mixing the rice krispies with the chocolate-peanut butter blend.
Print
Homemade Crunch Bars Recipe
- Total Time: 10 minutes
- Yield: 12 1x
Description
Indulgent homemade crunch bars deliver a sweet symphony of chocolate and crispy rice, melding nostalgia with pure delight. Chocolate enthusiasts will savor this simple, irresistible treat that brings childhood memories to life with each satisfying bite.
Ingredients
Main Ingredients:
- 1 1/2 cups chocolate chips
- 1/3 cup peanut butter
- 1 cup rice krispies
Toppings:
- Flaked sea salt (optional)
Instructions
- Prepare a square baking dish by lining it completely with parchment paper, ensuring edges are fully covered for effortless chocolate bar removal.
- Create a smooth, glossy mixture by combining chocolate chips and peanut butter in a microwave-safe bowl, heating in short intervals and stirring thoroughly between each burst until completely melted and integrated.
- Gently fold rice krispies into the warm chocolate-peanut butter blend, carefully coating each cereal piece to ensure uniform coverage and maintaining the crispy texture.
- Transfer the chocolatey mixture into the prepared pan, using a spatula to distribute evenly and create a uniform layer with consistent thickness across the entire surface.
- Enhance flavor complexity by sprinkling a delicate layer of flaked sea salt over the top for a subtle flavor contrast.
- Position the pan in the freezer, allowing the bars to solidify and set for approximately 15 minutes until they reach a firm, crisp consistency.
- Remove from freezer and slice into precise rectangular bars, creating clean edges and uniform portions for serving.
Notes
- Ensure parchment paper extends over the pan edges for effortless lifting and clean removal of the crunch bars.
- Use high-quality chocolate chips with at least 60% cocoa content for richer, more intense chocolate flavor and better melting consistency.
- Experiment with alternative nut butters like almond or cashew butter for diverse taste profiles and dietary accommodations.
- Sprinkle crushed nuts or coconut flakes on top before freezing to add extra texture and nutritional variety to the bars.
- Prep Time: 5 minutes
- Cook Time: 5 minutes
- Category: Snacks, Desserts
- Method: Baking
- Cuisine: American
Nutrition
- Serving Size: 12
- Calories: 180
- Sugar: 10 g
- Sodium: 50 mg
- Fat: 9 g
- Saturated Fat: 4 g
- Unsaturated Fat: 5 g
- Trans Fat: 0 g
- Carbohydrates: 22 g
- Fiber: 1 g
- Protein: 3 g
- Cholesterol: 0 mg
Angelina Wiles
Content Editor & Culinary Enthusiast
Expertise
Food Writing and Editing, Vegetarian and Vegan Cuisine, Baking and Pastry Arts, Sustainable Cooking Practices
Education
Portland Community College
Certificate in Culinary Arts
Focus: Emphasis on sustainable cooking practices, vegetarian cuisine, and food writing.
Oregon Culinary Institute
Diploma in Baking and Pastry Arts
Focus: Specialized training in artisanal baking, pastry techniques, and dessert presentation.
Angelina’s love for cooking started with handwritten family recipes and weekend trips to farmers’ markets around Portland. She followed her passion with a Certificate in Culinary Arts from Portland Community College, then perfected her sweet side with a Diploma in Baking and Pastry Arts at Oregon Culinary Institute.
Angelina believes recipes should feel like a conversation, not a science project. She’s all about helping readers trust themselves in the kitchen with simple steps, fresh ideas, and easy twists on classic meals.
When she’s not editing recipes, she’s baking bread, sipping coffee, or getting inspired by the changing seasons.