
Festive Holiday Eggnog Pie Recipe: Your New Favorite Treat
Creamy holiday eggnog pie blends festive cheer with delectable dessert magic.
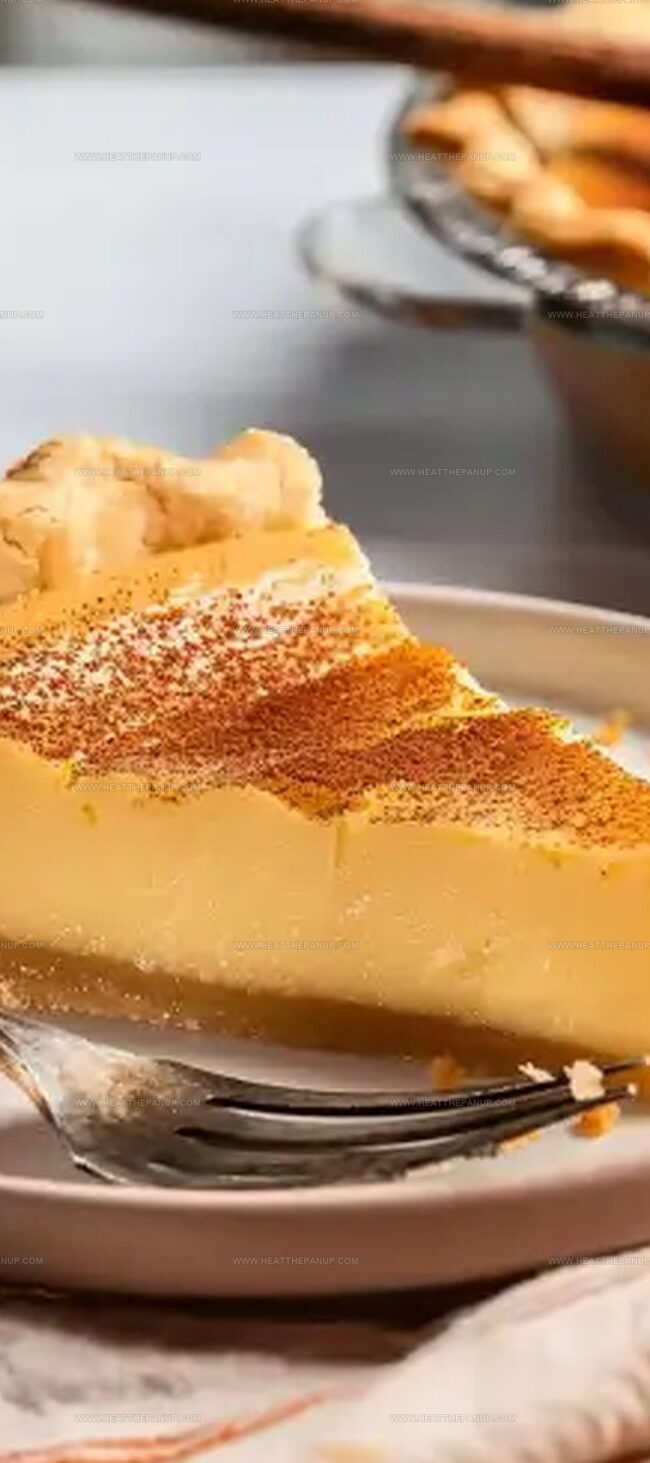
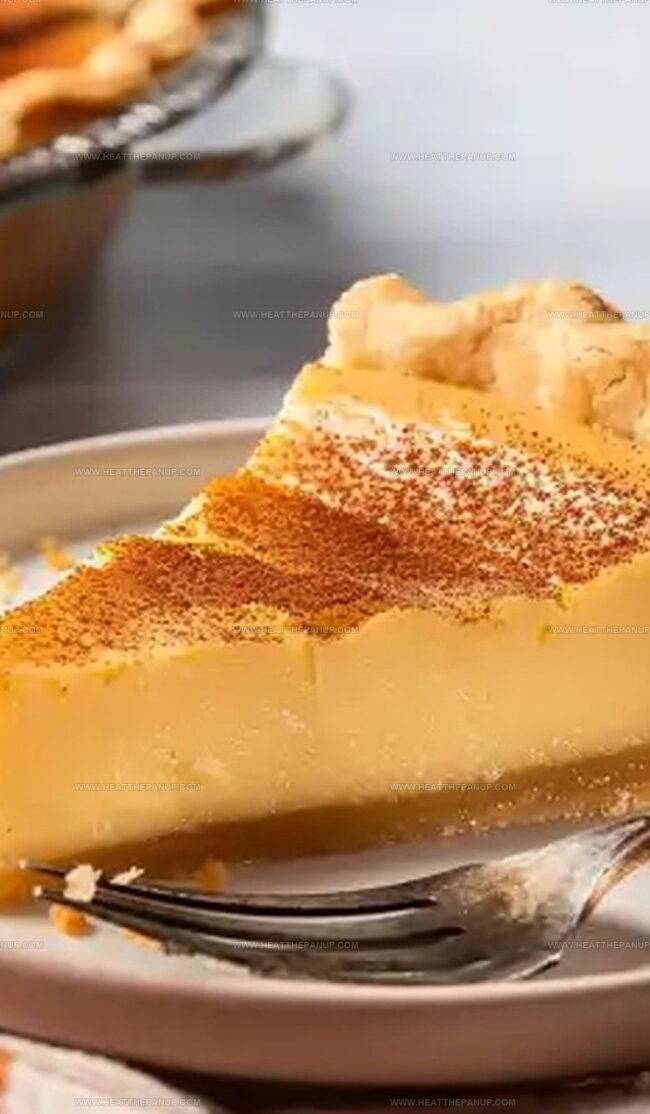
Whispers of nutmeg and cinnamon dance through each silky slice.
Seasonal warmth fills your kitchen with nostalgic comfort.
Rich custard nestles into a flaky crust, promising indulgence.
Smooth textures and classic flavors merge in this irresistible treat.
Memories of cozy gatherings spark with every delightful bite.
Come celebrate the spirit of the season, one heavenly forkful at a time.
Eggnog Pie That’s Sweet, Cool, and Holiday-Ready
Holiday Eggnog Pie Ingredients
Pie Crust:Wet Ingredients:Dry Ingredients:Holiday Eggnog Pie Simple Baking Directions
Step 1: Warm Up the Oven
Fire up your oven to a toasty 350°F, getting it ready for the delicious pie adventure ahead.
Step 2: Create the Creamy Base
In a large mixing bowl, whisk together:Blend these ingredients until they’re perfectly combined and smooth.
Step 3: Mix the Magical Liquid
Gradually pour and whisk in:Stir everything until the mixture looks silky and completely blended with no lumps.
Step 4: Prepare the Pie Vessel
Gently place your unbaked deep-dish pie crust into a pie dish, creating a cozy home for your eggnog filling.
Step 5: Pour and Fill
Carefully transfer the creamy eggnog mixture into the pie crust, filling it just below the top edge to prevent any overflow during baking.
Step 6: Bake to Perfection
Slide the pie into the preheated oven and bake for 45-50 minutes. You’ll know it’s done when the center is set and a knife comes out clean when inserted.
Step 7: Cool and Serve
Let the pie cool completely on a wire rack. Serve chilled or at room temperature for a delightful holiday treat that’ll make everyone smile.
Tips That Make Holiday Eggnog Pie Special
Holiday Eggnog Pie How To Chill It Perfectly
Eggnog Pie Sweet Pairings
Holiday Eggnog Pie: Festive Flavor Ideas
FAQs
Eggnog pie captures the quintessential holiday flavor with its rich, creamy texture and warm spices that remind people of festive celebrations and family gatherings.
Yes, you can prepare the eggnog pie 1-2 days in advance and store it in the refrigerator, which allows the flavors to meld and intensify before serving.
Absolutely! The recipe requires basic mixing and baking skills, with simple ingredients and straightforward steps that even novice bakers can successfully execute.
The pie is done when the center is set and a knife inserted near the center comes out clean, typically after 45-50 minutes of baking at 350°F.
Print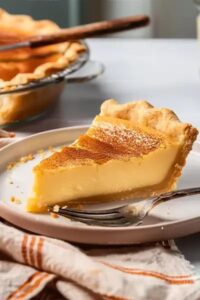
Holiday Eggnog Pie Recipe
- Total Time: 1 hour 10 minutes
- Yield: 8 1x
Description
Festive holiday eggnog pie brings creamy winter cheer straight from grandma’s kitchen. Rich custard nestled in buttery crust promises delightful seasonal comfort you’ll savor with each luxurious bite.
Ingredients
Main Ingredients:
- 2 cups eggnog
- 3 large beaten eggs
- 1 (9-inch) unbaked deep-dish pie crust
Dry Ingredients:
- 1 1/4 cups white sugar
- 1/4 cup all-purpose flour
Liquid and Flavor Ingredients:
- 1/4 cup melted unsalted butter
- 1 teaspoon vanilla extract
Instructions
- Warm the oven to a moderate temperature of 350°F, creating an ideal baking environment for the festive dessert.
- In a spacious mixing vessel, thoroughly combine the granulated sweetener with the powdery flour, ensuring a uniform mixture without any lumps.
- Introduce the creamy holiday beverage, whisked eggs, aromatic vanilla essence, and liquefied butter into the dry ingredients, blending until the mixture achieves a silky, homogeneous consistency.
- Carefully position the unbaked pastry shell into a pie plate, ensuring it sits evenly and smoothly.
- Gently cascade the velvety eggnog concoction into the pastry shell, filling it generously but leaving a slight margin to prevent overflow during baking.
- Transfer the pie to the preheated oven, allowing it to transform for 45-50 minutes until the filling sets firmly and a probing knife emerges pristine when inserted into the center.
- Remove from the oven and let the pie rest and cool completely on a wire cooling rack, allowing the filling to stabilize and develop its full flavor profile.
- Serve the pie chilled or at ambient temperature, presenting a delightful holiday dessert that captures the essence of seasonal celebration.
Notes
- Test pie doneness by gently shaking the dish; the center should have a slight wobble but not be liquid-like when fully baked.
- Prevent pie crust edges from burning by covering them with aluminum foil strips during the last 15-20 minutes of baking.
- For a lighter texture, separate egg whites and beat them until stiff peaks form before folding gently into the eggnog mixture.
- Enhance flavor complexity by adding a pinch of nutmeg or cinnamon to complement the traditional eggnog profile.
- Prep Time: 20 minutes
- Cook Time: 50 minutes
- Category: Desserts
- Method: Baking
- Cuisine: American
Nutrition
- Serving Size: 8
- Calories: 300
- Sugar: 22 g
- Sodium: 130 mg
- Fat: 15 g
- Saturated Fat: 8 g
- Unsaturated Fat: 5 g
- Trans Fat: 0 g
- Carbohydrates: 38 g
- Fiber: 1 g
- Protein: 4 g
- Cholesterol: 70 mg
James Hambly
Founder & Recipe Creator
Expertise
Recipe Development, Culinary Education, Farm-to-Table Cooking, Southern Cuisine
Education
Asheville-Buncombe Technical Community College
Certificate in Culinary Arts
Focus: Hands-on training in professional cooking techniques, emphasizing farm-to-table practices and Southern cuisine.
The Chef’s Academy
Associate Degree in Culinary Arts
Focus: Comprehensive culinary education covering global cuisines, kitchen management, and food safety.
James grew up surrounded by the smells of cast-iron skillets and slow-cooked Southern meals in Asheville, North Carolina.
He sharpened his skills with a Certificate in Culinary Arts from Asheville-Buncombe Technical Community College, and later leveled up with an Associate Degree from The Chef’s Academy.
James’s philosophy is simple: the best meals don’t need fancy tricks, just fresh ingredients, a hot pan, and a little bit of heart. His favorite days are spent testing one-pan wonders, chasing bold flavors, and creating recipes that feel easy, even on a busy night.