
Sky-High Neapolitan Cake Recipe: Fluffy Layers for Mountain Bakers
Crafting a decadent high altitude neapolitan cake demands precision and passion for baking at challenging elevations.
Mountain kitchens present unique obstacles that skilled bakers must navigate with confidence.
Flour behaves differently when atmospheric pressure drops, requiring careful recipe adjustments.
Professional pastry chefs understand these subtle nuances that can make or break a delicate dessert.
Delightful layers of chocolate, vanilla, and strawberry will dance perfectly when you master these specialized techniques.
Expert bakers know small modifications create remarkable results at higher elevations.
Prepare to transform your mountain baking with this foolproof guide that guarantees sweet success every single time.
High Altitude Neapolitan Cake Highlights
Ingredients for High Altitude Neapolitan Cake
Cake Base Ingredients:Dairy and Wet Ingredients:Flavor-Specific Ingredients:Buttercream Components:Additional Decorative Items:Miscellaneous Ingredients:Baking Instructions for High Altitude Neapolitan Cake

Step 1: Warm Up the Oven
Crank your oven to a toasty 350°F.
Grab three 8-inch round cake pans and give them a quick spray with non-stick magic.
Line the bottom of each pan with parchment paper for easy cake removal.
Step 2: Craft Colorful Cake Layers
Whip up three distinct cake batters:Mix each batter with love and care.
Pour them into prepared pans and bake for 28-30 minutes.
Check doneness with a cake tester – it should come out clean.
Step 3: Cool Down the Cakes
Let cakes rest in their pans for 10 minutes.
Gently transfer them to a cooling rack.
Once completely cool, wrap them up in plastic wrap if not assembling immediately.
Step 4: Whip Up Dreamy Buttercreams
Create three delectable buttercream flavors:Beat softened butter until creamy.
Gradually add powdered sugar and flavor-specific ingredients.
Keep each buttercream in a separate covered bowl.
Step 5: Level and Layer
Use a serrated knife to create perfectly flat cake surfaces.
Start with the vanilla layer on a cake board.
Spread vanilla buttercream between each layer:Step 6: Apply Crumb Coat
Spread a thin layer of buttercream over the entire cake.
This seals in any loose crumbs.
Pop the cake in the refrigerator for 30 minutes to set.
Step 7: Create Smooth Final Coat
Use a turntable to apply the final buttercream layer.
Blend colors smoothly and fix any imperfections with a small spatula.
Step 8: Craft Playful Ice Cream Cone Topper
Scoop chilled buttercream onto a sugar cone to resemble ice cream scoops.
Insert a wooden skewer through the cone for stability.
Place the topper in the cake’s center.
Tip: Work in a cool kitchen and keep buttercream chilled for best results.
Enjoy your stunning Neapolitan masterpiece!
Best Tips for High Altitude Neapolitan Cake
How to Store and Enjoy High Altitude Neapolitan Cake Later
What Complements High Altitude Neapolitan Cake
Different Styles of High Altitude Neapolitan Cake
FAQs
High-altitude baking requires adjusting ingredient ratios and temperatures. At higher elevations, reduced air pressure causes cakes to rise faster and potentially collapse. For this recipe, using slightly less leavening agent and slightly higher baking temperatures helps maintain cake structure.
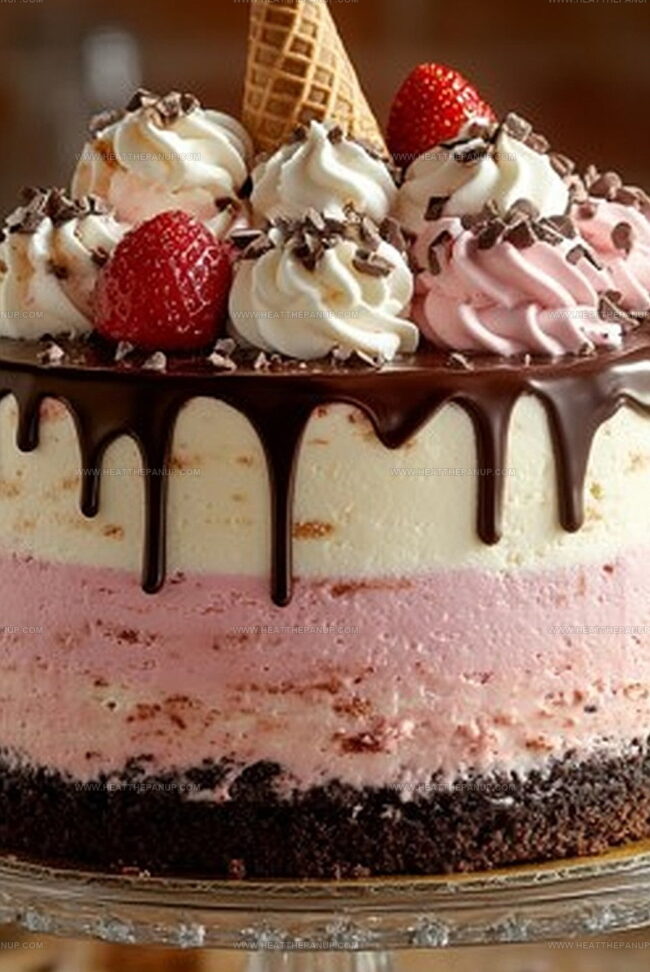
Multiple layers create visual interest and allow different flavors to shine. The vanilla, strawberry, and chocolate layers represent classic Neapolitan ice cream colors and tastes, providing a nostalgic dessert experience with complementary textures and flavors.
Using a turntable helps create even buttercream coverage. Applying a crumb coat first seals loose cake crumbs, then chilling the cake before the final buttercream layer ensures a smooth, professional-looking finish. A heated spatula can help smooth out imperfections.
Reduce oven temperature slightly, use less sugar, add an extra egg, and decrease leavening agents. These adjustments help maintain moisture and prevent the cake from drying out quickly in high-altitude environments.
Print
High Altitude Neapolitan Cake Recipe
- Total Time: 1 hour 15 minutes
- Yield: 12 1x
Description
Heavenly layers of rich chocolate, vanilla, and strawberry intertwine in this high altitude neapolitan cake, creating a symphony of flavors that dance across your palate. Delicate and precise baking techniques ensure a light, airy texture that will delight you with each sublime bite.
Ingredients
Main Ingredients:
- 1 1/2 cups all-purpose flour
- 1 1/4 teaspoons baking powder
- 1/2 teaspoon salt
- 1/2 cup (113 grams) unsalted butter, softened
- 1 cup granulated sugar
- 2 large eggs
Flavoring and Liquid Ingredients:
- 1 teaspoon pure vanilla extract
- 1/2 cup (120 milliliters) whole milk
Instructions
- Prepare workspace with three 8-inch round cake pans, kitchen equipment, and all necessary ingredients for each cake layer.
- Calibrate oven to 350°F (175°C), adjusting for high altitude baking conditions by slightly reducing sugar and increasing liquid content.
- Create protective cake pan barriers using non-stick spray and precision-cut parchment paper circles to ensure smooth cake release.
- Meticulously craft vanilla, strawberry, and chocolate cake batters, blending ingredients with careful attention to texture and consistency.
- Distribute cake batters evenly into prepared pans, utilizing gentle folding techniques to maintain delicate air bubbles.
- Position cake pans in preheated oven, rotating midway through baking to ensure uniform heat distribution and consistent browning.
- Test cake doneness using a slender cake tester, verifying no raw batter remains after 28-30 minutes of baking.
- Transfer freshly baked cakes to cooling racks, allowing natural temperature reduction and preventing moisture condensation.
- Carefully wrap cooled cake layers in protective plastic wrap to preserve moisture and freshness until assembly.
- Whip softened butter to creamy perfection, gradually incorporating powdered sugar for each flavor of buttercream.
- Integrate distinct flavor profiles – vanilla extract, strawberry puree, and cocoa powder – into respective buttercream mixtures.
- Employ a serrated knife to level cake layers, creating flat surfaces for precise stacking and even buttercream application.
- Construct cake layers strategically: vanilla base, followed by strawberry, topped with chocolate layer.
- Apply initial thin crumb coat, sealing loose cake particles and creating smooth foundation for final buttercream decoration.
- Chill cake briefly to stabilize crumb coat, preparing surface for final buttercream artistry.
- Utilize turntable for seamless buttercream application, blending colors with professional precision.
- Craft whimsical ice cream cone topper by sculpting chilled buttercream onto sugar cone, securing with wooden skewer.
- Delicately position ice cream cone decoration at cake’s central point, completing Neapolitan masterpiece.
Notes
- Adjust oven temperature by reducing 1-2 degrees for every 1,000 feet above sea level to prevent over-drying or uneven baking.
- Carefully measure ingredients precisely, as high altitude impacts ingredient ratios and cake texture significantly.
- Use room temperature ingredients to ensure smoother batter integration and consistent mixing at higher elevations.
- Consider adding an extra tablespoon of flour to stabilize cake structure and prevent potential collapsing during baking.
- Prep Time: 45 minutes
- Cook Time: 30 minutes
- Category: Desserts
- Method: Baking
- Cuisine: Italian
Nutrition
- Serving Size: 12
- Calories: 204
- Sugar: 12 g
- Sodium: 65 mg
- Fat: 9 g
- Saturated Fat: 5 g
- Unsaturated Fat: 4 g
- Trans Fat: 0 g
- Carbohydrates: 27 g
- Fiber: 0.7 g
- Protein: 3 g
- Cholesterol: 31 mg
Angelina Wiles
Content Editor & Culinary Enthusiast
Expertise
Food Writing and Editing, Vegetarian and Vegan Cuisine, Baking and Pastry Arts, Sustainable Cooking Practices
Education
Portland Community College
Certificate in Culinary Arts
Focus: Emphasis on sustainable cooking practices, vegetarian cuisine, and food writing.
Oregon Culinary Institute
Diploma in Baking and Pastry Arts
Focus: Specialized training in artisanal baking, pastry techniques, and dessert presentation.
Angelina’s love for cooking started with handwritten family recipes and weekend trips to farmers’ markets around Portland. She followed her passion with a Certificate in Culinary Arts from Portland Community College, then perfected her sweet side with a Diploma in Baking and Pastry Arts at Oregon Culinary Institute.
Angelina believes recipes should feel like a conversation, not a science project. She’s all about helping readers trust themselves in the kitchen with simple steps, fresh ideas, and easy twists on classic meals.
When she’s not editing recipes, she’s baking bread, sipping coffee, or getting inspired by the changing seasons.