Buttery Garlic Mozzarella Biscuit Bombs Recipe: Cheese-Filled Magic
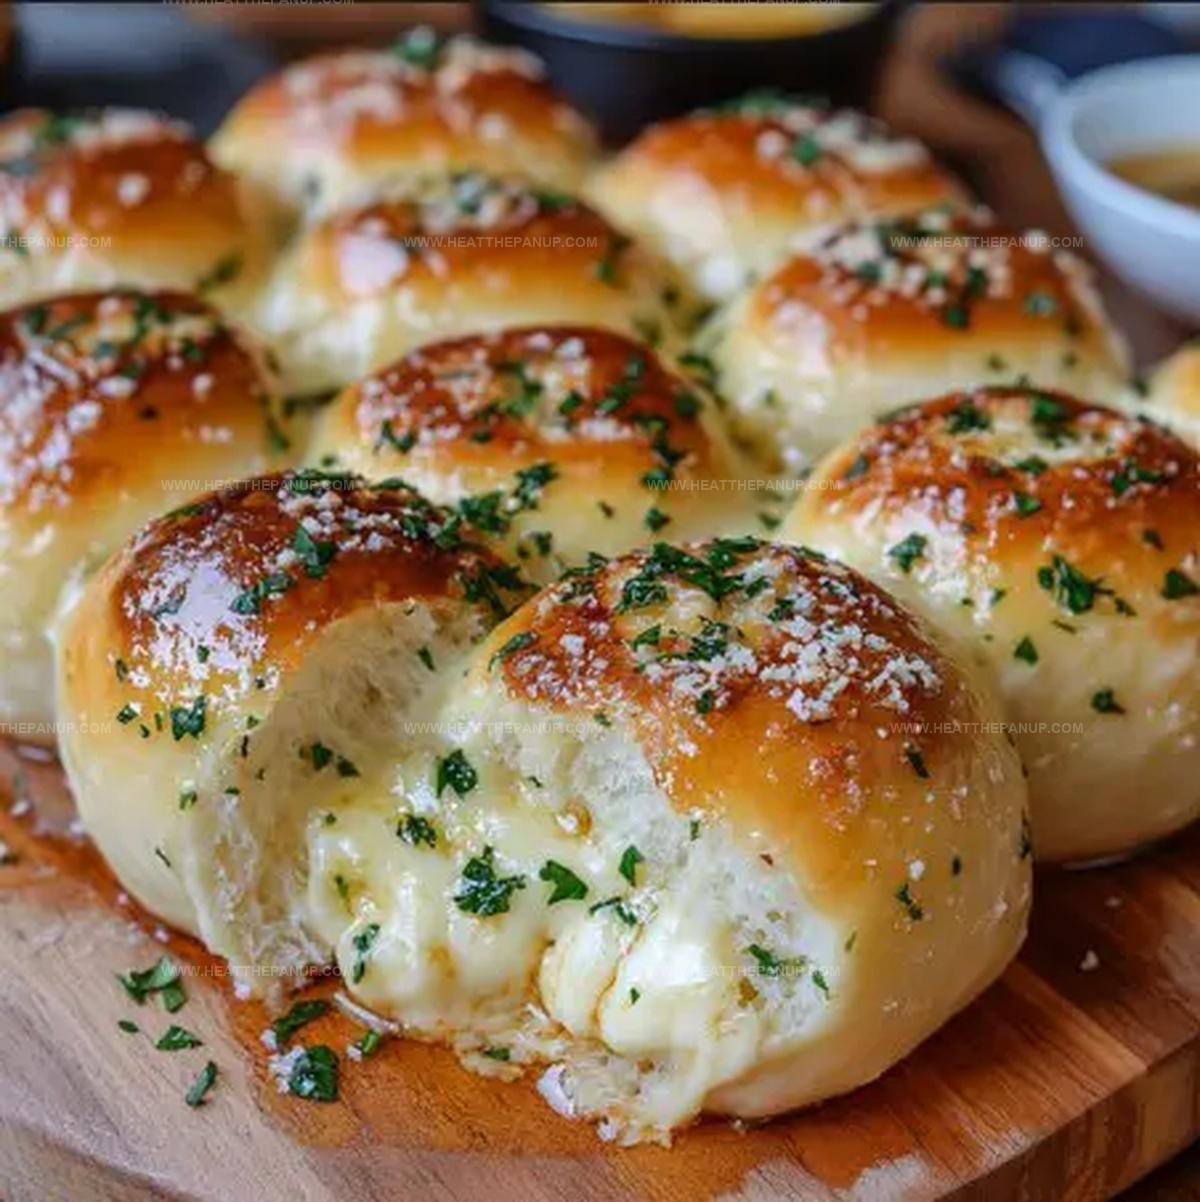
Warm, pillowy garlic mozzarella biscuit bombs promise an explosion of cheesy delight that melts right through comfort food expectations.
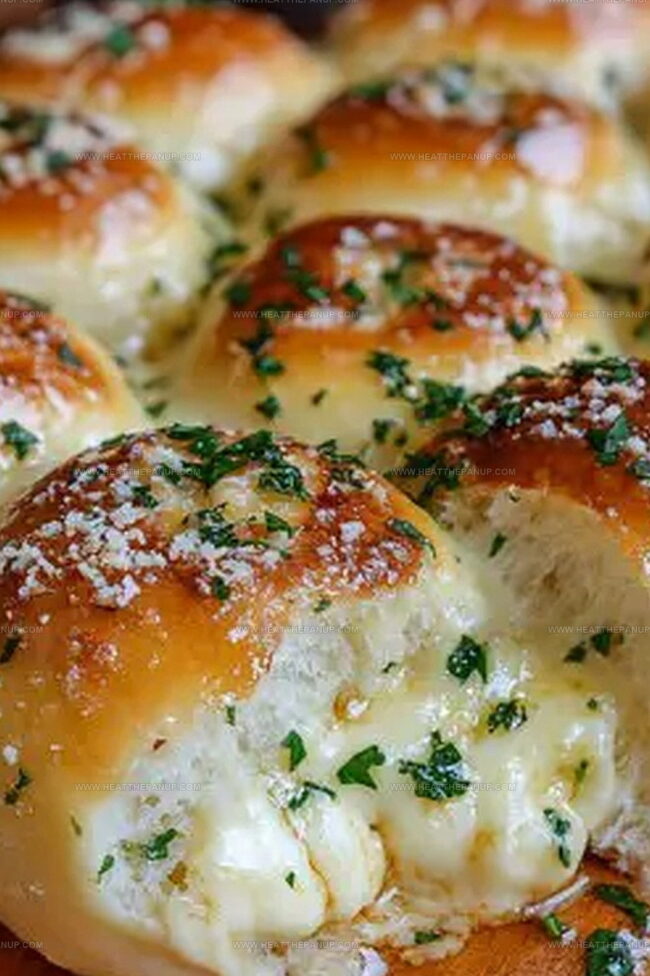
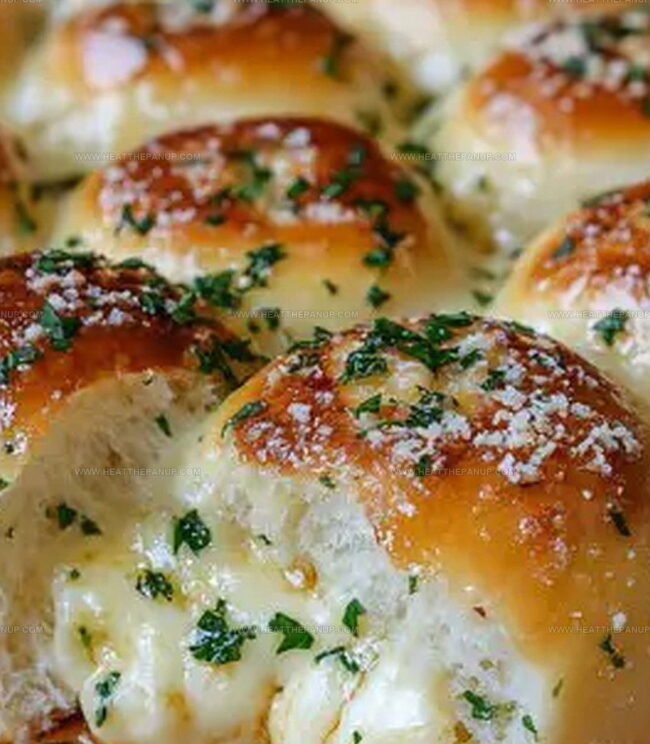
Crispy exteriors cradle molten cheese centers, inviting immediate culinary adventure.
Kitchens buzz with anticipation when these golden treasures emerge from the oven.
Buttery layers whisper promises of indulgence, tempting everyone nearby with irresistible aromas.
Cheese lovers will swoon at the first bite of these perfectly crafted morsels.
Simple ingredients combine into something magical that feels both nostalgic and exciting.
Come hungry and leave transformed by these irresistible little flavor bombs waiting to make your meal unforgettable.
Why Garlic Mozzarella Biscuit Bombs Are So Popular
Ingredients for Garlic Mozzarella Biscuit Bombs
Main Ingredients:
Bread Dough:Cheese:Herbs and Seasoning:Butter and Topping:Preparation Essentials:Step-by-Step Garlic Biscuit Bomb Recipe
Step 1: Prepare Dough for Rising
Retrieve frozen dough rolls and place them on a plate.
Cover completely with plastic wrap and let them rest in the refrigerator for minimum 4 hours.
During this time, the dough will expand and become puffy.
Step 2: Slice Cheese Sticks
Cut mozzarella sticks into bite-sized chunks approximately one inch long.
Step 3: Warm Up the Oven
Set oven temperature to 350°F.
Line a baking sheet with parchment paper for smooth release and easy cleanup.
Step 4: Create Cheese Pouches
Gently press each dough ball into a thin circular shape using your palms.
Ingredients for filling:Place two cheese pieces directly in the center of each dough disk.
Step 5: Seal Cheese Inside
Carefully pinch dough edges together, ensuring cheese is completely enclosed.
Position sealed pouches seam-side down on prepared baking sheet.
Step 6: Bake Until Golden
Slide baking sheet into preheated oven.
Bake for 9-11 minutes until edges turn beautiful golden brown.
Step 7: Prepare Flavor Drizzle
Melt butter using microwave or stovetop.
Mix in:Step 8: Add Finishing Touch
Remove baked pouches from oven.
Generously brush each piece with garlic butter mixture.
Step 9: Serve and Enjoy
Allow pouches to cool slightly.
Serve warm and watch cheese ooze deliciously when pulled apart.
Biscuit Bomb Pro Tips
How to Store and Heat Biscuit Bombs Later
Best Sides for Biscuit Bombs
Pair Up Cheesy Delight: Complementary Flavors and Beverages
Flavor Ideas for Biscuit Bomb Variations
FAQs
Pinch the dough edges very tightly and completely seal the cheese inside. Make sure no cheese is exposed when you place the biscuit bombs on the baking sheet.
Stick to mozzarella sticks as they are firmer and hold their shape better during baking. Fresh mozzarella is too soft and will likely leak out or become too runny.
Ensure the rolls are thawed completely in the refrigerator for at least 4 hours. Keep them in a warm, draft-free area during thawing to help them rise correctly. Room temperature and humidity can affect dough rising.
Yes, you can prepare the biscuit bombs up to the point of sealing the cheese in the dough, then refrigerate them overnight. Bake them fresh just before serving for the best taste and texture.
Print
Garlic Mozzarella Biscuit Bombs Recipe
- Total Time: 41 minutes
- Yield: 8 1x
Description
Mouthwatering garlic mozzarella biscuit bombs deliver cheesy, buttery goodness in one irresistible bite. Melted cheese and herbed dough create a savory companion perfect for sharing with hungry friends and family.
Ingredients
Main Ingredients:
- 8 frozen Texas Rolls (Rhodes brand preferred), thawed
- 4 sticks mozzarella cheese, cut into 16 pieces
Cheese and Herb Seasoning:
- 1 tablespoon parsley flakes (freshly chopped or dried)
- 2 cloves garlic, minced
Butter Topping:
- 4 tablespoons (2 fluid ounces) salted butter, melted
Instructions
- Gently defrost frozen dough rolls overnight in the refrigerator, ensuring they expand and become pillowy soft.
- Slice mozzarella sticks into compact bite-sized segments, preparing them for hidden cheese treasure.
- Warm the oven to a moderate 350°F and arrange parchment paper on a baking sheet for optimal non-stick surface.
- Delicately stretch each dough sphere into a thin circular canvas using gentle palm pressure.
- Position two precise cheese fragments precisely in the center of each dough disc, creating a potential molten core.
- Carefully seal the dough’s perimeter by pressing edges together, completely encapsulating the cheese to prevent any potential leakage.
- Arrange sealed dough packets seam-side downward on the prepared baking surface, maintaining uniform spacing.
- Transfer to preheated oven and bake until edges transform into a golden, appetizing hue, approximately 9-11 minutes.
- Meanwhile, transform butter into a luxurious garlic-infused glaze by melting and integrating finely chopped garlic and dried parsley.
- Extract baked parcels and generously coat with aromatic garlic butter using a culinary brush.
- Allow momentary cooling to prevent potential mouth-burning and enhance flavor melding before serving.
Notes
- Thaw dough slowly in the refrigerator to ensure even rising and prevent dough from becoming too soft or sticky.
- Cut mozzarella into uniform pieces to guarantee consistent cheese distribution and prevent uneven melting inside the biscuit bombs.
- Pinch dough edges firmly and completely seal cheese inside to prevent leakage during baking, creating a perfect cheesy pocket.
- Brush garlic butter immediately after baking while biscuits are hot to help the mixture absorb and enhance overall flavor profile.
- Prep Time: 30 minutes
- Cook Time: 11 minutes
- Category: Appetizer, Snacks
- Method: Baking
- Cuisine: Italian
Nutrition
- Serving Size: 8
- Calories: 150
- Sugar: 1 g
- Sodium: 320 mg
- Fat: 10 g
- Saturated Fat: 6 g
- Unsaturated Fat: 3 g
- Trans Fat: 0 g
- Carbohydrates: 13 g
- Fiber: 0 g
- Protein: 4 g
- Cholesterol: 20 mg
Angelina Wiles
Content Editor & Culinary Enthusiast
Expertise
Food Writing and Editing, Vegetarian and Vegan Cuisine, Baking and Pastry Arts, Sustainable Cooking Practices
Education
Portland Community College
Certificate in Culinary Arts
Focus: Emphasis on sustainable cooking practices, vegetarian cuisine, and food writing.
Oregon Culinary Institute
Diploma in Baking and Pastry Arts
Focus: Specialized training in artisanal baking, pastry techniques, and dessert presentation.
Angelina’s love for cooking started with handwritten family recipes and weekend trips to farmers’ markets around Portland. She followed her passion with a Certificate in Culinary Arts from Portland Community College, then perfected her sweet side with a Diploma in Baking and Pastry Arts at Oregon Culinary Institute.
Angelina believes recipes should feel like a conversation, not a science project. She’s all about helping readers trust themselves in the kitchen with simple steps, fresh ideas, and easy twists on classic meals.
When she’s not editing recipes, she’s baking bread, sipping coffee, or getting inspired by the changing seasons.