
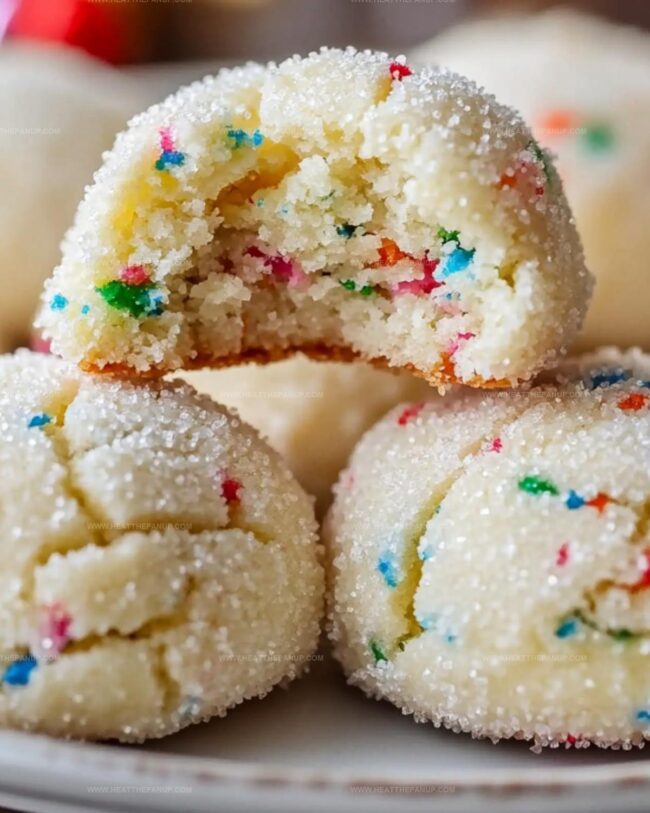
Make Joy Sparkle: Funfetti Snowball Cookies Recipe
Dancing with childhood memories, these funfetti snowball cookies sparkle like winter magic in every delightful bite.
Sweet nostalgia swirls through classic buttery dough flecked with colorful sprinkles.
Sugar-dusted rounds melt softly against your tongue, creating instant happiness.
Delicate crumbs whisper promises of celebration and pure joy.
Playful and whimsical, each cookie carries a sprinkle of pure delight.
Crafted with simple ingredients, these treats bring smiles faster than imagination can keep up.
Rush to your kitchen and let these cheerful morsels transform an ordinary moment into something extraordinary.
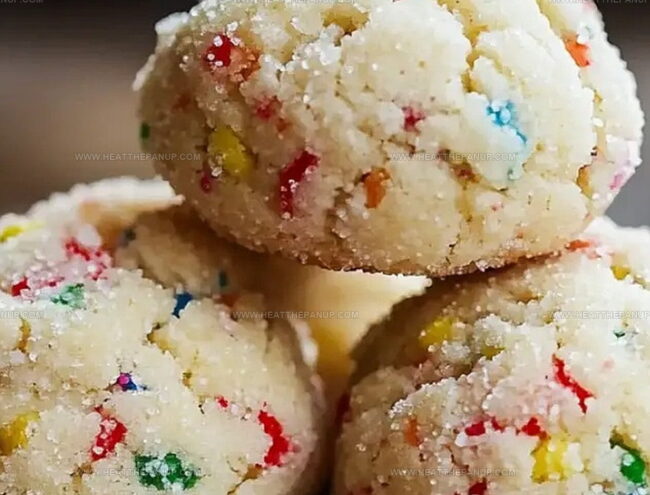
Snowball Cookies With Colorful Funfetti Crunch

Funfetti Snowball Cookies Ingredient Overview
Base Ingredients:Dry Ingredients:Flavor and Decoration Ingredients:Funfetti Snowball Cookie Assembly Guide
Step 1: Whip Butter and Sugar
In a spacious mixing bowl, blend softened butter and powdered sugar using an electric mixer.
Whip until the mixture becomes airy and fluffy.
Pour in vanilla extract and continue mixing until fully incorporated.
Step 2: Create Cookie Dough
Gently add dry ingredients into the butter mixture:Stir until dough forms.
Sprinkle in colorful elements:Fold ingredients gently to distribute evenly.
Step 3: Chill Dough
Cover the dough with plastic wrap and refrigerate for half an hour.
Chilling helps solidify butter and makes shaping easier.
Step 4: Prepare Baking Station
Warm oven to 350°F.
Line baking sheet with parchment paper.
Step 5: Form Snowball Shapes
Remove chilled dough.
Roll small portions into one-inch round balls.
Arrange cookies on prepared baking sheet with one-inch spacing between each.
Step 6: Bake Cookies
Slide baking sheet into preheated oven.
Bake for 10-12 minutes until cookie bottoms turn golden while tops remain pale.
Step 7: Cool and Dust
Allow cookies to rest on baking sheet for five minutes.
Transfer to wire cooling rack.
Once completely cooled, roll each cookie in powdered sugar.
For extra wintery look, dust with second sugar coating.
Cookie Tips for Funfetti Snowball Color Bursts
Keep Funfetti Snowball Cookies Fresh
Funfetti Snowball Cookies Suggestions
Funfetti Snowball Cookies in Festive Styles
FAQs
Yes, but reduce the added salt in the recipe to prevent the cookies from becoming too salty. If using salted butter, skip or significantly reduce the salt measurement.
Chilling helps the butter firm up, prevents spreading during baking, and makes the dough easier to handle. It also allows the flour to hydrate, resulting in a more tender cookie texture.
Use gel food coloring or sprinkles specifically designed for baking. Avoid liquid food coloring, which can cause color bleeding and affect the cookie’s texture.
Absolutely! You can freeze the dough balls for up to 3 months. Place them on a baking sheet, freeze until solid, then transfer to a freezer bag. Bake directly from frozen, adding 1-2 minutes to the baking time.
Print
Funfetti Snowball Cookies Recipe
- Total Time: 25 minutes
- Yield: 24 1x
Description
Sweet memories come alive with these delightful funfetti snowball cookies that dance between childhood nostalgia and festive cheer. Powdered sugar-dusted spheres of buttery goodness melt in your mouth, promising pure delight with each playful, sprinkle-studded bite.
Ingredients
Main Ingredients:
- 2 cups all-purpose flour
- 1 cup unsalted butter, softened
- 1/2 cup powdered sugar (for cookie dough)
Flavor Enhancers:
- 1 teaspoon vanilla extract
- 1/2 cup festive red and green sprinkles (Funfetti-style)
- 1/4 cup mini white chocolate chips (optional)
Finishing Ingredients:
- 1/2 cup powdered sugar (for rolling)
- 1/4 teaspoon salt
Instructions
- Whip the butter and powdered sugar in a spacious mixing bowl until the mixture transforms into a cloud-like, airy consistency, ensuring complete incorporation of vanilla extract for enhanced flavor depth.
- Gently introduce flour and salt into the creamy base, stirring methodically until a cohesive dough emerges, then tenderly fold in vibrant sprinkles and delicate white chocolate mini chips for festive bursts of color and texture.
- Wrap the freshly prepared dough and nestle it in the refrigerator for a precise 30-minute cooling period, allowing ingredients to harmonize and simplifying future shaping processes.
- Activate the oven to a precise 350°F, preparing a parchment-lined baking sheet that will serve as the stage for your delightful confections.
- Extract the chilled dough and craft uniform spherical morsels approximately one inch in diameter, strategically positioning them across the baking surface with modest spacing to ensure even heat distribution.
- Slide the cookie-laden sheet into the heated oven, monitoring for approximately 10-12 minutes until the cookie bottoms develop a subtle golden hue while maintaining a pristine pale upper surface.
- After removing from the oven, permit cookies to rest momentarily on the baking sheet, then transition them to a cooling rack for complete temperature reduction.
- Once thoroughly cooled, generously enrobe each cookie in a luxurious coating of powdered sugar, creating a picturesque snowball effect that can be repeated for an extra layer of wintry elegance.
Notes
- Chill the dough thoroughly to prevent spreading and maintain the perfect snowball shape during baking.
- Use room temperature butter for smooth mixing and easier dough formation, ensuring a consistent texture.
- Add extra sprinkles on top after coating with powdered sugar for a more festive and colorful appearance.
- Choose gluten-free flour blend as a simple swap to make these cookies suitable for gluten-sensitive individuals.
- Prep Time: 15 minutes
- Cook Time: 10 minutes
- Category: Desserts, Snacks
- Method: Baking
- Cuisine: American
Nutrition
- Serving Size: 24
- Calories: 150
- Sugar: 10 g
- Sodium: 40 mg
- Fat: 8 g
- Saturated Fat: 5 g
- Unsaturated Fat: 3 g
- Trans Fat: 0 g
- Carbohydrates: 20 g
- Fiber: 0 g
- Protein: 1 g
- Cholesterol: 30 mg
Angelina Wiles
Content Editor & Culinary Enthusiast
Expertise
Food Writing and Editing, Vegetarian and Vegan Cuisine, Baking and Pastry Arts, Sustainable Cooking Practices
Education
Portland Community College
Certificate in Culinary Arts
Focus: Emphasis on sustainable cooking practices, vegetarian cuisine, and food writing.
Oregon Culinary Institute
Diploma in Baking and Pastry Arts
Focus: Specialized training in artisanal baking, pastry techniques, and dessert presentation.
Angelina’s love for cooking started with handwritten family recipes and weekend trips to farmers’ markets around Portland. She followed her passion with a Certificate in Culinary Arts from Portland Community College, then perfected her sweet side with a Diploma in Baking and Pastry Arts at Oregon Culinary Institute.
Angelina believes recipes should feel like a conversation, not a science project. She’s all about helping readers trust themselves in the kitchen with simple steps, fresh ideas, and easy twists on classic meals.
When she’s not editing recipes, she’s baking bread, sipping coffee, or getting inspired by the changing seasons.