
Creamy Frozen Yogurt Bites Recipe: A Sweet Summer Treat
Cool summer afternoons spark magical moments with these delightful frozen yogurt bites that combine creamy textures and vibrant flavors.
Fresh ingredients dance together in a delectable treat perfect for quick snacking.
Nutritious and simple, they come together faster than traditional desserts.
Kids absolutely adore helping create these colorful little morsels in the kitchen.
Mixing different fruit combinations adds playful excitement to your culinary adventure.
Sweet and tangy, these bites offer a refreshing alternative to heavy ice cream treats.
You’ll find these delightful nibbles becoming an instant favorite for everyone who tries them.
Let’s unleash some delicious creativity and make something extraordinary that will have people asking for more!
Why Frozen Yogurt Bites Are So Fun
What’s Inside Frozen Yogurt Bites
Base Ingredients:Topping Ingredients:Additional Ingredients:How to Prep Frozen Yogurt Bites
Step 1: Prepare Your Chilling Station
Line a small sheet pan with parchment paper, ensuring it fits perfectly in your freezer.
The parchment paper will prevent the yogurt bites from sticking and make removal a breeze.
Step 2: Get Your Yogurt Ready
Grab a piping bag or a plastic sandwich bag for your yogurt.
If using a sandwich bag, snip a tiny corner to create a makeshift piping tool.
No fancy equipment?
A spoon works just fine!
Step 3: Create Yogurt Droplets
Pipe or spoon small, adorable dollops of yogurt onto the parchment-lined tray.
Leave some breathing room between each bite to prevent them from merging into one big yogurt blob.
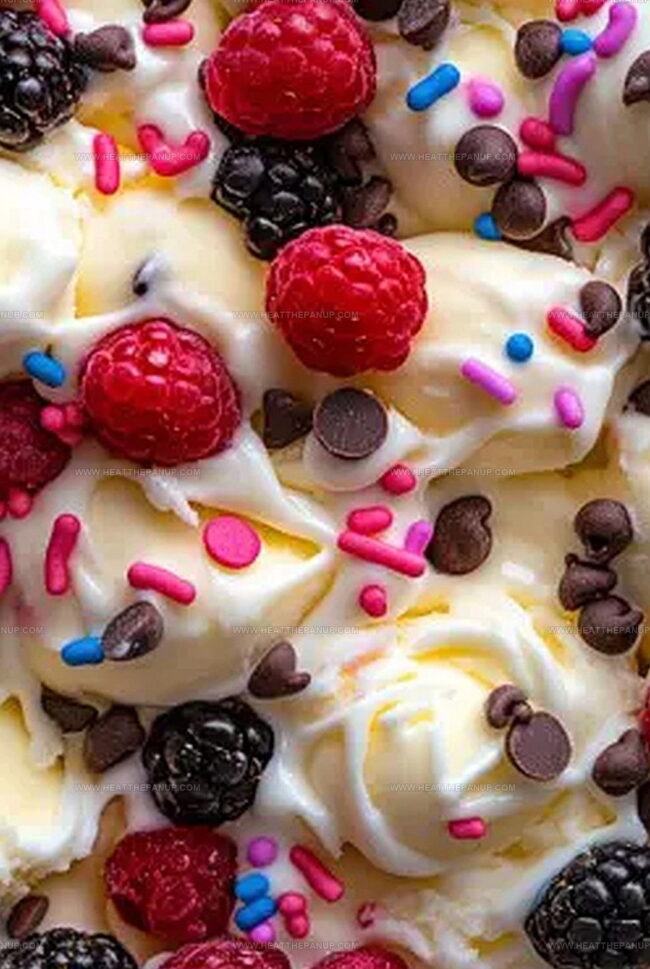
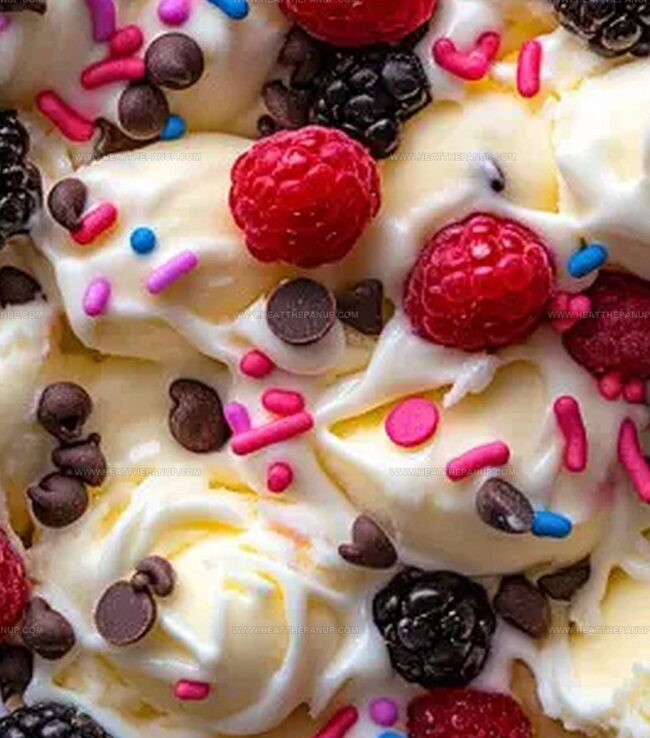
Step 4: Jazz Up with Toppings
Sprinkle your favorite mix-ins over the yogurt drops.
Try these delicious options:Gently press the toppings to make sure they nestle into the yogurt.
Step 5: Freeze to Perfection
Slide the tray into the freezer for 2-3 hours or let them chill overnight.
Want to protect your treats?
Loosely cover with foil, making sure it doesn’t touch the yogurt bites.
Step 6: Store and Enjoy
Once frozen, carefully lift the bites off the parchment paper.
Transfer to a freezer-safe container or bag.
Keep them tucked away in the freezer until your snack attack hits!
Tips for Frozen Yogurt Bite Success
Keeping Frozen Yogurt Bites Fresh
Pairing Ideas for Frozen Yogurt Bites
Frozen Yogurt Bites Style Ideas
FAQs
Greek yogurt is ideal due to its thick, creamy texture. It holds its shape better when frozen and provides a richer taste compared to regular yogurt.
Yes, coconut or almond-based yogurts work well. Just ensure they have a thick consistency to maintain the bite’s structure when frozen.
They can be stored for up to 2 months in an airtight freezer-safe container. Always label the container with the date you made them.
These bites are protein-rich, lower in sugar compared to ice cream, and can be customized with nutritious toppings like fresh fruits, nuts, or seeds for added health benefits.
Print
Frozen Yogurt Bites Recipe
- Total Time: 20 minutes
- Yield: 10 1x
Description
Cool summer treats meet healthy snacking with these frozen yogurt bites. Packed with fresh fruit and creamy yogurt, these bite-sized delights offer a refreshing and nutritious option you’ll crave on warm afternoons.
Ingredients
Frozen Yogurt Bites Ingredients
Main Ingredients:
- 1 cup yogurt (Greek or regular, full-fat or low-fat, dairy or non-dairy)
Toppings:
- 1/4 cup diced strawberries
- 1/4 cup small blueberries
- 1/4 cup sprinkles
- 1/4 cup mini chocolate chips
- 1/4 cup granola
- 1/4 cup nuts
- 1/4 cup shredded coconut
Equipment:
- 1 small sheet pan or tray
- 1 parchment paper
- 1 plastic bag (for piping) or 1 spoon or 1 squeeze bottle
Instructions
- Gather a parchment-lined tray that fits easily inside your freezer, ensuring a smooth freezing process.
- Select a piping bag or resealable plastic bag and fill it with your preferred yogurt variety, creating a convenient dispensing method.
- Cut a small corner of the bag if using a plastic bag, allowing precise and controlled yogurt placement.
- Carefully pipe small, uniform dollops of yogurt onto the parchment paper, maintaining consistent spacing between each bite to prevent merging.
- Quickly enhance the yogurt drops by sprinkling selected toppings, gently pressing them into the surface to secure their placement.
- Strategically position the tray in the freezer, creating an environment that allows uniform freezing of the yogurt bites.
- Allow the yogurt bites to solidify completely, which typically requires 2-3 hours or an overnight resting period in the freezer.
- Optional: Loosely cover the tray with aluminum foil to protect the bites from potential freezer odors or ice crystals.
- Once fully frozen, delicately remove the yogurt bites from the parchment paper using a thin spatula or clean hands.
- Transfer the frozen bites to a sealed freezer-safe container or resealable bag for convenient storage and future enjoyment.
Notes
- Choose yogurt with thick consistency for better structure and less melting during freezing.
- Experiment with Greek yogurt for higher protein content and creamier texture.
- Keep toppings small and lightweight to prevent sinking into yogurt during freezing.
- Use silicone molds as alternative to parchment paper for perfectly shaped bites.
- Consider non-dairy yogurt alternatives for vegan or lactose-intolerant dietary needs.
- Opt for low-sugar yogurt and fresh fruit toppings for healthier snack option.
- Create variety by mixing different yogurt flavors and complementary toppings like granola, nuts, or chia seeds.
- Remove bites from freezer 2-3 minutes before serving for optimal texture and easier eating.
- Prep Time: 20 minutes
- Cook Time: 0 minutes
- Category: Snacks, Desserts
- Method: Freezing
- Cuisine: American
Nutrition
- Serving Size: 10
- Calories: 50
- Sugar: 5 g
- Sodium: 20 mg
- Fat: 2 g
- Saturated Fat: 1 g
- Unsaturated Fat: 1 g
- Trans Fat: 0 g
- Carbohydrates: 8 g
- Fiber: 0 g
- Protein: 3 g
- Cholesterol: 5 mg
Angelina Wiles
Content Editor & Culinary Enthusiast
Expertise
Food Writing and Editing, Vegetarian and Vegan Cuisine, Baking and Pastry Arts, Sustainable Cooking Practices
Education
Portland Community College
Certificate in Culinary Arts
Focus: Emphasis on sustainable cooking practices, vegetarian cuisine, and food writing.
Oregon Culinary Institute
Diploma in Baking and Pastry Arts
Focus: Specialized training in artisanal baking, pastry techniques, and dessert presentation.
Angelina’s love for cooking started with handwritten family recipes and weekend trips to farmers’ markets around Portland. She followed her passion with a Certificate in Culinary Arts from Portland Community College, then perfected her sweet side with a Diploma in Baking and Pastry Arts at Oregon Culinary Institute.
Angelina believes recipes should feel like a conversation, not a science project. She’s all about helping readers trust themselves in the kitchen with simple steps, fresh ideas, and easy twists on classic meals.
When she’s not editing recipes, she’s baking bread, sipping coffee, or getting inspired by the changing seasons.