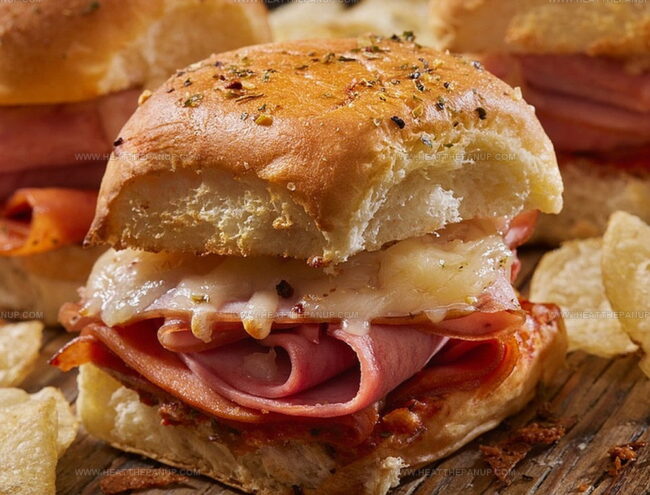
Quick & Juicy French Dip Sliders Recipe: Irresistible Party Bites
Crafting delectable french dip sliders brings pure comfort to any gathering.
Small sandwiches pack massive flavor with tender roast beef and melted cheese.
Soft Hawaiian rolls create the perfect base for these mini masterpieces.
Juicy meat dripping with savory au jus makes these sliders irresistible.
Each bite combines rich beef and creamy cheese in a harmony of textures.
Quick to assemble and even faster to devour, these sliders will become your new favorite party snack.
What People Love About French Dip Sliders
What You’ll Need for French Dip Sliders
Bread:Main Proteins:Seasoning and Sauce:Dipping Sauce:How to Make French Dip Sliders Easily
Step 1: Warm Up the Oven
Crank the oven to a toasty 350°F.
Gently slice the slider buns right down the middle, creating a perfect base for your delicious sandwich.
Step 2: Layer the Goodness
Arrange the bottom bun halves in a baking dish.
Start stacking your mouthwatering ingredients:Carefully place the top bun halves over the loaded bottom pieces.
Step 3: Create a Flavor-Packed Butter Blend
In a small mixing bowl, whip together:Generously brush this magical mixture all over the slider tops.
Step 4: Bake to Perfection
Cover the baking dish with foil and slide into the oven.
Bake for 10 minutes, then unveil by removing the foil.
Continue baking for another 10 minutes until the tops turn a gorgeous golden brown and the cheese becomes irresistibly melty.
Step 5: Prepare the Dipping Sauce
While the sliders are getting crispy, warm up the beef broth in a small pot.
You can use the stovetop or microwave – whatever suits your kitchen vibe.
Step 6: Serve and Enjoy
Plate those gorgeous sliders and place a small bowl of warm beef broth right beside them.
Dip, bite, and savor every single delicious moment!
Tips for Perfect French Dip Sliders
How to Save and Reheat French Dip Sliders
What Pairs Well With French Dip Sliders
French Dip Sliders Recipe Variations
FAQs
The key ingredients include slider buns, roast beef, provolone cheese, butter, Worcestershire sauce, minced onion, garlic powder, salt, pepper, and beef broth.
Yes, you can assemble the sliders in advance and refrigerate them, covered, until you’re ready to bake. Just add an extra 5-10 minutes to the baking time if baking directly from the refrigerator.
To get the perfect cheese melt, make sure to remove the foil during the last 10 minutes of baking, which allows the tops to turn golden brown and the cheese to become fully melted.
Deli-sliced roast beef works best, preferably medium-thickness slices that are tender and easy to layer on the slider buns.
Print
French Dip Sliders Recipe
- Total Time: 40 minutes
- Yield: 12 1x
Description
Succulent French Dip Sliders bring classic comfort to your table with a mouthwatering twist on a beloved sandwich. Melted cheese, tender roast beef, and rich au jus create an irresistible flavor combination you won’t be able to resist.
Ingredients
Protein:
- 1 pound (454 grams) thinly sliced deli roast beef
- 12 slices provolone cheese
Bread:
- 12 slider buns
Seasonings and Liquids:
- 1/2 cup (118 milliliters) butter, melted
- 1 tablespoon Worcestershire sauce
- 1 tablespoon dried minced onion
- 1 teaspoon garlic powder
- 1/2 teaspoon salt
- 1/4 teaspoon black pepper
- 1 cup (237 milliliters) beef broth (for dipping)
Instructions
- Prepare the oven environment by heating to 350°F (175°C), creating an ideal baking atmosphere for the sliders.
- Carefully divide slider buns horizontally, arranging bottom halves in a sturdy baking dish to create a stable foundation.
- Meticulously layer tender roast beef slices across bun bottoms, followed by smooth provolone cheese, ensuring complete coverage.
- Gently position bun tops over the cheese layer, creating compact sandwich units.
- Craft a flavorful butter mixture by combining melted butter, Worcestershire sauce, finely minced onion, garlic powder, salt, and pepper in a mixing bowl.
- Generously brush the prepared seasoned butter blend across slider tops, ensuring even distribution for maximum flavor infusion.
- Shield the sliders with aluminum foil, then bake for 10 minutes to allow initial heating and cheese melting.
- Remove foil and return to oven, continuing baking for an additional 10 minutes until tops achieve a golden-brown hue and cheese becomes perfectly melted.
- Simultaneously, warm beef broth in a small saucepan over medium heat or in the microwave, preparing the dipping element.
- Transfer hot sliders to serving plate and accompany with a warm bowl of beef broth for an authentic dipping experience.
Notes
- Slice buns evenly to ensure uniform cooking and perfect bite-sized portions.
- Use high-quality deli roast beef for maximum flavor and tender texture.
- Experiment with different cheese varieties like Swiss or cheddar for unique taste profiles.
- Make ahead and refrigerate assembled sliders, baking just before serving to save time during gatherings.
- Prep Time: 20 minutes
- Cook Time: 20 minutes
- Category: Lunch, Dinner, Appetizer
- Method: Baking
- Cuisine: American
Nutrition
- Serving Size: 12
- Calories: 310
- Sugar: 1 g
- Sodium: 800 mg
- Fat: 20 g
- Saturated Fat: 10 g
- Unsaturated Fat: 8 g
- Trans Fat: 0 g
- Carbohydrates: 24 g
- Fiber: 1 g
- Protein: 14 g
- Cholesterol: 50 mg


Angelina Wiles
Content Editor & Culinary Enthusiast
Expertise
Food Writing and Editing, Vegetarian and Vegan Cuisine, Baking and Pastry Arts, Sustainable Cooking Practices
Education
Portland Community College
Certificate in Culinary Arts
Focus: Emphasis on sustainable cooking practices, vegetarian cuisine, and food writing.
Oregon Culinary Institute
Diploma in Baking and Pastry Arts
Focus: Specialized training in artisanal baking, pastry techniques, and dessert presentation.
Angelina’s love for cooking started with handwritten family recipes and weekend trips to farmers’ markets around Portland. She followed her passion with a Certificate in Culinary Arts from Portland Community College, then perfected her sweet side with a Diploma in Baking and Pastry Arts at Oregon Culinary Institute.
Angelina believes recipes should feel like a conversation, not a science project. She’s all about helping readers trust themselves in the kitchen with simple steps, fresh ideas, and easy twists on classic meals.
When she’s not editing recipes, she’s baking bread, sipping coffee, or getting inspired by the changing seasons.