Irresistible Cheesy Garlic Chicken Wraps Recipe for Comfort Food Fans
Crafting these delightful cheesy garlic chicken wraps will revolutionize your weeknight dinner routine.
Layers of savory flavors dance together in each bite-sized bundle.
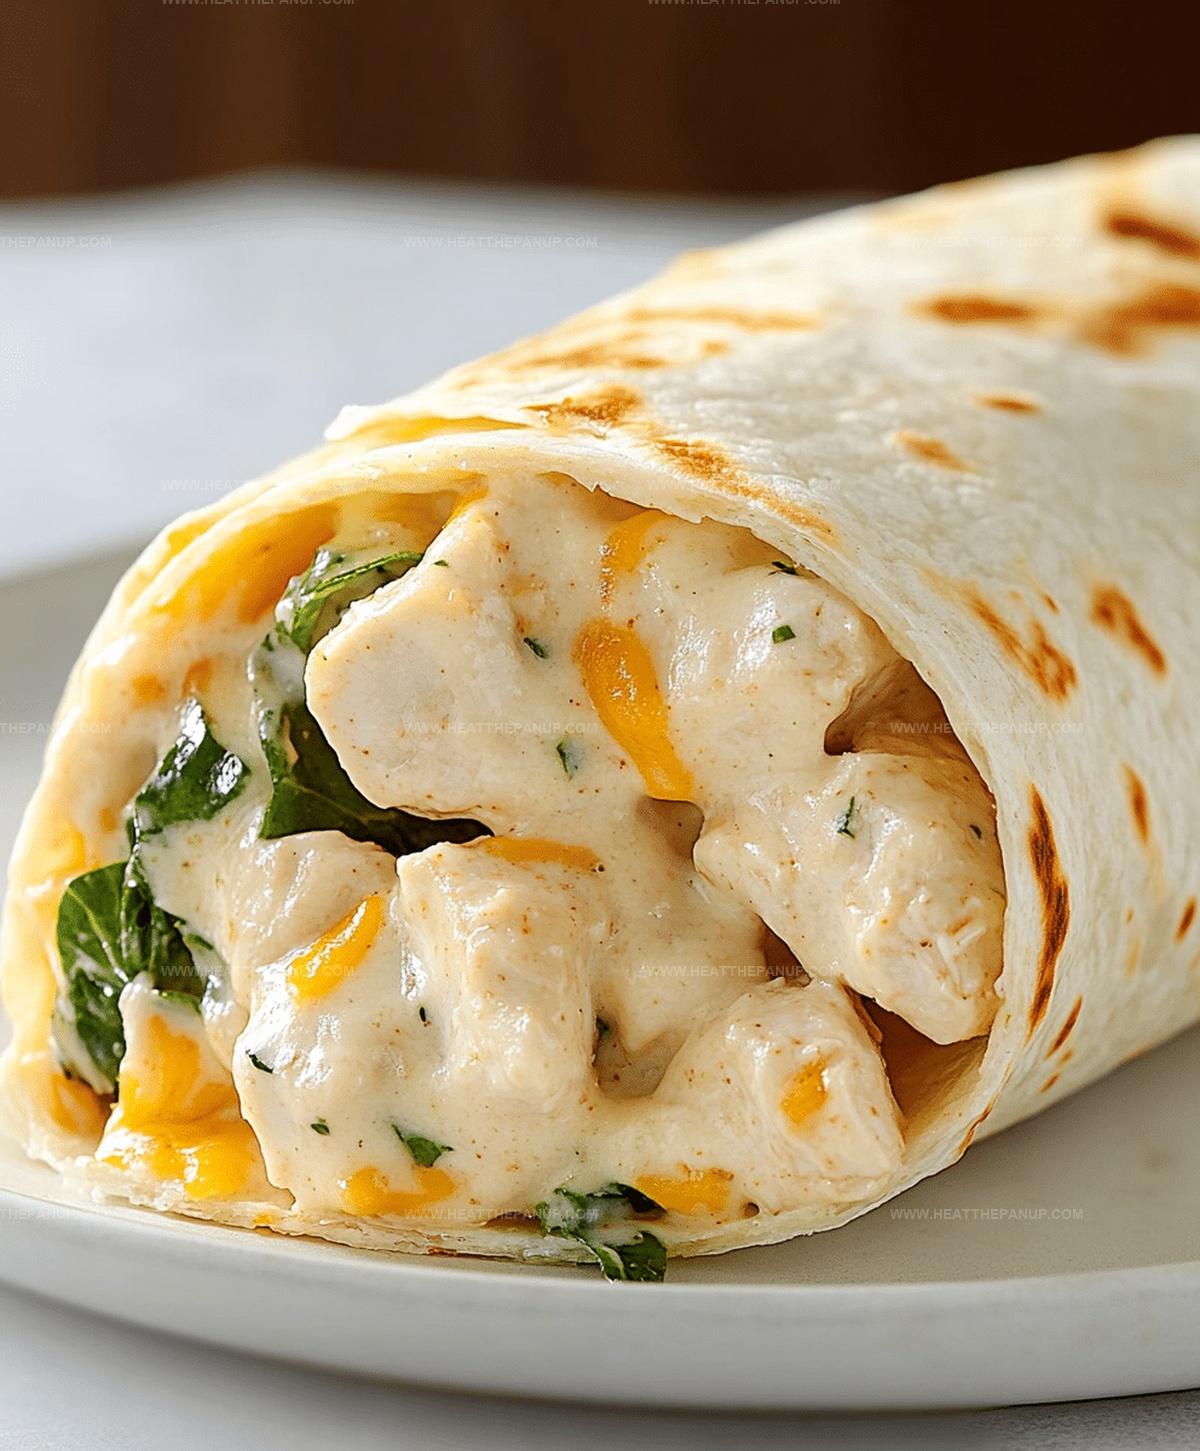
Tender chicken mingles with melted cheese and aromatic garlic, creating a mouthwatering combination.
Weeknight meals become something special when you transform simple ingredients into an extraordinary experience.
Quick preparation means you can whip up these wraps faster than ordering takeout.
Fragrant herbs and zesty seasonings elevate this dish from ordinary to extraordinary.
Let’s roll into a delicious adventure that will have everyone asking for seconds!
Cheesy Garlic Chicken Wraps Are Quick And Satisfying
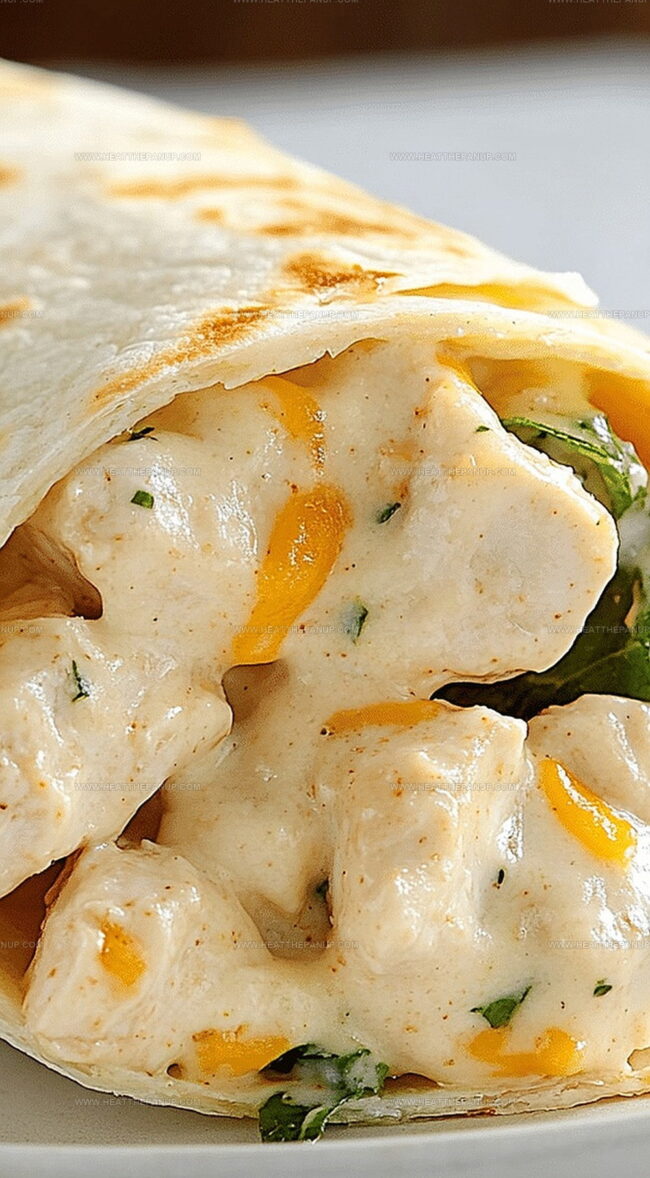
Cheesy Garlic Chicken Wraps Cooking Combo
Protein Base:Flavor Enhancers:Wrap and Optional Toppings:Cheesy Garlic Chicken Wraps Cooking Method
Step 1: Sizzle Chicken Perfectly
Heat olive oil in a skillet over medium flame.
Place chicken breasts in the pan and generously sprinkle with:Cook chicken thoroughly, ensuring each side turns golden brown and reaches internal temperature of 165°F, approximately 6-8 minutes per side.
Step 2: Transform Chicken Into Delicate Slices
Transfer cooked chicken to cutting board.
Using sharp knife, slice chicken into thin, elegant strips.
Step 3: Create Cheesy Foundation
Spread tortillas flat on clean surface.
Sprinkle generous layer of shredded cheese across each tortilla.
Step 4: Layer Savory Chicken
Arrange sliced chicken strips directly on top of melting cheese layer.
Step 5: Craft Wrap Technique
Carefully fold tortilla edges inward, then roll chicken-filled tortilla into compact wrap.
Step 6: Crisp and Melt Wraps
Return wrapped tortillas to heated skillet.
Cook each side until exterior becomes crispy golden brown and cheese melts completely.
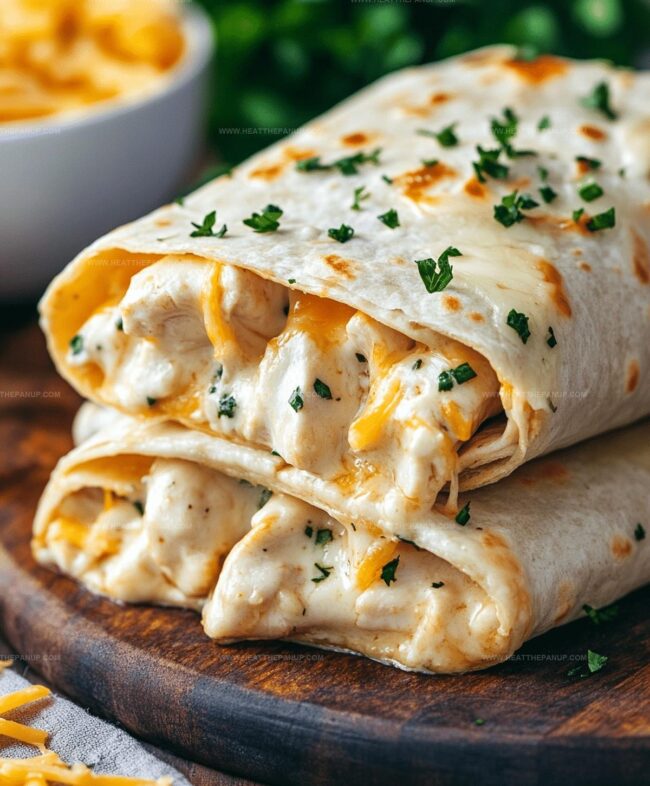
Step 7: Garnish and Serve
Optional: Top wraps with fresh:Plate immediately and enjoy warm, gooey cheesy garlic chicken wraps.
Cheesy Garlic Chicken Wraps – Tips For Wrapping And Baking

How to Store and Warm Up Cheesy Garlic Chicken Wraps
Cheesy Chicken Wraps Flavor Add-ons
Cheesy Garlic Chicken Wraps with Filling Options
FAQs
Mozzarella or cheddar cheese are perfect choices. They melt beautifully and add rich flavor to the chicken wraps.
Yes, chicken thighs work great. They’re often more tender and juicy compared to chicken breasts, which can make your wraps even more delicious.
Use a meat thermometer to check that the internal temperature reaches 165°F (74°C). Alternatively, cut into the thickest part of the chicken to ensure no pink remains.
Absolutely! You can cook the chicken and prepare the wraps ahead of time. Store the components separately and assemble when ready to eat for maximum freshness and crispiness.
Print
Flavorful Cheesy Garlic Chicken Wraps Recipe
- Total Time: 30 minutes
- Yield: 4 1x
Description
Mouthwatering cheesy garlic chicken wraps deliver a flavor explosion that melts together tender chicken, rich cheese, and zesty garlic. Crisp tortillas wrapped around savory ingredients promise a satisfying meal you’ll crave again and again.
Ingredients
Main Protein:
- 2 boneless, skinless chicken breasts
Cheese and Dairy:
- 1 cup shredded mozzarella cheese
Seasonings and Additional Ingredients:
- 2 cloves garlic, minced
- 1 tablespoon (15 milliliters) olive oil
- Salt, to taste
- Pepper, to taste
- 4 large tortillas
Optional Toppings:
- Lettuce
- Tomatoes
- Avocado
Instructions
- Sear the chicken breasts in a hot skillet with olive oil, infusing them with minced garlic, salt, and black pepper. Ensure each side achieves a golden-brown exterior and the meat is thoroughly cooked through.
- Transfer the cooked chicken to a cutting board and slice into thin, uniform strips.
- Arrange the soft tortillas on a clean surface and generously distribute shredded cheese across each wrap’s center.
- Carefully layer the warm, sliced chicken directly over the cheese, ensuring even coverage.
- Craft the wraps by folding the tortilla edges inward, creating a neat, compact package.
- Return the assembled wraps to the skillet, allowing them to crisp and caramelize until the exterior turns a rich golden hue and the cheese melts into a creamy consistency.
- Once perfectly toasted, plate the wraps and embellish with fresh, crisp lettuce or juicy tomato garnishes for added texture and flavor.
Notes
- Ensure chicken is thoroughly cooked by checking internal temperature reaches 165°F using a meat thermometer for food safety.
- Choose whole wheat or low-carb tortillas to make this recipe more diet-friendly and nutritionally balanced.
- Customize flavor profiles by adding fresh herbs like basil or cilantro for extra zest and aromatic complexity.
- Substitute dairy cheese with plant-based alternatives like vegan cheese for lactose-intolerant or dairy-free eaters, maintaining the wrap’s creamy texture.
- Prep Time: 10 minutes
- Cook Time: 20 minutes
- Category: Lunch, Dinner, Snacks
- Method: Frying
- Cuisine: American
Nutrition
- Serving Size: 4
- Calories: 400
- Sugar: 1g
- Sodium: 600mg
- Fat: 18g
- Saturated Fat: 6g
- Unsaturated Fat: 10g
- Trans Fat: 0g
- Carbohydrates: 34g
- Fiber: 2g
- Protein: 30g
- Cholesterol: 80mg
Angelina Wiles
Content Editor & Culinary Enthusiast
Expertise
Food Writing and Editing, Vegetarian and Vegan Cuisine, Baking and Pastry Arts, Sustainable Cooking Practices
Education
Portland Community College
Certificate in Culinary Arts
Focus: Emphasis on sustainable cooking practices, vegetarian cuisine, and food writing.
Oregon Culinary Institute
Diploma in Baking and Pastry Arts
Focus: Specialized training in artisanal baking, pastry techniques, and dessert presentation.
Angelina’s love for cooking started with handwritten family recipes and weekend trips to farmers’ markets around Portland. She followed her passion with a Certificate in Culinary Arts from Portland Community College, then perfected her sweet side with a Diploma in Baking and Pastry Arts at Oregon Culinary Institute.
Angelina believes recipes should feel like a conversation, not a science project. She’s all about helping readers trust themselves in the kitchen with simple steps, fresh ideas, and easy twists on classic meals.
When she’s not editing recipes, she’s baking bread, sipping coffee, or getting inspired by the changing seasons.