
Rustic No-Knead Artisan Bread Recipe: Bakery-Fresh at Home
Crafting a delightful no-knead artisan bread recipe brings pure joy to home bakers seeking simplicity and flavor.
Novice and experienced cooks alike can master this magical technique with minimal effort.
Soft, crusty loaves emerge from your kitchen without complex techniques or extensive preparation.
Professional bakery results happen right on your countertop with just a few basic ingredients.
Minimal mixing creates maximum satisfaction when you pull a golden, crackling loaf from the oven.
Flour, water, yeast, and salt combine in a transformative process that feels almost miraculous.
Slice into this warm, aromatic bread and savor the incredible texture that proves anyone can become an exceptional baker.
No-Knead Bread That’s Foolproof and Crusty

Easy Artisan Bread Ingredient Guide
Dry Ingredients:Wet Ingredients:Optional Toppings/Extras:No-Knead Artisan Bread Preparation
Step 1: Mix Flour and Wet Ingredients
Create a magical dough by combining bread flour, salt, and yeast in a spacious mixing bowl. Pour in water and stir until the mixture transforms into a shaggy, rough-looking blend. Don’t worry about making it perfect – the beauty of this bread is its rustic nature.
Gently mix until ingredients are just combined, leaving some lumps and uneven spots.
Step 2: Let the Dough Develop Flavor
Cover the bowl with a damp kitchen towel and let the dough rest at room temperature. This slow fermentation will develop deep, complex flavors over 12-18 hours. The dough will become puffy and bubbly, showing signs of fermentation.
Step 3: Shape the Artisan Loaf
Sprinkle a clean work surface with flour. Carefully transfer the risen dough onto the surface. Gently fold the edges towards the center, creating a soft, rounded shape. Use light touches to form a beautiful round loaf without deflating the precious air bubbles.
Step 4: Prepare for Final Rise
Place the shaped dough on a piece of parchment paper. Loosely cover with a clean kitchen towel. Let the bread rise for another 2 hours, allowing it to become light and airy.
Step 5: Bake to Golden Perfection
Preheat the oven to 450°F with a Dutch oven inside. Carefully transfer the dough (on the parchment paper) into the hot Dutch oven. Cover and bake for 30 minutes to create steam and develop a crispy crust. Remove the lid and bake for an additional 15-20 minutes until the bread turns a beautiful golden brown.
Step 6: Cool and Enjoy
Remove the bread from the oven and transfer to a cooling rack. Resist the temptation to cut immediately! Let the bread cool completely for at least an hour. This allows the interior to set and prevents a gummy texture. Slice, serve, and savor your homemade artisan bread.
Handy Notes for Artisan Bread
Easy No-Knead Artisan Bread: Storage Tips That Work
No-Knead Bread Flavor Matches
Bread Add-Ons and Mix Ideas
FAQs
While bread flour has higher protein content that creates better gluten structure, you can substitute all-purpose flour. However, the bread might be slightly less chewy and have a less robust texture.
You can use a heavy ceramic or cast-iron pot with a lid. If unavailable, place a metal pan with water on the bottom rack to create steam, which helps develop a crispy crust.
Dissolve yeast in warm water (around 110°F). If it becomes foamy and bubbles within 5-10 minutes, the yeast is active and ready to use. If no reaction occurs, your yeast might be expired.
Different flour brands absorb water differently. Add flour gradually during mixing if the dough seems too wet. The consistency should be shaggy but not runny.
Print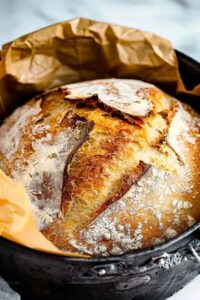
Easy No-Knead Artisan Bread Recipe
- Total Time: 1 hour 10 minutes
- Yield: 12 1x
Description
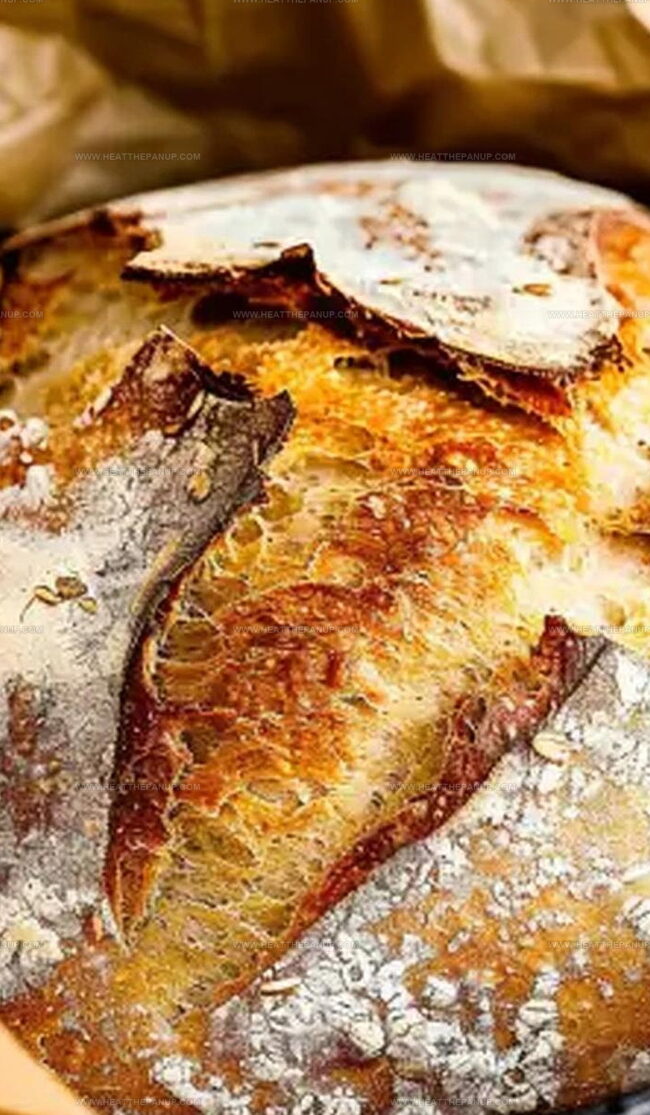
Rustic homemade no-knead artisan bread delivers golden-crusted perfection with minimal effort. Crusty exterior and tender crumb invite bakers to savor simple Mediterranean-inspired comfort right from their kitchen.
Ingredients
Main Ingredients:
- 480 grams (3.54 cups) bread flour
- 360 grams (1.5 cups) water
Secondary Ingredients:
- 9 grams (1.5 teaspoons) salt
Leavening Agent:
- 3 grams (1/2 teaspoon) instant yeast
Instructions
- Mix dry ingredients like bread flour, salt, and yeast in a spacious mixing vessel, creating a uniform powder blend.
- Pour room-temperature water into the dry mixture, stirring until a rough, uneven dough emerges with visible flour pockets.
- Drape a slightly dampened cloth over the bowl, allowing the dough to rest and ferment at ambient temperature for 12-18 hours, watching it expand and develop complex flavors.
- Generously dust a clean countertop with flour, gently transferring the risen dough onto the surface without deflating its delicate structure.
- Use soft, careful motions to fold the dough edges toward its center, gradually creating a rounded, smooth loaf with tension.
- Position the shaped dough onto parchment paper, lightly covering it to prevent moisture loss during a final 2-hour proofing period.
- Position a heavy Dutch oven inside the oven, preheating to a scorching 450°F to create an ideal baking environment.
- Carefully slide the parchment-wrapped dough into the heated Dutch oven, covering immediately to trap steam and promote crust development.
- Bake covered for 30 minutes, then remove the lid to allow the exterior to transform into a golden, crispy shell during the final 15-20 minutes.
- Transfer the freshly baked bread to a cooling rack, allowing it to rest and settle for optimal texture before slicing and serving.
Notes
- Flour matters most, so use high-protein bread flour for the best texture and rise.
- Let the dough ferment slowly at room temperature to develop complex, tangy sourdough-like flavors.
- Minimal handling keeps the bread tender, so fold gently and avoid overworking the dough.
- Preheating the Dutch oven creates a steamy environment, giving the bread a crispy, golden crust and perfect chew.
- Prep Time: 20 minutes
- Cook Time: 50 minutes
- Category: Snacks, Dinner
- Method: Baking
- Cuisine: American
Nutrition
- Serving Size: 12
- Calories: 120
- Sugar: 0g
- Sodium: 0.75g
- Fat: 0.5g
- Saturated Fat: 0g
- Unsaturated Fat: 0.5g
- Trans Fat: 0g
- Carbohydrates: 25g
- Fiber: 1g
- Protein: 4g
- Cholesterol: 0mg
James Hambly
Founder & Recipe Creator
Expertise
Recipe Development, Culinary Education, Farm-to-Table Cooking, Southern Cuisine
Education
Asheville-Buncombe Technical Community College
Certificate in Culinary Arts
Focus: Hands-on training in professional cooking techniques, emphasizing farm-to-table practices and Southern cuisine.
The Chef’s Academy
Associate Degree in Culinary Arts
Focus: Comprehensive culinary education covering global cuisines, kitchen management, and food safety.
James grew up surrounded by the smells of cast-iron skillets and slow-cooked Southern meals in Asheville, North Carolina.
He sharpened his skills with a Certificate in Culinary Arts from Asheville-Buncombe Technical Community College, and later leveled up with an Associate Degree from The Chef’s Academy.
James’s philosophy is simple: the best meals don’t need fancy tricks, just fresh ingredients, a hot pan, and a little bit of heart. His favorite days are spent testing one-pan wonders, chasing bold flavors, and creating recipes that feel easy, even on a busy night.