
Gooey Garlic Cheese Bombs Recipe: Fresh Bread Bites
Warm, golden cheese bombs with garlic’s irresistible kick are about to become your next favorite appetizer.
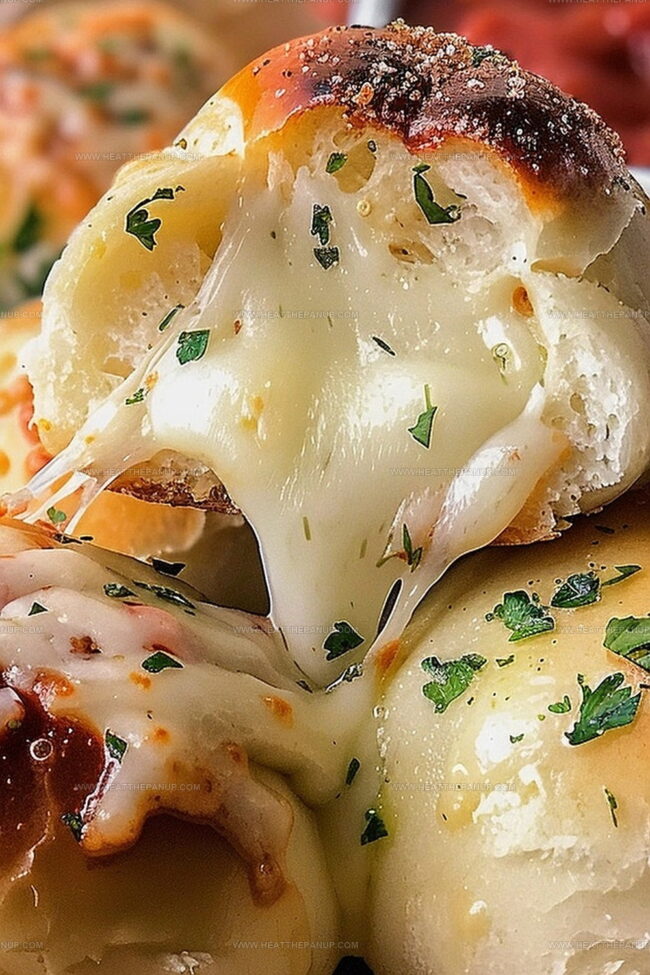
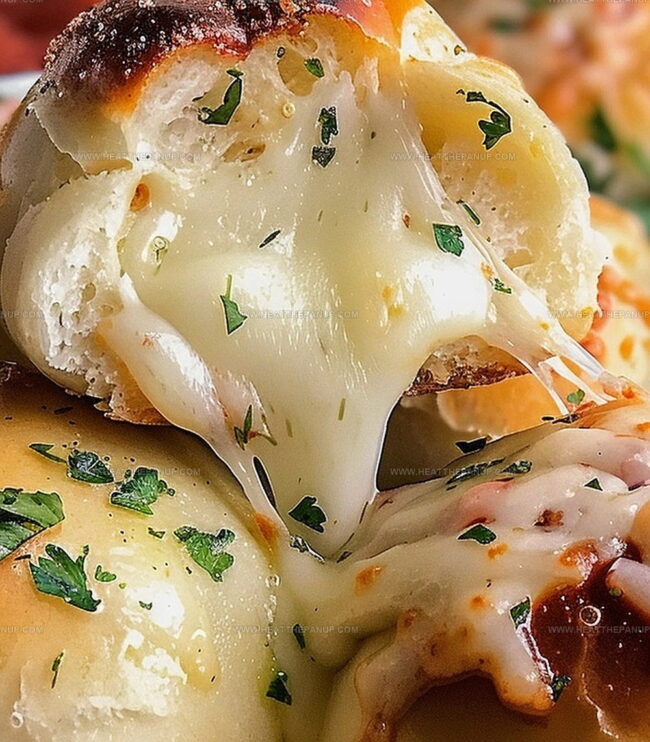
Soft, pillowy dough wraps around melted cheese and aromatic garlic, creating a mouthwatering treat that bursts with flavor.
These delectable bites promise to be the star of any gathering or casual snack time.
Crispy on the outside and gooey on the inside, they deliver a perfect balance of textures and tastes.
Every bite promises a delightful explosion of savory goodness that will have everyone asking for seconds.
Prepare to elevate your snack game with these simple yet incredible cheese bombs that never fail to impress.
Grab a plate and let the culinary magic begin.
Why Easy Garlic Cheese Bombs Always Disappear Fast
What You’ll Need for Garlic Cheese Bombs
Main Ingredients:
Dough and Cheese:Flavor Enhancers:Preparation Extras:How to Make Easy Garlic Cheese Bombs
Step 1: Thaw and Prep Dough
Pull frozen dough rolls from the freezer and place on a plate.
Cover completely with plastic wrap and let rest in refrigerator for 4-6 hours until they become puffy and nearly doubled in size.
Step 2: Slice Cheese
Cut mozzarella sticks into small chunk-sized pieces about one inch long.
Set aside on a clean cutting board.
Step 3: Prepare Baking Space
Warm oven to 350°F.
Line a baking sheet with parchment paper or silicone mat for easy cleanup.
Step 4: Shape Cheese Bombs
Gently press each dough ball into a flat circular disk using your palms.
Place cheese chunks directly in the center of each disk.
Carefully fold dough edges over cheese, pinching and sealing completely to prevent cheese from leaking during baking.
Position each bomb seam-side down on prepared baking sheet.
Step 5: Create Garlic Butter Topping
Combine ingredients for topping:Melt butter in microwave or small saucepan and mix with herbs until well blended.
Step 6: Bake and Finish
Slide baking sheet into preheated oven.
Bake 9-11 minutes until bombs turn golden brown and puffed.
Remove from oven and immediately brush generously with prepared garlic butter mixture.
Step 7: Serve and Enjoy
Let cheese bombs cool for 2-3 minutes.
Serve warm and watch everyone dive in!
Tips for Gooey Garlic Cheese Bombs
Store and Reheat Garlic Cheese Bombs with Ease
Dishes to Serve with Garlic Cheese Bombs
Flavor Upgrades for Garlic Cheese Bombs
FAQs
The key is to pinch the dough edges tightly and completely seal the cheese inside the dough ball. Make sure there are no gaps or thin spots when closing the dough to keep the cheese contained.
Yes, you can use homemade or store-bought fresh dough. Just ensure the dough is soft and pliable enough to wrap around the cheese pieces easily.
Mozzarella sticks are ideal because they melt smoothly and create that classic stretchy cheese pull. You can also use cheddar or pepper jack for different flavor profiles.
No special equipment is needed. Just a baking sheet, parchment paper, and a basic oven will work perfectly for this simple recipe.
Print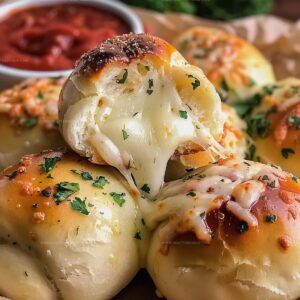
Easy Garlic Cheese Bombs Recipe
- Total Time: 6 hours 10 minutes
- Yield: 8 1x
Description
Warm, pillowy garlic cheese bombs explode with savory goodness, melting hearts and tantalizing taste buds. Golden-brown pastry pockets harbor molten cheese and aromatic garlic, promising ultimate comfort with each irresistible bite you’ll savor.
Ingredients
Main Ingredients:
- 8 frozen Texas Rolls (thawed, Rhodes brand preferred)
- 4 sticks mozzarella cheese (cut into 16 pieces)
Seasoning and Flavor Enhancers:
- 4 tablespoons salted butter (melted)
- 2 cloves garlic (minced)
- 1 tablespoon parsley flakes (freshly chopped or dried)
Instructions
- Gently remove frozen dough rolls from packaging and arrange on a chilled surface, covering with loose plastic film. Allow them to gradually expand and soften over 4-6 hours in refrigerated environment.
- Slice mozzarella sticks into compact, uniform segments approximately one inch long.
- Calibrate oven temperature to 350°F and prepare a clean parchment-lined baking surface.
- Delicately press each dough sphere into a thin, circular shape using fingertips, creating a smooth disk.
- Strategically position two cheese segments precisely at the center of each dough disk.
- Carefully fold and seal dough edges, ensuring complete cheese encapsulation. Smoothly transform each bundle with sealed side facing downward on prepared baking sheet.
- Transfer baking sheet into preheated oven, monitoring transformation for 9-11 minutes until exterior achieves golden-brown luminescence.
- Concurrently, transform butter into liquid state through gentle heating, incorporating minced garlic and fragrant parsley flakes into molten mixture.
- Extract cheese bombs from oven and generously brush with aromatic garlic-herb infused butter.
- Permit brief cooling interval before serving, allowing internal cheese to stabilize while maintaining optimal temperature and texture.
Notes
- Perfectly Thaw Dough by slowly refrigerating rolls overnight, ensuring they double in size for soft, fluffy texture.
- Prevent Cheese Leakage by pinching dough edges tightly, creating a complete seal around mozzarella pieces to keep melted cheese inside.
- Customize Flavor by experimenting with different cheese types like cheddar or pepper jack for unique taste variations.
- Create Gluten-Free Alternative by substituting traditional dough with gluten-free pizza or bread dough to accommodate dietary restrictions.
- Prep Time: 6 hours
- Cook Time: 10 minutes
- Category: Snacks, Appetizer
- Method: Baking
- Cuisine: American
Nutrition
- Serving Size: 8
- Calories: 210
- Sugar: 1 g
- Sodium: 330 mg
- Fat: 15 g
- Saturated Fat: 9 g
- Unsaturated Fat: 4 g
- Trans Fat: 0 g
- Carbohydrates: 19 g
- Fiber: 1 g
- Protein: 5 g
- Cholesterol: 30 mg
James Hambly
Founder & Recipe Creator
Expertise
Recipe Development, Culinary Education, Farm-to-Table Cooking, Southern Cuisine
Education
Asheville-Buncombe Technical Community College
Certificate in Culinary Arts
Focus: Hands-on training in professional cooking techniques, emphasizing farm-to-table practices and Southern cuisine.
The Chef’s Academy
Associate Degree in Culinary Arts
Focus: Comprehensive culinary education covering global cuisines, kitchen management, and food safety.
James grew up surrounded by the smells of cast-iron skillets and slow-cooked Southern meals in Asheville, North Carolina.
He sharpened his skills with a Certificate in Culinary Arts from Asheville-Buncombe Technical Community College, and later leveled up with an Associate Degree from The Chef’s Academy.
James’s philosophy is simple: the best meals don’t need fancy tricks, just fresh ingredients, a hot pan, and a little bit of heart. His favorite days are spent testing one-pan wonders, chasing bold flavors, and creating recipes that feel easy, even on a busy night.