The Most Festive Easter Dirt Cake Recipe for Spring Smiles
Whip up a delightful easter dirt cake that promises pure childhood nostalgia and playful dessert magic.
Layers of creamy pudding, crushed cookies, and gummy worms create a whimsical treat that delights both kids and adults.
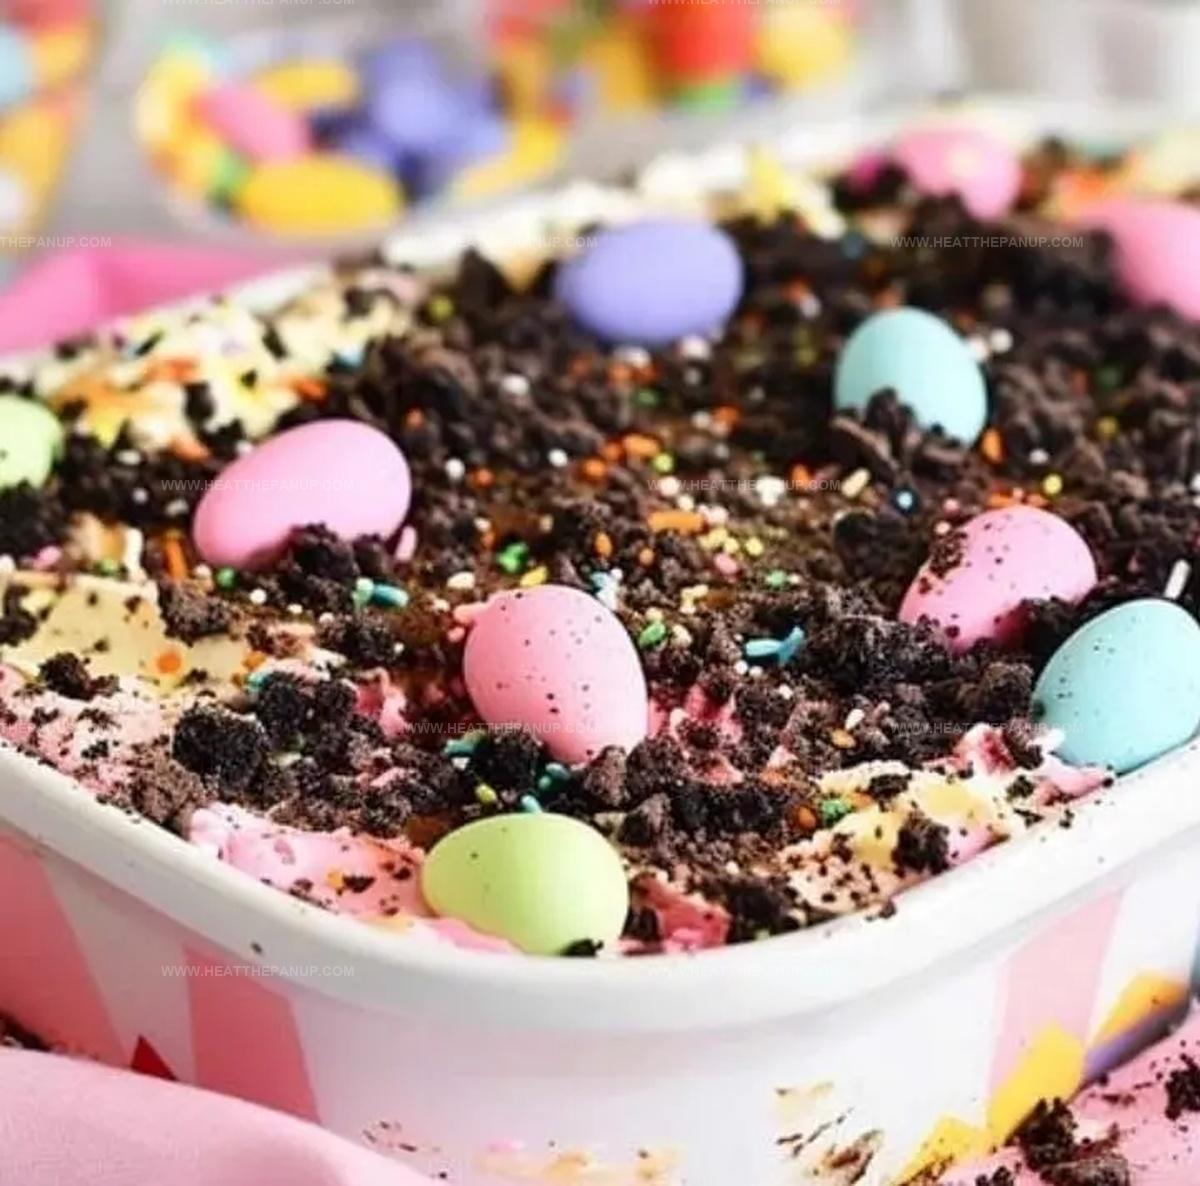
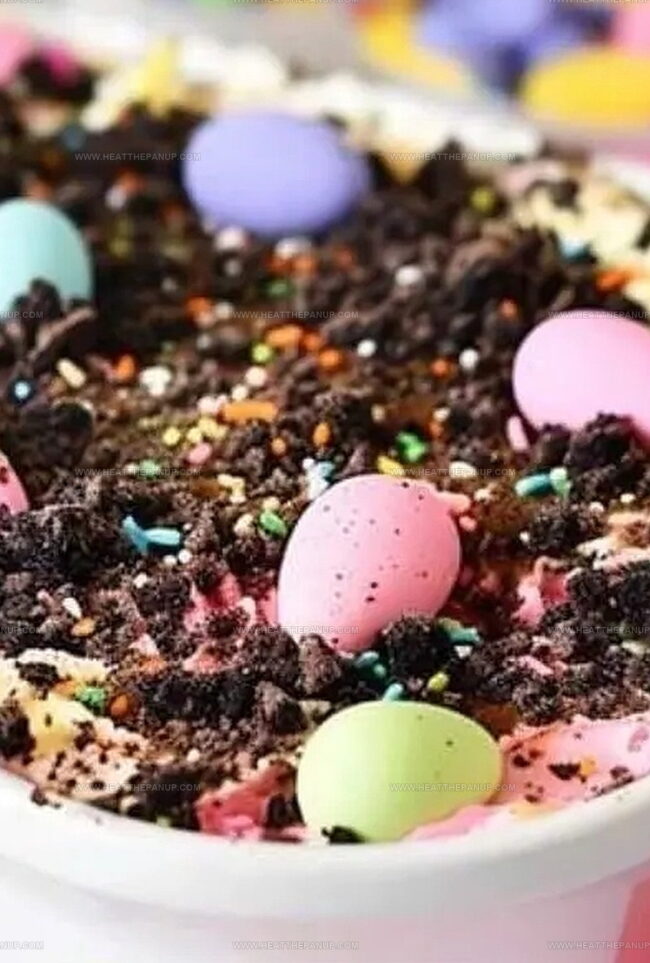
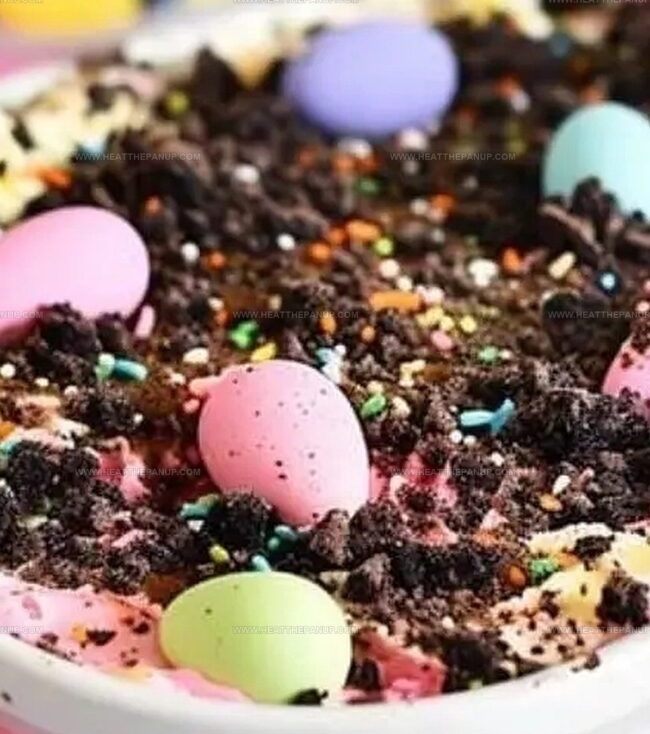
Chocolate crumbles mimic soil while colorful candies peek through like hidden spring treasures.
Sweet memories dance across your taste buds with each delectable spoonful.
Childhood celebrations come alive in this quirky, irresistible dessert that sparks joy and imagination.
Unexpected textures and rich flavors make this easter dirt cake a guaranteed crowd-pleaser that will have everyone asking for seconds.
Why Easter Dirt Cake Is So Fun
Ingredients For Easter Dirt Cake
Crust Layer:Dairy Components:Sweeteners and Mix-Ins:Decorative Toppings:How To Make Easter Dirt Cake
Step 1: Crumble Chocolate Cookies
Use a food processor or rolling pin to transform Oreo cookies into fine, dusty crumbs.
Create a smooth, uniform texture that will serve as the foundation for your delightful dessert.
Step 2: Whip Chocolate Pudding
In a spacious mixing bowl, combine chocolate pudding mix with milk.
Whisk energetically until the mixture transforms into a silky, lump-free consistency.
Allow the pudding to rest and thicken naturally.
Step 3: Blend Creamy Mixture
Grab an electric mixer and combine:Beat these ingredients until they become incredibly smooth and velvety.
Gently fold in whipped topping, creating a light and airy texture.
Step 4: Create Delicious Layers
Select a clear serving dish to showcase your dessert.
Build beautiful layers in this order:Repeat these layers, ensuring the top layer is cookie crumbs for a dramatic finish.
Step 5: Chill and Set
Place the assembled dessert in the refrigerator.
Let it cool and set for at least one hour, allowing flavors to meld together perfectly.
Step 6: Add Playful Decorations
Just before serving, sprinkle candy eggs and gummy worms across the top.
This transforms your dessert into a whimsical, garden-inspired treat that will delight guests of all ages.
Tips For Decorating Easter Dirt Cake
How To Store Easter Dirt Cake
Easter Dirt Cake Pairing Ideas
Ways To Remix Easter Dirt Cake
FAQs
The layered dessert mimics a fun “dirt” landscape with crushed Oreos representing soil, cream cheese mixture adding richness, and chocolate pudding creating depth. Gummy worms and candy eggs complete the playful Easter theme.
Absolutely! Kids love helping crush cookies, mix ingredients, and decorate the cake. It’s a hands-on dessert that’s both delicious and entertaining for children to prepare.
Yes, you can assemble the Easter Dirt Cake a day in advance. Keep it refrigerated, and add the decorative candy eggs and gummy worms just before serving to maintain their fresh appearance.
Not at all! This no-bake dessert requires basic mixing and layering skills. Even beginner cooks can easily follow the simple steps and create a delightful Easter treat.
Print
Easter Dirt Cake Recipe
- Total Time: 30 minutes
- Yield: 12 1x
Description
Rich chocolate layers of Easter Dirt Cake reveal childhood memories with playful pudding crumbles and cookie crunch. Springtime dessert dreams come alive as chocolate bunnies peek through delightful creamy textures you’ll savor with pure joy.
Ingredients
Main Ingredients:
- 36 Oreo cookies, crushed
- 2 packages (3.9 ounces / 110 grams each) instant chocolate pudding mix
- 4 cups (946 milliliters) cold milk
- 8 ounces (226 grams) cream cheese, softened
Binding and Sweetening Ingredients:
- 1/4 cup (57 grams) unsalted butter, softened
- 1 cup (120 grams) powdered sugar
- 12 ounces (340 grams) whipped topping, thawed
Decorative Ingredients:
- Candy-coated chocolate eggs
- Gummy worms
Instructions
- Pulverize chocolate sandwich cookies into fine, uniform crumbs using a food processor or rolling pin, ensuring a consistent texture for the foundation layer.
- Whisk chocolate pudding mix with milk in a spacious mixing vessel, stirring vigorously until the mixture transforms into a smooth, creamy consistency. Allow the pudding to rest and thicken naturally.
- Using an electric mixer, cream together softened cream cheese, butter, and powdered sugar until the mixture achieves a silky, luxurious texture with no visible lumps.
- Delicately fold whipped topping into the cream cheese blend, maintaining the airy volume while creating a light, velvety mixture.
- Construct the dessert in a transparent serving dish by establishing an initial layer of cookie crumbs as the base, followed by a generous spread of cream cheese mixture.
- Pour the thickened chocolate pudding over the cream cheese layer, creating an even, smooth surface.
- Repeat the layering process, alternating between cookie crumbs, cream cheese mixture, and pudding, ensuring each stratum is distributed evenly.
- Complete the dessert with a final crown of cookie crumbs, providing a textural contrast to the creamy layers beneath.
- Refrigerate the assembled dessert for a minimum of one hour, allowing the components to meld and set firmly.
- Prior to serving, embellish the top with whimsical candy eggs and squiggly gummy worms, transforming the cake into a festive Easter-themed treat.
Notes
- Crush Oreos finely for a smoother, more delicate texture that blends perfectly with the creamy layers.
- Use instant pudding mix for quicker preparation and consistent thickness in the dessert.
- Softening cream cheese at room temperature ensures a silky, lump-free mixture without overmixing.
- Layer ingredients carefully to create visually appealing and evenly distributed flavors throughout the dessert.
- Prep Time: 30 minutes
- Cook Time: 0 minutes
- Category: Desserts
- Method: None
- Cuisine: American
Nutrition
- Serving Size: 12
- Calories: 320
- Sugar: 21 g
- Sodium: 230 mg
- Fat: 18 g
- Saturated Fat: 10 g
- Unsaturated Fat: 6 g
- Trans Fat: 0 g
- Carbohydrates: 38 g
- Fiber: 1 g
- Protein: 3 g
- Cholesterol: 25 mg
Angelina Wiles
Content Editor & Culinary Enthusiast
Expertise
Food Writing and Editing, Vegetarian and Vegan Cuisine, Baking and Pastry Arts, Sustainable Cooking Practices
Education
Portland Community College
Certificate in Culinary Arts
Focus: Emphasis on sustainable cooking practices, vegetarian cuisine, and food writing.
Oregon Culinary Institute
Diploma in Baking and Pastry Arts
Focus: Specialized training in artisanal baking, pastry techniques, and dessert presentation.
Angelina’s love for cooking started with handwritten family recipes and weekend trips to farmers’ markets around Portland. She followed her passion with a Certificate in Culinary Arts from Portland Community College, then perfected her sweet side with a Diploma in Baking and Pastry Arts at Oregon Culinary Institute.
Angelina believes recipes should feel like a conversation, not a science project. She’s all about helping readers trust themselves in the kitchen with simple steps, fresh ideas, and easy twists on classic meals.
When she’s not editing recipes, she’s baking bread, sipping coffee, or getting inspired by the changing seasons.