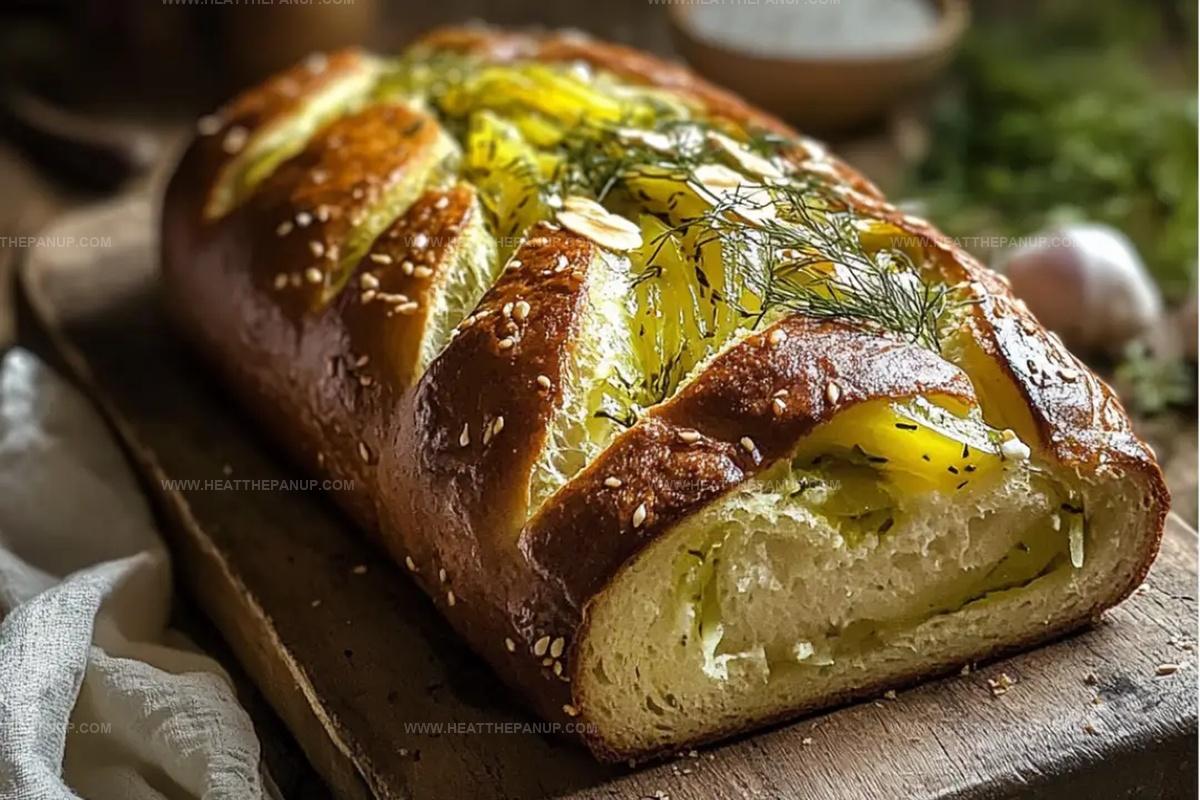
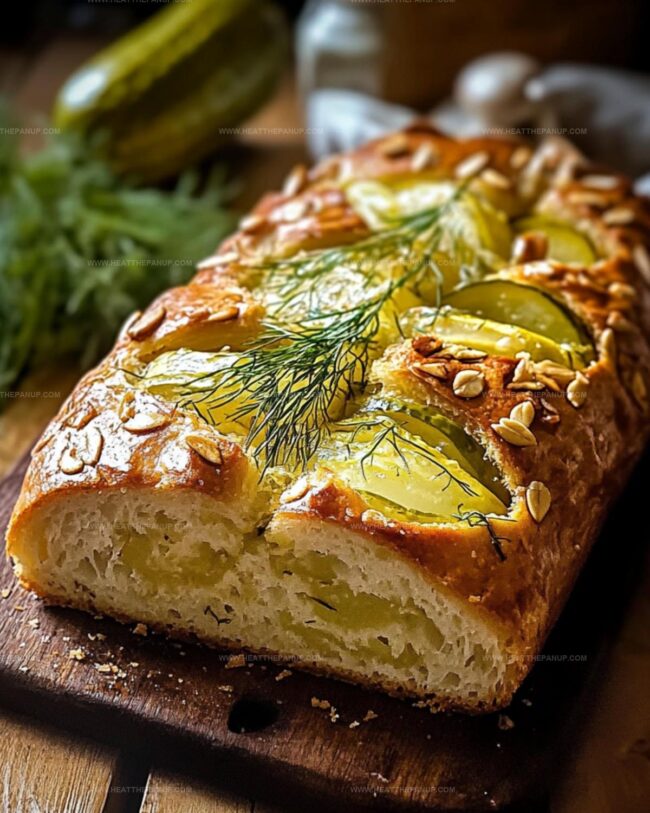
The Zesty Dill Pickle Bread Recipe Everyone’s Talking About
Crafting a delightful dill pickle bread recipe can turn an ordinary afternoon into a culinary adventure.
Unexpected ingredients sometimes create magic in the kitchen.
Tangy pickles bring surprising zest to traditional bread-making techniques.
Savory aromas will soon fill your home with warm, inviting scents.
Pickle lovers understand how a single ingredient can completely transform a classic recipe.
Home bakers seeking something unique will adore this unconventional twist on comfort food.
Slice into this remarkable bread and let your taste buds explore a whole new world of flavor.
Dill Pickle Bread That Brings Tang to Every Slice
Ingredient Set of Dill Pickle Bread
Bread Base Ingredients:Liquid and Fat Ingredients:Flavor Enhancers:How to Make Dill Pickle Bread from Scratch
Step 1: Prepare Pickle Ingredients
Finely chop the dill pickle and gently blot away excess moisture using a paper towel.
Set the chopped pickle aside for later use.
Step 2: Activate Yeast
Combine yeast with sugar in warm pickle juice.
Let the mixture sit and become frothy, which typically takes about 10 minutes.
The liquid will become bubbly and foamy, indicating the yeast is active and ready.
Step 3: Create Bread Dough Base
In a large mixing bowl, combine the activated yeast mixture with:Use a mixer with a flat paddle attachment to blend all ingredients until they form a cohesive mixture.
Step 4: Knead and Develop Dough
Switch to a dough hook and continue mixing.
Gradually incorporate:Knead the dough on medium speed for 6-10 minutes until it becomes smooth and elastic.
Step 5: Adjust Dough Consistency
Fine-tune the dough’s texture by adding flour or warm water, one tablespoon at a time.
The goal is a soft, pliable dough that’s not too sticky or dry.
Step 6: First Dough Rise
Transfer the dough to a greased bowl.
Cover and let it rise in a warm spot until it doubles in size, which takes approximately one hour.
Once risen, gently punch down the dough to release air bubbles.
Step 7: Shape The Loaf
Form the dough into a round loaf.
Place it in a greased Dutch oven, cover, and allow a second rise for 30 minutes.
Step 8: Prepare For Baking
Preheat the oven to 450°F.
This high temperature will help create a crispy, golden crust.
Step 9: Initial Baking Phase
Place the covered Dutch oven in the preheated oven.
Bake for 20 minutes to develop initial structure and color.
Step 10: Final Baking Stage
Remove the lid and continue baking for an additional 10-15 minutes.
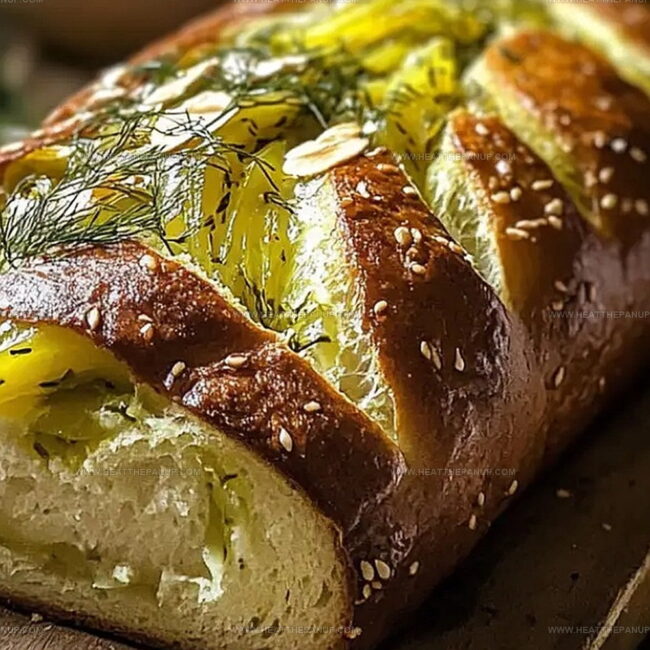
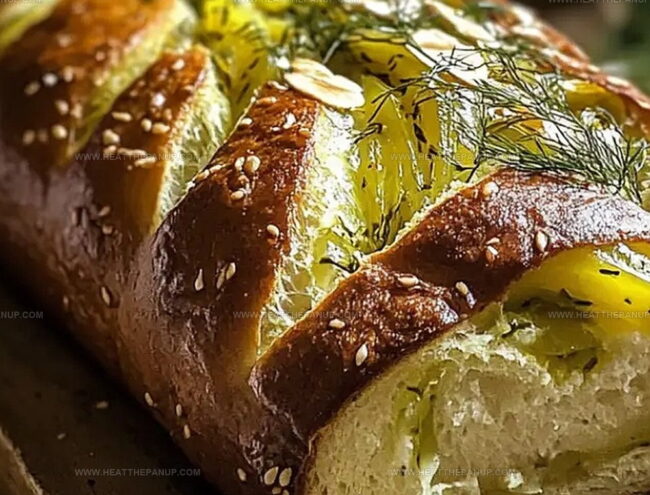
The bread is done when it reaches an internal temperature of 200°F and develops a beautiful golden-brown crust.
Step 11: Cool And Serve
Carefully remove the bread from the Dutch oven.
Place on a cooling rack and let it rest for 30 minutes before slicing.
This allows the interior to set and makes clean, neat slices possible.
Dill Pickle Bread Hacks for Bold, Briny Flavor Fans
Storing Guide for Dill Pickle Bread
Dill Pickle Bread Serving Ideas
Dill Pickle Bread with Flavor Infusions
FAQs
Yes, you can use store-bought pickle juice as a substitute for homemade pickle juice. Just ensure it’s from a jar of dill pickles to maintain the flavor profile.
A stand mixer with a dough hook is helpful but not mandatory. You can also knead the dough by hand, though it might require more effort and time.
When you mix yeast with warm liquid and sugar, it should become frothy within 10 minutes. If no bubbles form, your yeast might be expired and you’ll need to replace it.
Absolutely! Use about 3 times more fresh dill compared to dried dill. Fresh dill will give a slightly more vibrant flavor to your bread.
Print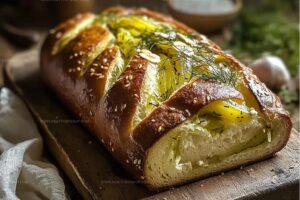
Dill Pickle Bread Recipe
- Total Time: 1 hour 35 minutes
- Yield: 12 1x
Description
Homemade Dill Pickle Bread brings tangy zest to classic quick bread with a unique twist. Briny pickles and fresh dill create a savory sensation you’ll crave for unexpected comfort and delightful flavor combinations.
Ingredients
Main Ingredients:
- 3 cups bread flour or unbleached all-purpose flour
- 1 cup lukewarm dill pickle juice (110F)
- 1 large dill pickle, diced
Seasoning and Flavor Enhancers:
- 1 tablespoon dried dill weed
- 1/4 teaspoon salt
- 1 tablespoon + 1 teaspoon sugar, divided
Yeast and Liquid Ingredients:
- 3 teaspoons instant active dry yeast
- 1 tablespoon extra-virgin olive oil
Instructions
- Meticulously pat the dill pickle dry using paper towels to remove excess moisture, ensuring a crisp texture in the final bread.
- Activate the yeast by dissolving it in warm pickle juice, allowing the mixture to become foamy and fragrant for approximately 10 minutes.
- Combine the activated yeast with olive oil, sugar, and initial flour quantities in a large mixing bowl, creating a smooth, preliminary dough base.
- Gradually incorporate remaining flour, kneading thoroughly until the dough transforms into a cohesive, elastic consistency that springs back when touched.
- Fold the finely chopped dill pickles and dried dill weed into the dough, distributing them evenly throughout the mixture for consistent flavor.
- Transfer the prepared dough to a lightly greased bowl, covering it with a clean kitchen towel to allow for proper fermentation and rising.
- Once the dough has doubled in volume, gently deflate it and shape into a round loaf, preparing it for the final proofing stage.
- Position the shaped loaf in a preheated Dutch oven, allowing it to rise for an additional 30 minutes before baking.
- Place the covered Dutch oven in a 450°F oven, creating a steamy environment that will help develop a crisp, golden crust.
- After the initial covered baking period, remove the lid and continue baking until the bread achieves a deep golden brown color and reaches an internal temperature of 200°F.
- Remove the freshly baked loaf from the oven and allow it to cool completely on a wire rack, enabling the interior to set and develop its full flavor profile.
Notes
- Blot pickles thoroughly to prevent excess moisture from making the dough soggy and affecting bread texture.
- Pickle juice adds a tangy flavor and can replace some water, enhancing the bread’s unique taste profile.
- Experiment with different pickle varieties like garlic or spicy dill to create unique bread variations.
- Ensure yeast activation by using warm (not hot) liquid to prevent killing the live cultures.
- Prep Time: 15 minutes
- Cook Time: 1 hour 20 minutes
- Category: Snacks, Appetizer
- Method: Baking
- Cuisine: American
Nutrition
- Serving Size: 12
- Calories: 150
- Sugar: 2 g
- Sodium: 300 mg
- Fat: 3 g
- Saturated Fat: 0.5 g
- Unsaturated Fat: 2.5 g
- Trans Fat: 0 g
- Carbohydrates: 28 g
- Fiber: 1 g
- Protein: 4 g
- Cholesterol: 0 mg
Angelina Wiles
Content Editor & Culinary Enthusiast
Expertise
Food Writing and Editing, Vegetarian and Vegan Cuisine, Baking and Pastry Arts, Sustainable Cooking Practices
Education
Portland Community College
Certificate in Culinary Arts
Focus: Emphasis on sustainable cooking practices, vegetarian cuisine, and food writing.
Oregon Culinary Institute
Diploma in Baking and Pastry Arts
Focus: Specialized training in artisanal baking, pastry techniques, and dessert presentation.
Angelina’s love for cooking started with handwritten family recipes and weekend trips to farmers’ markets around Portland. She followed her passion with a Certificate in Culinary Arts from Portland Community College, then perfected her sweet side with a Diploma in Baking and Pastry Arts at Oregon Culinary Institute.
Angelina believes recipes should feel like a conversation, not a science project. She’s all about helping readers trust themselves in the kitchen with simple steps, fresh ideas, and easy twists on classic meals.
When she’s not editing recipes, she’s baking bread, sipping coffee, or getting inspired by the changing seasons.