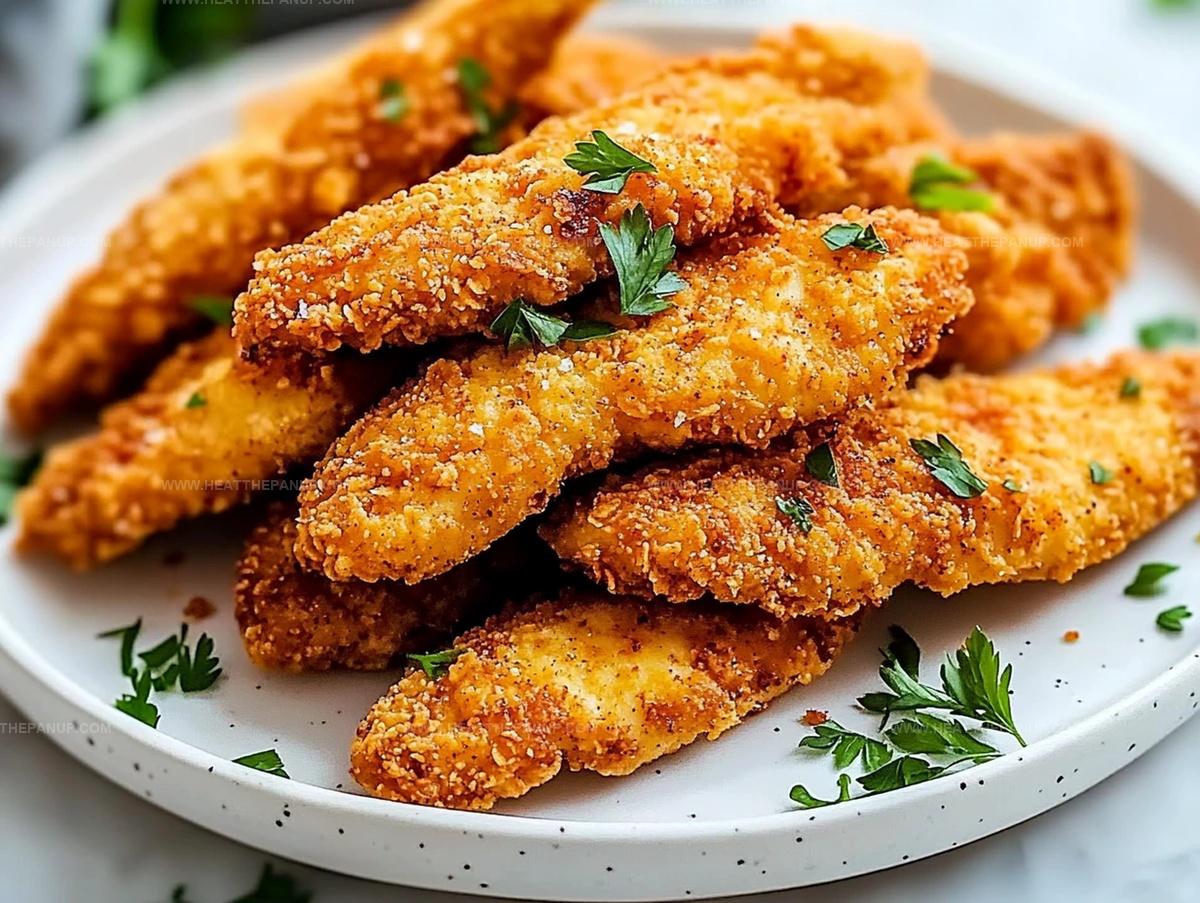
Easy Crispy Homemade Baked Chicken Tenders Recipe for Dinner
Weeknight dinners demand quick, crowd-pleasing recipes that satisfy every palate, and these crispy homemade baked chicken tenders hit the spot perfectly.
Packed with irresistible flavor and a golden-brown crunch, this dish brings restaurant-style comfort right to your kitchen.
The secret lies in a perfectly seasoned coating that transforms ordinary chicken into a crispy delight.
Each tender offers a satisfying crunch that will have everyone at the table reaching for seconds.
Lean protein meets delectable seasoning in this simple yet impressive meal that comes together in under thirty minutes.
These chicken tenders are healthier than their deep-fried counterparts, proving that nutritious can also mean delicious.
Fire up your oven and get ready to become the dinner hero your family will cheer for.
What Makes These Chicken Tenders So Crispy and Satisfying
Ingredients for Homemade Baked Chicken Strips
Main Protein:Breading Ingredients:Binding and Coating Ingredients:How to Make Crispy Chicken Tenders in the Oven
Step 1: Slice and Prepare Chicken
Start by transforming your chicken into perfect tender strips.
If you’re working with chicken breasts, slice them into neat 1-inch wide strips.
Already have chicken tenders?
You’re ready to roll!
Step 2: Create Flavor-Packed Coating Stations
Set up two shallow bowls for your breading adventure:Step 3: Season the Protein
Gently sprinkle salt and pepper over each chicken strip, giving them a flavor boost.
Step 4: Dunk and Coat Technique
Dip each chicken strip into the egg, letting excess drip away.
Roll the eggy strip through the breadcrumb mixture, pressing gently to create a perfect crunchy armor.
Want extra crunch?
Double-coat by repeating the egg and breadcrumb dance.
Step 5: Prepare Baking Surface
Line a baking sheet with parchment paper or silicone mat.
Pro tip: Use a wire rack for maximum crispiness and even cooking.
Step 6: Arrange for Perfect Baking
Place breaded tenders on the prepared surface, leaving space between each piece.
No crowding allowed!
Step 7: Bake to Golden Perfection
Crank your oven to 400°F.
Lightly mist tenders with olive oil spray for extra crunch.
Bake for 20-25 minutes, flipping midway.
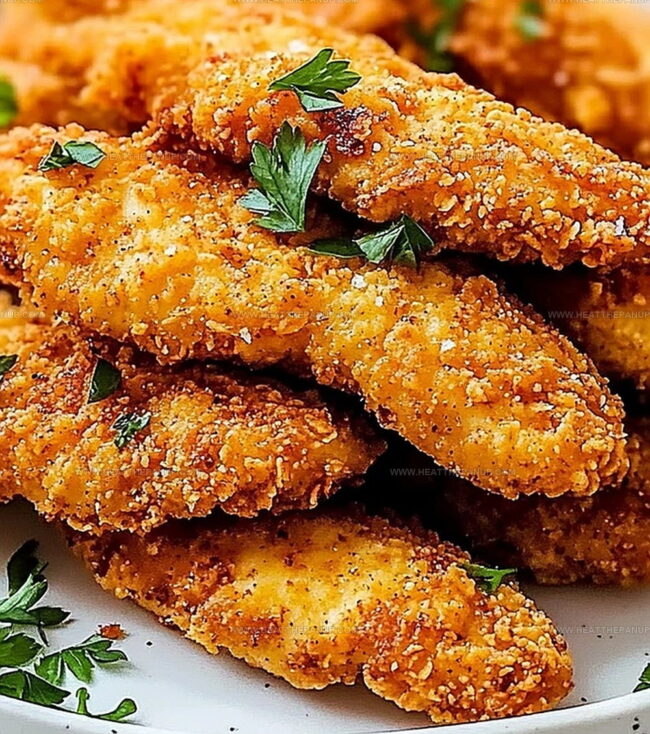
Look for that gorgeous golden-brown color.
Step 8: Temperature Check and Serve
Confirm internal chicken temperature reaches 165°F for safe eating.
Let tenders rest 2-3 minutes.
Serve alongside your favorite dipping sauces like tangy honey mustard or classic ranch.
Pro Tips for Crunchy, Golden Tenders
How to Store and Reheat Baked Chicken Strips

Sides That Pair Well With Chicken Tenders
Tasty Chicken Tender Twist Ideas
FAQs
The key is using breadcrumbs, double coating the chicken, and lightly spraying with olive oil before baking. This creates a crunchy exterior that stays crisp even after cooling.
Absolutely! Panko breadcrumbs work great for extra crunchiness, while regular breadcrumbs or gluten-free options are also perfect. Each type will give a slightly different texture to your chicken tenders.
While not mandatory, a wire rack helps air circulate around the chicken, preventing the bottom from getting soggy. If you don’t have one, simply flip the tenders halfway through baking to ensure even crispiness.
Use a meat thermometer to check that the internal temperature reaches 165°F (74°C). The chicken should also look golden brown and have a crispy exterior when properly cooked.
Print
Crispy Homemade Baked Chicken Tenders Recipe
- Total Time: 45 minutes
- Yield: 4 1x
Description
Crispy homemade baked chicken tenders deliver golden-brown perfection with minimal effort and maximum flavor. Seasoned breadcrumbs and a smart oven technique ensure juicy, crunchy results that will delight your dinner crowd.
Ingredients
Main Ingredients:
- 1 lb (454 grams) chicken breasts or chicken tenders
- 2 large eggs
- 1 cup panko breadcrumbs
- 1/2 cup grated Parmesan cheese
Seasoning Ingredients:
- 1 teaspoon garlic powder
- 1 teaspoon paprika
- 1/2 teaspoon onion powder
- 1/2 teaspoon salt
- 1/4 teaspoon black pepper
Cooking Ingredients:
- Olive oil spray
Instructions
- Transform chicken breasts into uniform strips, ensuring consistent thickness for even cooking. If using pre-cut chicken tenders, skip slicing.
- Create two separate shallow preparation bowls: one for whisked eggs and another for seasoned breadcrumb mixture.
- Blend breadcrumbs with Parmesan, garlic powder, paprika, onion powder, salt, and pepper to develop a complex flavor profile.
- Season chicken strips delicately with salt and pepper, enhancing natural meat flavors.
- Immerse each chicken strip into beaten eggs, allowing excess liquid to drip away smoothly.
- Carefully roll egg-coated strips through breadcrumb mixture, applying gentle pressure to ensure complete, even coating.
- For maximum crunchiness, execute a double-dredging technique by repeating egg and breadcrumb process.
- Prepare baking surface with parchment paper or silicone mat to prevent sticking and simplify cleanup.
- Position wire cooling rack atop baking sheet to promote optimal air circulation and achieve crispy exterior.
- Arrange breaded chicken tenders with sufficient spacing, preventing moisture accumulation and promoting uniform browning.
- Preheat oven to 400°F, creating ideal environment for golden, crisp exterior.
- Mist chicken tenders lightly with olive oil spray to enhance crispiness and color.
- Bake for 20-25 minutes, rotating midway to guarantee consistent browning and thorough cooking.
- Verify internal temperature reaches 165°F using meat thermometer to ensure food safety.
- Allow tenders to rest briefly after removing from oven, permitting juices to redistribute.
- Present warm with complementary dipping sauces like honey mustard, BBQ, or ranch for enhanced enjoyment.
Notes
- Coating Hack: Double-dipping the chicken in egg and breadcrumbs creates an ultra-crispy exterior that stays crunchy even after cooling down.
- Temperature Precision: Use a meat thermometer to guarantee chicken reaches 165°F without overcooking, ensuring juicy and safe-to-eat tenders.
- Gluten-Free Modification: Swap traditional breadcrumbs with crushed gluten-free cornflakes or almond flour for a celiac-friendly version that maintains crispy texture.
- Make-Ahead Strategy: Prepare breaded tenders ahead of time and refrigerate for up to 24 hours before baking, allowing flavors to develop and saving preparation time.
- Prep Time: 20 minutes
- Cook Time: 25 minutes
- Category: Lunch, Dinner, Snacks
- Method: Baking
- Cuisine: American
Nutrition
- Serving Size: 4
- Calories: 250
- Sugar: 1 g
- Sodium: 400 mg
- Fat: 8 g
- Saturated Fat: 2 g
- Unsaturated Fat: 6 g
- Trans Fat: 0 g
- Carbohydrates: 26 g
- Fiber: 1 g
- Protein: 22 g
- Cholesterol: 140 mg
James Hambly
Founder & Recipe Creator
Expertise
Recipe Development, Culinary Education, Farm-to-Table Cooking, Southern Cuisine
Education
Asheville-Buncombe Technical Community College
Certificate in Culinary Arts
Focus: Hands-on training in professional cooking techniques, emphasizing farm-to-table practices and Southern cuisine.
The Chef’s Academy
Associate Degree in Culinary Arts
Focus: Comprehensive culinary education covering global cuisines, kitchen management, and food safety.
James grew up surrounded by the smells of cast-iron skillets and slow-cooked Southern meals in Asheville, North Carolina.
He sharpened his skills with a Certificate in Culinary Arts from Asheville-Buncombe Technical Community College, and later leveled up with an Associate Degree from The Chef’s Academy.
James’s philosophy is simple: the best meals don’t need fancy tricks, just fresh ingredients, a hot pan, and a little bit of heart. His favorite days are spent testing one-pan wonders, chasing bold flavors, and creating recipes that feel easy, even on a busy night.