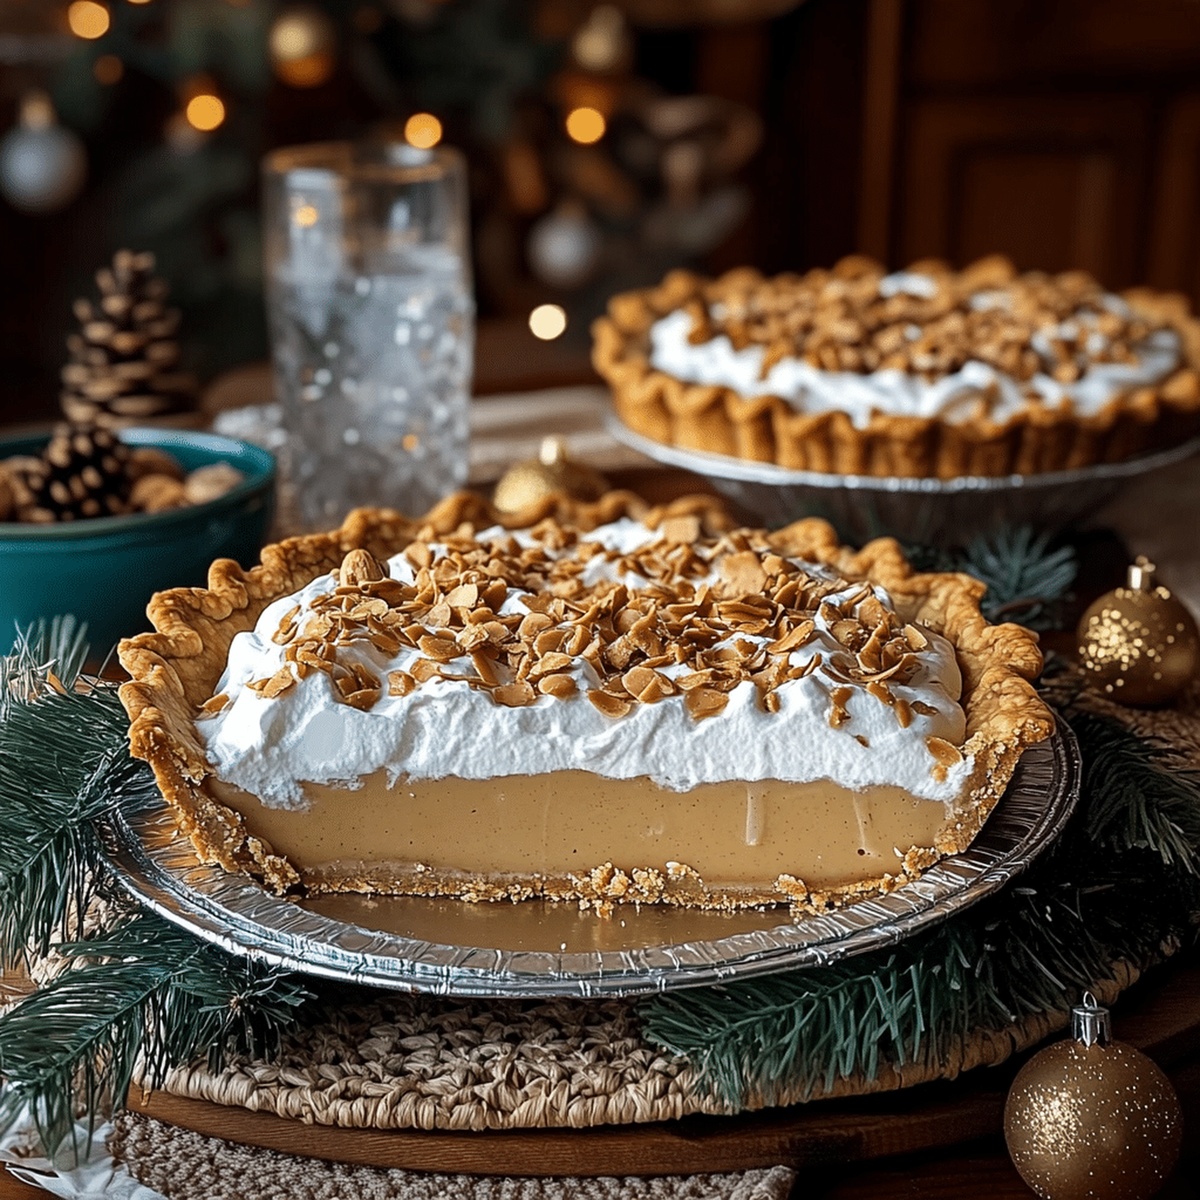
Irresistible Amish Peanut Butter Cream Pie Recipe for Bliss
Crafting a delectable amish peanut butter cream pie demands passion and precision from home bakers seeking comfort.
Creamy textures mingle with rich, nostalgic flavors passed down through generations.
Midwest kitchens whisper sweet secrets about this classic dessert that melts hearts instantly.
Regional ingredients combine to create something truly magical on your plate.
Smooth peanut butter layers promise decadent moments of pure indulgence.
Culinary traditions shine through each carefully prepared slice, connecting you to time-honored recipes.
Savor every bite and let this pie transport you to a world of delightful simplicity.
Why Amish Peanut Butter Cream Pie Is a Sweet Dream
What Goes into Amish Peanut Butter Cream Pie
For the Base:For the Filling Main Ingredients:For the Liquid Ingredients:For the Toppings:How to Make Amish Peanut Butter Cream Pie with Ease
Step 1: Craft Your Pie Base
Select a pre-baked pie crust and place it on a clean, flat surface. Ensure the crust has completely cooled to room temperature.
Step 2: Whip Cream Cheese Smooth
Use an electric mixer to beat cream cheese until it transforms into a silky, velvety texture with no lumps.
Step 3: Sweeten the Mixture
Gradually add powdered sugar to the cream cheese, blending until the mixture becomes light and airy with zero sugar crystals.
Step 4: Introduce Peanut Butter
Gently fold in creamy peanut butter, creating a uniform and luxurious base that combines all ingredients seamlessly.
Step 5: Create Liquid Blend
In a separate bowl, whisk together:Blend until the mixture becomes slightly frothy and well-integrated.
Step 6: Combine Filling Components
Slowly pour the liquid mixture into the peanut butter base, stirring continuously to prevent lumps and maintain a smooth consistency.
Step 7: Fill the Pie Crust
Transfer the combined filling into the pre-baked pie crust. Use a spatula to spread evenly and eliminate any air pockets.
Step 8: Chill and Set
Refrigerate the pie for 3-4 hours or overnight, allowing the filling to firm up and develop rich, creamy flavors.
Step 9: Add Crunchy Topping
Sprinkle chopped peanuts across the pie surface for extra texture and visual interest.
Step 10: Drizzle Chocolate Accent
Create an artistic pattern by drizzling chocolate syrup over the chilled pie.
Step 11: Finish with Whipped Cream
Pipe or spread whipped cream around the edges or on top, providing a light contrast to the dense filling.
Step 12: Serve and Enjoy
Slice the chilled pie, revealing layers of creamy, nutty, and sweet goodness. Serve immediately and savor each delectable bite.
Smart Tips for Amish Peanut Butter Cream Pie Success
Creative Spins on Amish Peanut Butter Cream Pie
Perfect Pairings for Amish Peanut Butter Cream Pie
Storing Amish Peanut Butter Cream Pie Like a Pro
Amish Peanut Butter Cream Pie FAQs Unwrapped
Yes, crunchy peanut butter works great and adds extra texture to the pie filling.
Absolutely! Use a gluten-free pie crust or graham cracker crust as an alternative to traditional crusts.
Ensure you whip the cream cheese thoroughly and chill the pie for the full recommended time to help it set properly.
While possible, full-fat ingredients provide the best texture and richness for this creamy peanut butter pie.
Print
Cloudlike Amish Peanut Butter Cream Pie Recipe
- Total Time: 3-4 hours (plus chilling time)
- Yield: 8 1x
Description
Silky Amish peanut butter cream pie whispers comfort from rural kitchens, blending creamy richness with nostalgic sweetness. Generations of family recipes converge in this delectable dessert, inviting you to savor a slice of heartwarming tradition.
Ingredients
Main Ingredients:
- 1 pre-baked 9-inch pie crust
- 1 cup creamy peanut butter
- 1 (8 oz) package cream cheese, softened
- 1 cup powdered sugar
Filling Base:
- 1 cup heavy whipping cream
- 1/2 cup whole milk
- 2 large eggs
- 1 tsp vanilla extract
Topping and Garnish:
- 1/2 cup chopped peanuts
- 1/4 cup chocolate syrup
- 1/2 cup whipped cream
Instructions
- Prepare the pre-baked pie crust by ensuring it’s completely cooled and set aside on a stable surface.
- In a large mixing bowl, whip the cream cheese until smooth and creamy, using an electric mixer at medium speed for about 2-3 minutes.
- Gradually incorporate the powdered sugar into the cream cheese, blending until the mixture becomes light and fluffy with no sugar granules remaining.
- Fold in the creamy peanut butter, stirring gently to create a uniform, velvety texture that seamlessly combines all ingredients.
- In a separate bowl, vigorously whisk the whole milk, heavy whipping cream, eggs, and vanilla extract until the mixture is well-integrated and slightly frothy.
- Carefully pour the liquid mixture into the peanut butter base, stirring continuously to prevent any lumps and ensure a silky-smooth consistency.
- Transfer the combined filling into the pre-baked pie crust, using a spatula to spread it evenly and eliminate any air pockets.
- Refrigerate the pie for at least 3-4 hours, or preferably overnight, allowing the filling to set completely and develop a rich, creamy texture.
- Before serving, generously sprinkle chopped peanuts across the surface of the chilled pie for added crunch and visual appeal.
- Drizzle chocolate syrup in an artistic pattern over the pie, creating an elegant decorative touch.
- Finish by piping or spreading whipped cream around the edges or on top of the pie, providing a light and airy contrast to the dense peanut butter filling.
- Slice and serve the pie chilled, ensuring each portion captures the perfect balance of creamy, nutty, and sweet flavors.
Notes
- Prevent pie crust sogginess by thoroughly baking and cooling it before adding the filling, ensuring a crisp base.
- Soften cream cheese at room temperature beforehand to achieve a smoother, lump-free mixture when whipping.
- Substitute peanut butter with almond or sunflower seed butter for those with nut allergies, maintaining a similar creamy texture.
- Reduce sugar content by using sugar-free powdered sweetener or a natural alternative like stevia for a more diet-friendly version.
- Prep Time: 20 minutes
- Cook Time: 0 minutes
- Category: Desserts
- Method: Chilling
- Cuisine: American
Nutrition
- Serving Size: 8
- Calories: 400
- Sugar: 20 g
- Sodium: 250 mg
- Fat: 30 g
- Saturated Fat: 10 g
- Unsaturated Fat: 15 g
- Trans Fat: 0 g
- Carbohydrates: 35 g
- Fiber: 2 g
- Protein: 8 g
- Cholesterol: 50 mg
James Hambly
Founder & Recipe Creator
Expertise
Recipe Development, Culinary Education, Farm-to-Table Cooking, Southern Cuisine
Education
Asheville-Buncombe Technical Community College
Certificate in Culinary Arts
Focus: Hands-on training in professional cooking techniques, emphasizing farm-to-table practices and Southern cuisine.
The Chef’s Academy
Associate Degree in Culinary Arts
Focus: Comprehensive culinary education covering global cuisines, kitchen management, and food safety.
James grew up surrounded by the smells of cast-iron skillets and slow-cooked Southern meals in Asheville, North Carolina.
He sharpened his skills with a Certificate in Culinary Arts from Asheville-Buncombe Technical Community College, and later leveled up with an Associate Degree from The Chef’s Academy.
James’s philosophy is simple: the best meals don’t need fancy tricks, just fresh ingredients, a hot pan, and a little bit of heart. His favorite days are spent testing one-pan wonders, chasing bold flavors, and creating recipes that feel easy, even on a busy night.