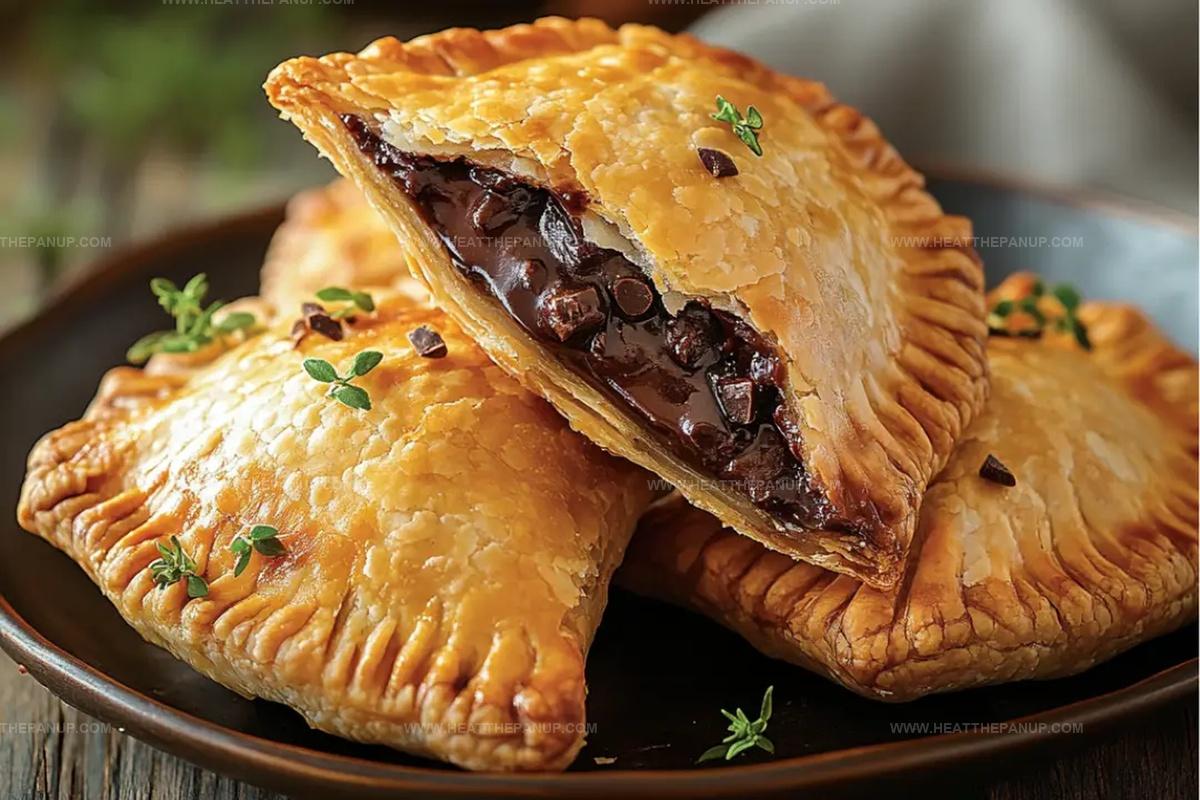
Easy Chocolate-Filled Hand Pies Recipe: Cozy Bites of Sweetness
Sweet chocolate tucked inside delicate pastry creates an irresistible hand pie experience.
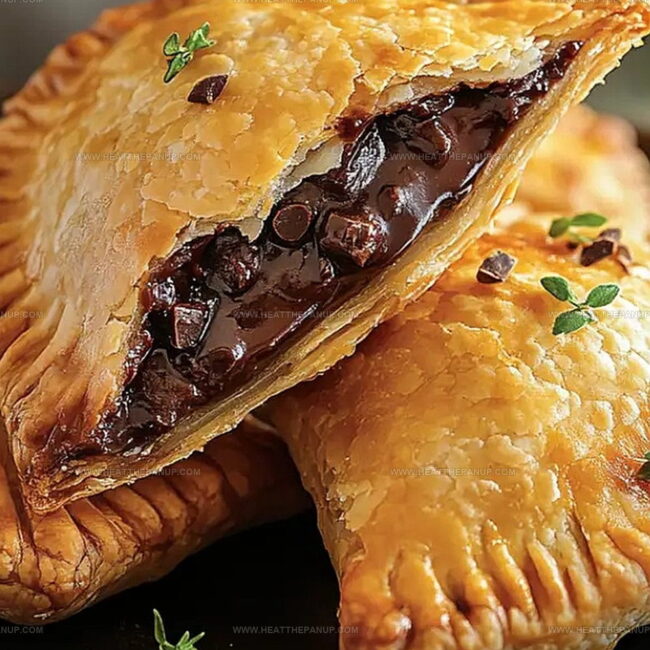
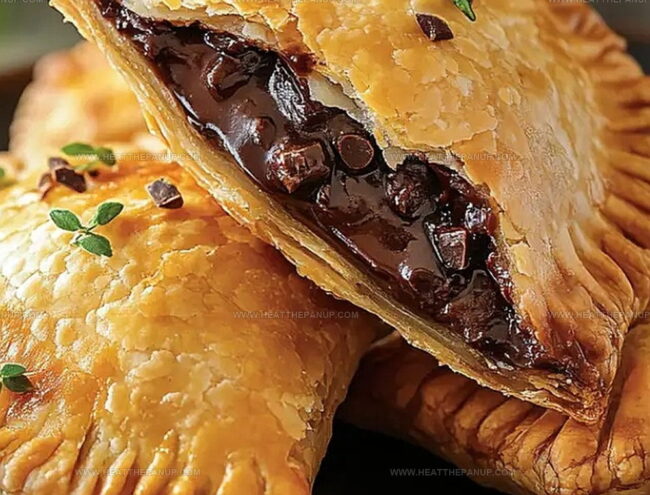
Crisp edges and rich filling promise pure deliciousness with every bite.
Tender dough wraps around smooth chocolate, creating pockets of pure joy.
Minimal ingredients blend together effortlessly for a treat that feels special yet simple.
Baking these small wonders fills your kitchen with incredible warmth and anticipation.
Each hand pie delivers a personal-sized indulgence perfect for sharing or savoring solo.
A sprinkle of powdered sugar transforms these little pastries into something magical.
One taste will convince you these chocolate-filled treasures deserve a spot in your dessert repertoire.
Chocolate Hand Pies That Are Easy and Filled to Perfection
Quick Weekend Treat: Whip up these delightful chocolate-filled hand pies with minimal effort and maximum deliciousness.
Effortless Preparation: Create these handheld desserts in under 30 minutes, perfect for spontaneous sweet cravings or last-minute gatherings.
Kid-Friendly Cooking: Engage children in the fun process of cutting pie crusts, spooning chocolate, and sealing edges – a playful baking adventure for all ages.
Portable Dessert Perfection: Enjoy mess-free, grab-and-go pastries that are ideal for picnics, school lunches, or casual dessert sharing with friends.
Ingredients Inside Chocolate-Filled Hand Pies
Pie Crusts:Chocolate Filling:Egg Wash and Finishing:Chocolate Hand Pie Filling and Baking Guide
Step 1: Fire Up the Oven
Crank your oven to a toasty 375°F (190°C).
Grab a baking sheet and drape it with parchment paper for a non-stick surface.
Step 2: Roll and Shape the Dough
Dust your work surface with a light flour sprinkle.
Gently roll out pie crusts and transform them into perfectly shaped circles or rectangles.
Use a cookie cutter or sharp knife to create uniform pastry canvases.
Step 3: Whip Up Chocolate Magic
Grab a small saucepan and create a silky chocolate mixture:Melt these ingredients over low heat, stirring until they become a smooth, glossy pool of deliciousness.
Let the mixture cool and slightly thicken.
Step 4: Build Your Flavor Pockets
Dollop a small amount of the chocolate mixture onto the center of half your pastry shapes.
Leave a tiny border around the edges to prevent spillage.
Step 5: Seal the Delectable Treasures
Crown each chocolate-filled pastry with a matching dough top.
Gently press the edges together.
Use fork tines to create a beautiful crimped border that locks in all the chocolatey goodness.
Step 6: Create a Golden Glaze
Whisk together:Lovingly brush this mixture over the tops of your pastry parcels for a stunning golden finish.
Step 7: Bake to Perfection
Slide the baking sheet into the oven.
Bake for 15-18 minutes until the pastries turn a gorgeous golden brown and develop a beautifully flaky texture.
Step 8: Serve and Indulge
Allow the pastry parcels to cool briefly.
For an extra touch of decadence, sprinkle a few chocolate chips on top while they’re still warm, creating irresistible melty pockets of joy.
Hand Pie Tricks for Melty Chocolate Centers
Reheat Chocolate-Filled Hand Pies
Chocolate-Filled Hand Pies Pairings
French Toast Roll-Ups with Cinnamon Swirls
FAQs
Make sure to leave a small border around the edges when adding the filling and seal the pie edges firmly with a fork. Avoid overfilling the hand pies, which can cause leakage during baking.
Absolutely! You can experiment with milk chocolate, dark chocolate, or even white chocolate. Just ensure you use good-quality chocolate chips that melt smoothly.
The egg wash helps create a beautiful golden-brown color and gives the hand pies a shiny, professional finish. If you don’t have eggs, you can brush the pies with milk as an alternative.
Look for a golden-brown color on the crust and a flaky texture. The edges should be crisp and slightly darker than the center. Typically, 15-18 minutes at 375°F (190°C) will give you perfect results.
Print
Chocolate-Filled Hand Pies Recipe
- Total Time: 30 minutes
- Yield: 8 1x
Description
Sweet pastry crescents packed with rich chocolate promise a delightful journey through French bakery traditions. Small hand pies deliver pure comfort and indulgence that will melt hearts faster than their delicate golden crusts.
Ingredients
Chocolate Filling:
- 1 cup chocolate chips (semi-sweet or milk chocolate)
- 1/4 cup heavy cream
Pie Dough:
- 1 package pre-made pie crusts (or homemade pie dough)
Egg Wash and Optional Topping:
- 1 egg
- 1 tablespoon water
- Optional: additional chocolate chips for topping
Instructions
- Transform the kitchen workspace by aligning the oven rack and preheating to 375°F (190°C), while simultaneously preparing a parchment-lined baking sheet for optimal pastry performance.
- Delicately unfurl pie crusts across a flour-dusted surface, wielding a precise cutting tool to craft uniform geometric shapes that will cradle the decadent chocolate interior.
- Craft a silky chocolate filling by gently melting chocolate chips into heavy cream, stirring with meditative patience until the mixture achieves a luxurious, glossy consistency. Allow the molten mixture to rest and slightly thicken.
- Strategically deposit dollops of the rich chocolate mixture onto the center of each pastry base, maintaining a careful perimeter to prevent leakage during the sealing process.
- Crown each chocolate-laden pastry base with its corresponding crust companion, employing gentle finger pressure to fuse the edges. Enhance the seal by pressing fork tines around the perimeter, creating an intricate crimped border.
- Whisk egg with water to generate a luminous wash, then tenderly brush the pie surfaces to promote a golden, glossy exterior during baking.
- Transfer the assembled hand pies onto the prepared baking sheet, allowing them to transform in the heated oven for 15-18 minutes until achieving a burnished, flaky perfection.
- Permit the hand pies a momentary cooling interlude, then serve while still warm. For an indulgent finale, scatter additional chocolate chips atop the pies, allowing them to melt seductively.
Notes
- Chill the pie dough before rolling to prevent shrinkage and create flakier crusts that hold their shape better during baking.
- Control chocolate filling temperature carefully to avoid leaking; let it cool until slightly thickened but still spreadable for easier sealing.
- Create perfect seals by crimping edges with fork tines and ensuring no filling touches the border to prevent separation during baking.
- Experiment with alternative fillings like dark chocolate, white chocolate, or add nuts for extra texture and flavor complexity in your hand pies.
- Prep Time: 15 minutes
- Cook Time: 15 minutes
- Category: Desserts, Snacks
- Method: Baking
- Cuisine: American
Nutrition
- Serving Size: 8
- Calories: 300
- Sugar: 10 g
- Sodium: 150 mg
- Fat: 18 g
- Saturated Fat: 10 g
- Unsaturated Fat: 8 g
- Trans Fat: 0 g
- Carbohydrates: 30 g
- Fiber: 1 g
- Protein: 3 g
- Cholesterol: 20 mg
Angelina Wiles
Content Editor & Culinary Enthusiast
Expertise
Food Writing and Editing, Vegetarian and Vegan Cuisine, Baking and Pastry Arts, Sustainable Cooking Practices
Education
Portland Community College
Certificate in Culinary Arts
Focus: Emphasis on sustainable cooking practices, vegetarian cuisine, and food writing.
Oregon Culinary Institute
Diploma in Baking and Pastry Arts
Focus: Specialized training in artisanal baking, pastry techniques, and dessert presentation.
Angelina’s love for cooking started with handwritten family recipes and weekend trips to farmers’ markets around Portland. She followed her passion with a Certificate in Culinary Arts from Portland Community College, then perfected her sweet side with a Diploma in Baking and Pastry Arts at Oregon Culinary Institute.
Angelina believes recipes should feel like a conversation, not a science project. She’s all about helping readers trust themselves in the kitchen with simple steps, fresh ideas, and easy twists on classic meals.
When she’s not editing recipes, she’s baking bread, sipping coffee, or getting inspired by the changing seasons.