Irresistible Chocolate Oreo Hand Pies Recipe: Sweet Pocket Treats
Sweet memories often collide with my grandma’s legendary chocolate oreo hand pies that used to make Sunday afternoons magical.
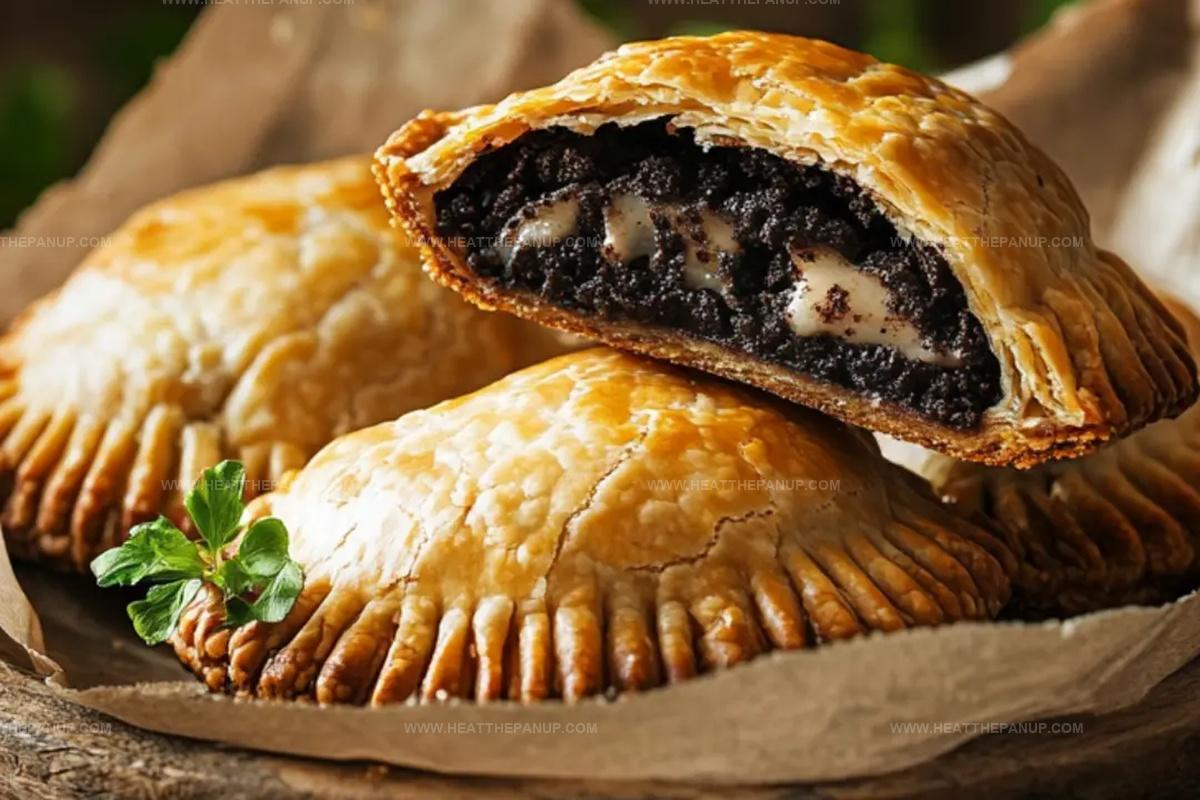
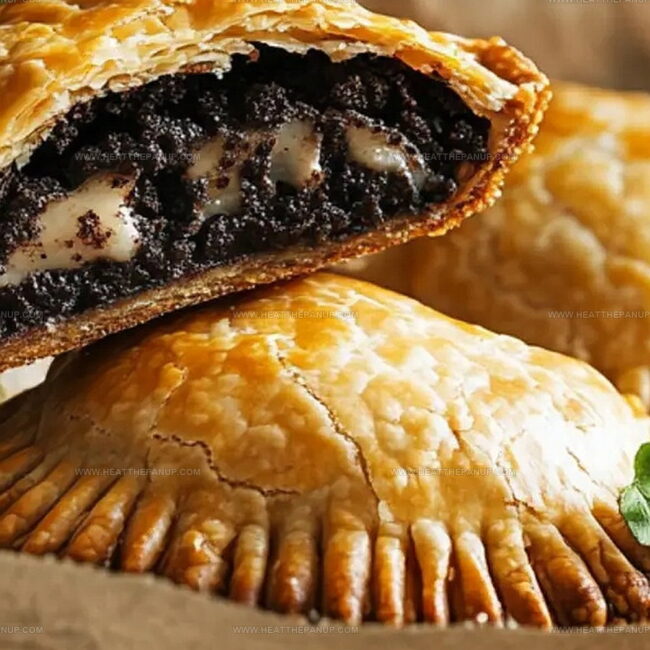
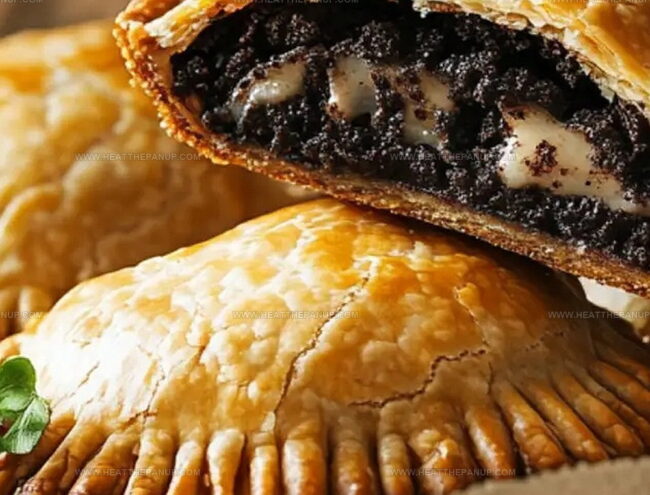
Crisp pastry edges promise delightful surprises waiting inside these handheld treats.
Nostalgic flavors meld perfectly between buttery layers of homemade dough.
Small pockets of rich chocolate and crushed cookies create irresistible bites that tempt even the most disciplined dessert lover.
Compact and portable, these miniature delights work wonderfully for picnics, potlucks, or quiet moments of indulgence.
Simple ingredients come together quickly, making this recipe accessible for bakers of all skill levels.
Each bite promises a delectable journey through comfort and creativity that you won’t want to miss.
Oreo Hand Pies With a Chocolatey Crunch
Whip Up Quick Treats: Perfect for spontaneous dessert cravings with minimal prep time and ingredients you likely have in your kitchen.
Crowd-Pleasing Delight: Kids and adults will absolutely love these handheld pies packed with rich Oreo and chocolate flavors, making them ideal for family gatherings, parties, or after-school snacks.
Super Simple Technique: No advanced baking skills required – even novice cooks can create these hand pies with basic kitchen tools and straightforward steps that take less than 30 minutes from start to finish.
Versatile Dessert Option: Easily customize by swapping Oreos for different cookie types, adding different chocolate spreads, or adjusting sweetness levels to match personal preferences and dietary needs.
Chocolate Oreo Hand Pies Ingredients Inside
Main Base Ingredients:Binding and Finishing Ingredients:Preparation Support Ingredients:Oreo Hand Pie Instructions with Chocolate Filling
Step 1: Prepare Your Baking Space
Warm up your oven to 375°F.
Cover a baking sheet with parchment paper to prevent sticking and ensure easy cleanup.
Step 2: Create Dreamy Oreo Filling
Crush Oreo cookies into fine crumbs.
Mix the crumbs thoroughly with softened cream cheese until you get a smooth, rich mixture that holds together perfectly.
Step 3: Shape the Pie Shells
Dust your work surface with a light layer of flour.
Roll out pie crusts gently.
Use a round cookie cutter or a glass to cut perfect circles about 4 inches wide.
Step 4: Load Up with Delicious Filling
Place your filling in the center of each dough circle:Step 5: Seal the Delightful Pockets
Fold the dough over the filling, creating cute half-moon shapes.
Use a fork to crimp and seal the edges, ensuring no filling escapes during baking.
Step 6: Add a Golden Glow
Whisk together egg and milk to create a beautiful egg wash.
Gently brush the surface of each hand pie, giving them a gorgeous golden color.
Step 7: Add Extra Sparkle
Sprinkle a light dusting of sugar on top for a crispy, sweet finish.
Step 8: Bake to Perfection
Slide the hand pies into the oven.
Bake for 15-18 minutes until they turn a beautiful golden brown color.
Step 9: Serve and Devour
Let the pies cool slightly.
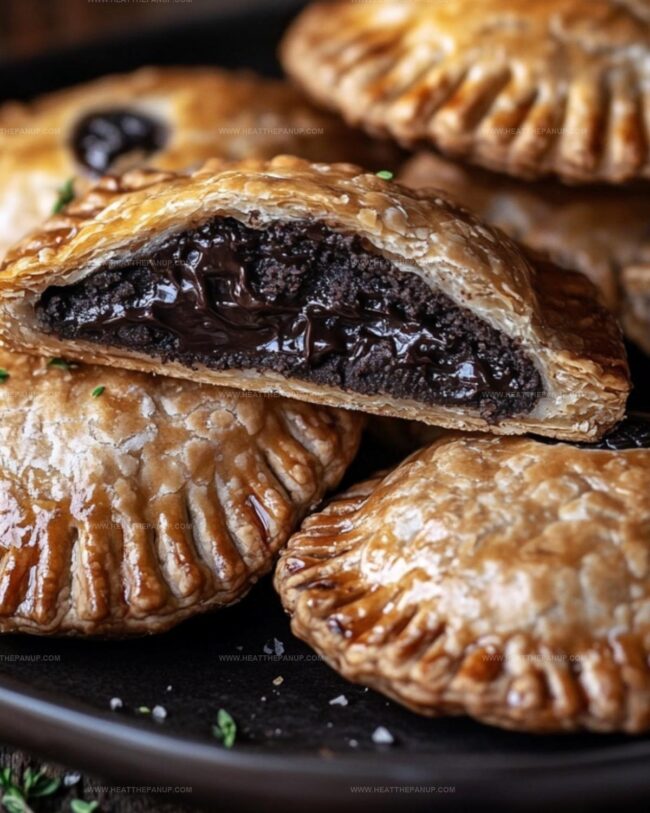
Serve warm and watch the chocolate ooze out with each delicious bite.
Enjoy immediately for maximum deliciousness!
Hand Pie Tips for an Oreo Chocolate Pocket Treat
Reheat Chocolate Oreo Hand Pies
Chocolate Oreo Hand Pies Treat Matches
Oreo Hand Pies with Chocolate Spins
FAQs
Yes, you can experiment with flavors like mint, peanut butter, or birthday cake Oreos to create unique hand pies. Just make sure to crush them finely for the best texture.
Seal the edges firmly with a fork and avoid overfilling. Make sure there are no gaps when crimping the edges to keep the filling inside during baking.
Absolutely! You can prepare the hand pies and refrigerate them for up to 24 hours before baking. Just brush with egg wash and bake when ready to serve.
Yes, you can freeze uncooked hand pies. Place them on a baking sheet, freeze until solid, then transfer to a freezer bag. Bake directly from frozen, adding a few extra minutes to the cooking time.
Print
Chocolate Oreo Hand Pies Recipe
- Total Time: 30 minutes
- Yield: 8 1x
Description
Chocolate oreo hand pies deliver delightful pocket-sized indulgence straight from dessert heaven. Sweet chocolate pastry encases creamy oreo filling, creating perfect handheld treats that melt in your mouth with irresistible charm.
Ingredients
Main Ingredients:
- 1 package Oreo cookies
- 4 ounces (113 grams) cream cheese
- 1 cup (170 grams) chocolate chips or chocolate spread
- 1 package refrigerated pie crusts or homemade pie dough
Binding and Finishing Ingredients:
- 1 egg
- 1 tablespoon milk
Optional Topping:
- 1 tablespoon sugar
Instructions
- Prepare the oven environment by heating to 375°F (190°C) and covering a baking sheet with parchment paper for optimal baking conditions.
- Pulverize Oreo cookies into fine crumbs and integrate with cream cheese, kneading until the mixture transforms into a cohesive, moldable texture.
- Gently unroll pie crusts on a flour-dusted surface, utilizing a circular cutter or drinking glass to craft precise dough rounds approximately 4 inches wide.
- Carefully position a generous dollop of Oreo-cream cheese mixture at the center of each dough circle, strategically adding chocolate chips or rich chocolate spread for intensified flavor complexity.
- Delicately fold the dough halves together, creating elegant half-moon shaped pockets, then meticulously crimp edges using fork tines to ensure complete sealing.
- Whisk egg and milk together to craft a luminous egg wash, then delicately brush the surface of each hand pie to encourage a beautiful golden-brown exterior.
- Scatter a light sprinkle of granulated sugar across the pies for an additional layer of caramelized sweetness and textural intrigue.
- Transfer pies to the preheated oven, allowing them to bake for 15-18 minutes until they achieve a rich, amber-toned appearance.
- Remove from oven and permit brief cooling, then serve while chocolate remains luxuriously molten and decadent.
Notes
- Perfectly seal the edges by crimping with a fork to prevent filling from leaking during baking.
- Create gluten-free version by substituting regular pie crust with almond flour or gluten-free pastry dough.
- Prevent soggy bottoms by placing hand pies on a preheated baking sheet and ensuring a crisp, golden crust.
- Experiment with different chocolate variations like dark, milk, or white chocolate to customize flavor profiles.
- Prep Time: 15 minutes
- Cook Time: 15 minutes
- Category: Desserts, Snacks
- Method: Baking
- Cuisine: American
Nutrition
- Serving Size: 8
- Calories: 290
- Sugar: 14g
- Sodium: 200mg
- Fat: 15g
- Saturated Fat: 8g
- Unsaturated Fat: 6g
- Trans Fat: 0g
- Carbohydrates: 36g
- Fiber: 1g
- Protein: 3g
- Cholesterol: 20mg
Angelina Wiles
Content Editor & Culinary Enthusiast
Expertise
Food Writing and Editing, Vegetarian and Vegan Cuisine, Baking and Pastry Arts, Sustainable Cooking Practices
Education
Portland Community College
Certificate in Culinary Arts
Focus: Emphasis on sustainable cooking practices, vegetarian cuisine, and food writing.
Oregon Culinary Institute
Diploma in Baking and Pastry Arts
Focus: Specialized training in artisanal baking, pastry techniques, and dessert presentation.
Angelina’s love for cooking started with handwritten family recipes and weekend trips to farmers’ markets around Portland. She followed her passion with a Certificate in Culinary Arts from Portland Community College, then perfected her sweet side with a Diploma in Baking and Pastry Arts at Oregon Culinary Institute.
Angelina believes recipes should feel like a conversation, not a science project. She’s all about helping readers trust themselves in the kitchen with simple steps, fresh ideas, and easy twists on classic meals.
When she’s not editing recipes, she’s baking bread, sipping coffee, or getting inspired by the changing seasons.