
Easy Chocolate Lava Brownie Cookies Recipe: Gooey Baking Magic
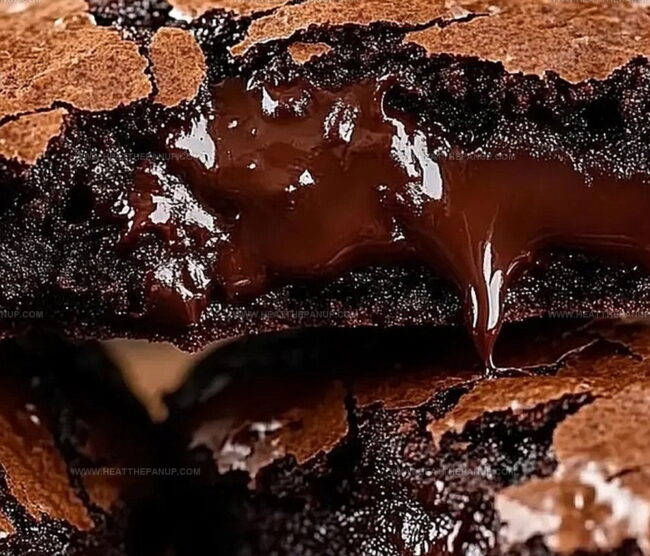
Decadent chocolate lava brownie cookies melt hearts with their gooey, rich centers.
Warm from the oven, these treats promise pure indulgence.
Soft chocolate edges give way to an irresistible molten core that oozes with each bite.
Chocolate lovers will swoon over this simple yet sophisticated dessert.
The combination of brownie texture and lava-like filling creates a dessert that feels both familiar and exciting.
One taste transports you to a world of pure chocolate bliss.
Prepare to be enchanted by these irresistible cookies that redefine dessert expectations.
Why Chocolate Lava Cookies Are So Satisfying
Ingredients for Chocolate Lava Brownie Cookies
Main Ingredients:Dry Ingredients:Sweeteners and Flavor Enhancers:How to Bake Lava-Filled Cookies Easily
Step 1: Warm Up the Oven
Set your oven to a toasty 350°F.
This will create the perfect environment for your decadent chocolate treats.
Step 2: Create Chocolate Magic
In a microwave-safe bowl, combine:Gently melt these together, stirring until smooth and glossy.
Allow the mixture to cool down slightly so it won’t cook the eggs.
Step 3: Blend Sweet Ingredients
Whisk together in a separate bowl:Stir this sweet mixture into the melted chocolate until fully incorporated.
Step 4: Combine Dry Ingredients
Sift together:Gently fold these dry ingredients into the chocolate mixture until just combined.
Step 5: Chill and Prepare
Place the dough in the refrigerator for 15 minutes.
This helps the dough become easier to handle and prevents spreading during baking.
Step 6: Shape Chocolate Treasures
Roll the chilled dough into balls.
Press a few extra chocolate chips into the center of each ball for a surprise molten center.
Step 7: Bake to Perfection
Arrange cookie dough balls on a baking sheet.
Bake for 10-12 minutes until the tops look shiny and develop beautiful cracks.
Step 8: Cool and Enjoy
Let the cookies rest on the baking sheet for 5 minutes.
Transfer to a wire rack to cool completely.
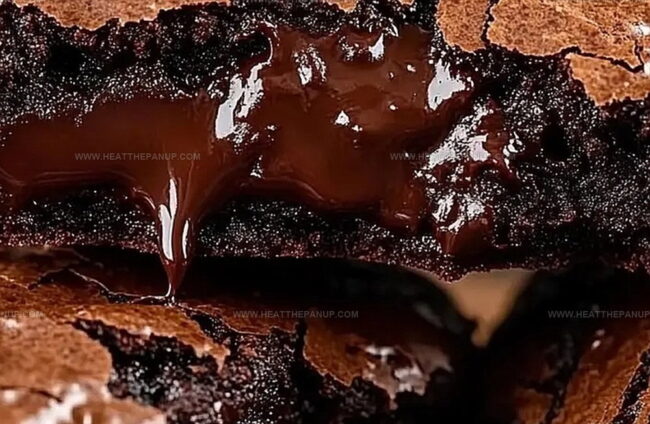
The centers will remain wonderfully gooey and rich.
Tips to Nail That Molten Chocolate Center
Storing and Reheating Lava Cookies Right
What Goes With Lava Brownie Cookies
Flavor Options for Chocolate Lava Cookies
FAQs
Yes, these chocolate lava brownie cookies are packed with intense chocolate flavor from melted chocolate chips and cocoa powder, creating a rich and decadent dessert that will satisfy serious chocolate cravings.
When baking, the extra chocolate chips inserted in the center of each cookie melt during cooking, creating a gooey, molten chocolate center that oozes out when you bite into the cookie.
You can prepare the cookie dough in advance and chill it in the refrigerator for up to 24 hours before baking. This can actually help develop deeper flavors and make the dough easier to handle.
No special equipment is needed. You’ll just require basic baking tools like a mixing bowl, whisk, baking sheet, and wire cooling rack to create these delicious chocolate lava brownie cookies.
Print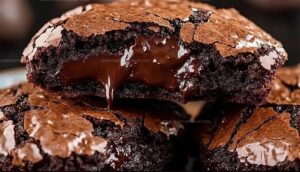
Chocolate Lava Brownie Cookies Recipe
- Total Time: 40 minutes
- Yield: 12 1x
Description
Chocolate lava brownie cookies melt hearts with their gooey, indulgent centers and rich cocoa depth. Warm, fudgy centers ooze with intense chocolate passion, inviting you to savor each irresistible, decadent bite.
Ingredients
Main Ingredients:
- 12 ounces (340 grams) semi-sweet chocolate chips
- 2 large eggs
- 1 cup (120 grams) all-purpose flour
Sugars and Fats:
- 1/2 cup (113 grams) unsalted butter
- 1/2 cup (100 grams) granulated sugar
- 1/2 cup (100 grams) brown sugar, packed
Flavor Enhancers and Binding Ingredients:
- 1 teaspoon vanilla extract
- 1/4 cup (25 grams) cocoa powder
- 1 teaspoon baking powder
- 1/2 teaspoon salt
- Additional chocolate chips for filling
Instructions
- Warm the oven to a moderate temperature, preparing a baking surface with parchment paper or a silicone mat.
- Create a decadent base by gently melting chocolate and butter together, allowing the mixture to cool until slightly tepid.
- In a separate vessel, vigorously combine granulated and brown sugars with eggs and vanilla extract, blending until smooth and homogeneous.
- Carefully integrate the melted chocolate mixture into the sugar mixture, stirring with deliberate, gentle motions.
- Delicately sift dry ingredients – flour, cocoa powder, baking powder, and salt – into the wet components, folding with minimal disruption to maintain a light texture.
- Refrigerate the dough for a brief period to enhance structural integrity and ease of handling.
- Craft uniform dough spheres, strategically embedding additional chocolate chips into the center of each cookie for surprise molten pockets.
- Arrange cookies on the prepared baking sheet, maintaining adequate spacing for potential spread.
- Bake until the cookie surfaces develop a glossy, crackled appearance, indicating perfect doneness.
- Allow cookies to rest on the baking sheet momentarily to set, then transfer to a cooling rack for complete temperature reduction.
- Serve and enjoy the luxurious contrast between crisp exterior and gooey chocolate center.
Notes
- Chill the dough to prevent spreading and create a denser, chewier texture during baking.
- Insert extra chocolate chips in the center for a gooey, molten chocolate surprise when biting into the cookie.
- Use high-quality dark chocolate for a richer, more intense chocolate flavor that elevates the entire dessert.
- For a gluten-free version, substitute all-purpose flour with almond flour or a gluten-free baking blend to accommodate dietary restrictions.
- Prep Time: 25 minutes
- Cook Time: 15 minutes
- Category: Desserts, Snacks
- Method: Baking
- Cuisine: American
Nutrition
- Serving Size: 12
- Calories: 250
- Sugar: 18 g
- Sodium: 150 mg
- Fat: 14 g
- Saturated Fat: 8 g
- Unsaturated Fat: 6 g
- Trans Fat: 0 g
- Carbohydrates: 30 g
- Fiber: 1 g
- Protein: 3 g
- Cholesterol: 40 mg
James Hambly
Founder & Recipe Creator
Expertise
Recipe Development, Culinary Education, Farm-to-Table Cooking, Southern Cuisine
Education
Asheville-Buncombe Technical Community College
Certificate in Culinary Arts
Focus: Hands-on training in professional cooking techniques, emphasizing farm-to-table practices and Southern cuisine.
The Chef’s Academy
Associate Degree in Culinary Arts
Focus: Comprehensive culinary education covering global cuisines, kitchen management, and food safety.
James grew up surrounded by the smells of cast-iron skillets and slow-cooked Southern meals in Asheville, North Carolina.
He sharpened his skills with a Certificate in Culinary Arts from Asheville-Buncombe Technical Community College, and later leveled up with an Associate Degree from The Chef’s Academy.
James’s philosophy is simple: the best meals don’t need fancy tricks, just fresh ingredients, a hot pan, and a little bit of heart. His favorite days are spent testing one-pan wonders, chasing bold flavors, and creating recipes that feel easy, even on a busy night.