
Dreamy Chocolate Chip Cannoli Cones Recipe: Homemade Bliss
Crafting delectable chocolate chip cannoli cones sparks pure culinary joy in my kitchen.
Sweet memories of sicily dance through each crispy, creamy bite.
Pastry shells become magical vessels for ricotta’s smooth embrace.
Delicate chocolate chips sprinkle unexpected delight across traditional dessert boundaries.
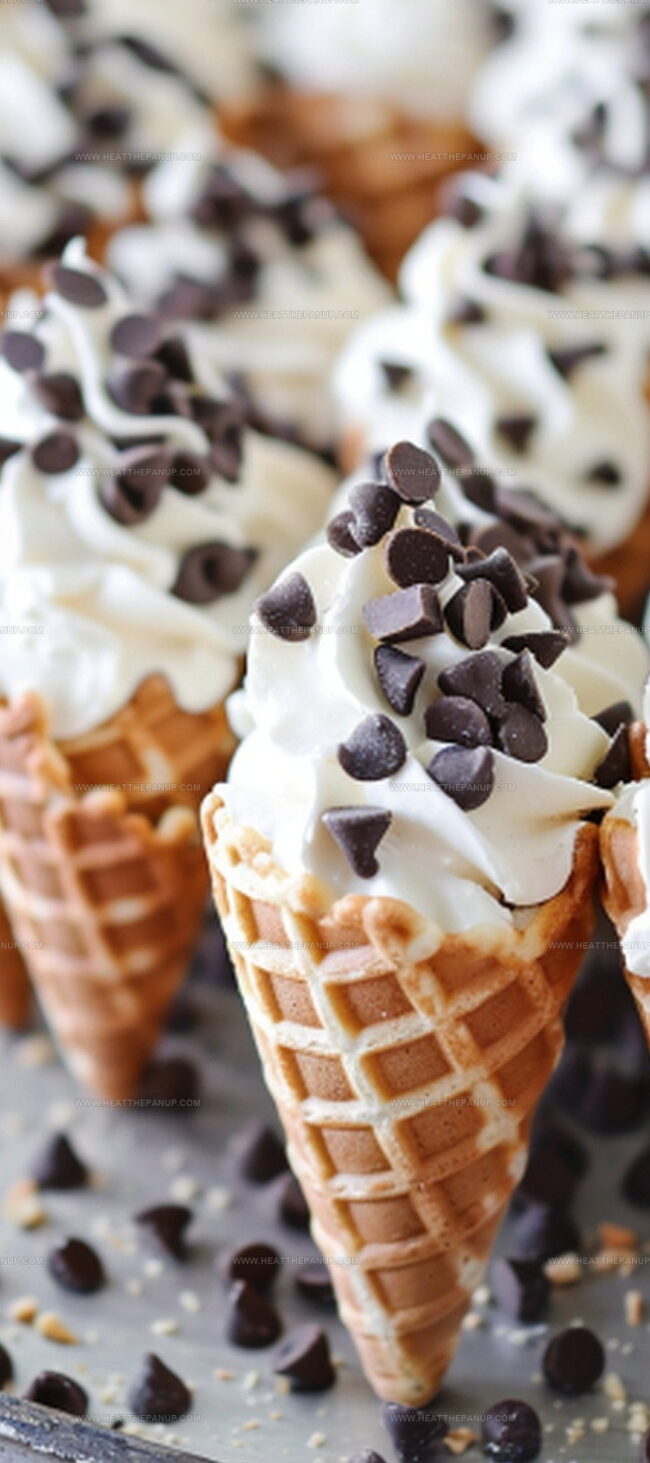
Crisp waffle cones provide a playful twist on classic Italian traditions.
Summer afternoons feel instantly brighter with these handheld treats.
Cannoli Cones Filled with Fun and Flavor
Chocolate Chip Cannoli Cones Ingredient Breakdown
Main Ingredients:
Cheese Base:Cone Elements:Garnish and Decoration:Chocolate Chip Cannoli Cones – Assembly

Step 1: Whip Up Creamy Cannoli Filling
In a mixing bowl, blend ricotta and mascarpone cheeses until they become silky smooth. Sprinkle in powdered sugar and vanilla extract, stirring until the mixture transforms into a luxurious cream. Gently fold in mini chocolate chips, creating delightful bursts of chocolatey goodness throughout the filling.
Step 2: Fill Waffle Cones with Decadent Cream
Transfer the luscious cannoli mixture into a piping bag fitted with a large round tip. Carefully pipe the filling into crisp waffle cones, starting from the bottom and gradually working upward. Ensure each cone is generously filled with the rich, creamy mixture.
Step 3: Create Chocolate-Dipped Pistachio Edges
Melt additional mini chocolate chips in a microwave-safe bowl, stirring every 30 seconds until perfectly smooth and glossy. Dip the rim of each filled cone into the melted chocolate, creating a delectable chocolate border. Immediately roll the chocolate-coated edges in crushed pistachios for a crunchy, nutty finish. Allow the chocolate to set completely.
Step 4: Finish and Serve with Flair
Artfully arrange the completed chocolate chip cannoli cones on a beautiful serving platter. For an extra touch of elegance, dust the cones with a light snowfall of powdered sugar. These divine treats are now ready to delight and impress your guests with their irresistible combination of creamy, crunchy, and chocolatey elements.
What Helps with Cannoli Cookie Cones
Cannoli Cones With Chocolate Chips: Save Them Crisp
Cannoli Cones Best Matches
Chocolate Chip Cannoli Cones: Sweet Style Ideas
FAQs
Refrigerate the filled cones just before serving and use thick, well-drained ricotta cheese to maintain the cone’s crispness.
Yes, prepare the filling up to 24 hours in advance and store it in an airtight container in the refrigerator until ready to pipe into the cones.
Use a piping bag with a large round tip and start filling from the bottom of the cone, rotating slowly to ensure even distribution and prevent air pockets.
Ensure the melted chocolate is smooth and not too hot, and gently dip the cone at a 45-degree angle for an even, clean chocolate coating.
Print
Chocolate Chip Cannoli Cones Recipe
- Total Time: 40 minutes
- Yield: 12 1x
Description
Crispy cannoli cones meet classic chocolate chip magic in this delightful Italian-inspired dessert. Sweet ricotta filling nestled in homemade waffle cones creates a perfect balance of crunch and creamy indulgence you’ll crave again and again.
Ingredients
Chocolate Chip Cannoli Cones Ingredients:
Main Ingredients:
- 1 cup (237 milliliters) ricotta cheese
- 1/2 cup (113 grams) mascarpone cheese
- 12 waffle cones
Filling Ingredients:
- 1/2 cup (57 grams) powdered sugar
- 1 teaspoon (5 milliliters) vanilla extract
- 1/2 cup (85 grams) mini chocolate chips
- Optional: powdered sugar for dusting
Topping Ingredients:
- 1/2 cup (64 grams) crushed pistachios
- 1/2 cup (85 grams) mini chocolate chips (for dipping)
Instructions
- Craft a velvety filling by whisking ricotta and mascarpone cheese until silky smooth, incorporating powdered sugar and vanilla extract to create a luxurious base.
- Gently fold mini chocolate chips into the creamy mixture, ensuring even distribution for bursts of chocolatey goodness throughout the filling.
- Transfer the decadent mixture into a piping bag fitted with a large round tip, preparing for precise cone filling.
- Carefully pipe the filling into waffle cones, starting from the bottom and methodically working upward to achieve a full, even distribution.
- Melt additional mini chocolate chips in short microwave intervals, stirring between each to prevent scorching and create a glossy chocolate coating.
- Dip the rim of each filled cone into the warm melted chocolate, allowing excess to drip off before rolling in crushed pistachios for a crunchy, nutty exterior.
- Allow the chocolate to set and stabilize at room temperature, creating a delicate seal and textural contrast.
- For a final elegant touch, lightly dust the prepared cannoli cones with a delicate sprinkle of powdered sugar, enhancing both visual appeal and subtle sweetness.
Notes
- Swap ricotta for Greek yogurt to reduce fat content and add protein, making the dessert healthier without compromising taste.
- Use dark chocolate chips for a more intense flavor and potential antioxidant benefits, creating a sophisticated twist on the classic recipe.
- Toast pistachios before crushing to enhance their nutty flavor and add a delightful crunch to the cone’s exterior.
- Prepare filling ahead of time and refrigerate for at least an hour to allow flavors to meld and achieve a more pronounced taste profile.
- Prep Time: 30 minutes
- Cook Time: 10 minutes
- Category: Desserts, Snacks
- Method: None
- Cuisine: Italian
Nutrition
- Serving Size: 12
- Calories: 200
- Sugar: 12 g
- Sodium: 75 mg
- Fat: 9 g
- Saturated Fat: 5 g
- Unsaturated Fat: 3 g
- Trans Fat: 0 g
- Carbohydrates: 28 g
- Fiber: 1 g
- Protein: 4 g
- Cholesterol: 20 mg
James Hambly
Founder & Recipe Creator
Expertise
Recipe Development, Culinary Education, Farm-to-Table Cooking, Southern Cuisine
Education
Asheville-Buncombe Technical Community College
Certificate in Culinary Arts
Focus: Hands-on training in professional cooking techniques, emphasizing farm-to-table practices and Southern cuisine.
The Chef’s Academy
Associate Degree in Culinary Arts
Focus: Comprehensive culinary education covering global cuisines, kitchen management, and food safety.
James grew up surrounded by the smells of cast-iron skillets and slow-cooked Southern meals in Asheville, North Carolina.
He sharpened his skills with a Certificate in Culinary Arts from Asheville-Buncombe Technical Community College, and later leveled up with an Associate Degree from The Chef’s Academy.
James’s philosophy is simple: the best meals don’t need fancy tricks, just fresh ingredients, a hot pan, and a little bit of heart. His favorite days are spent testing one-pan wonders, chasing bold flavors, and creating recipes that feel easy, even on a busy night.