
The Crispy Chi-Chis Baked Chicken Chimichangas Recipe You’ll Love
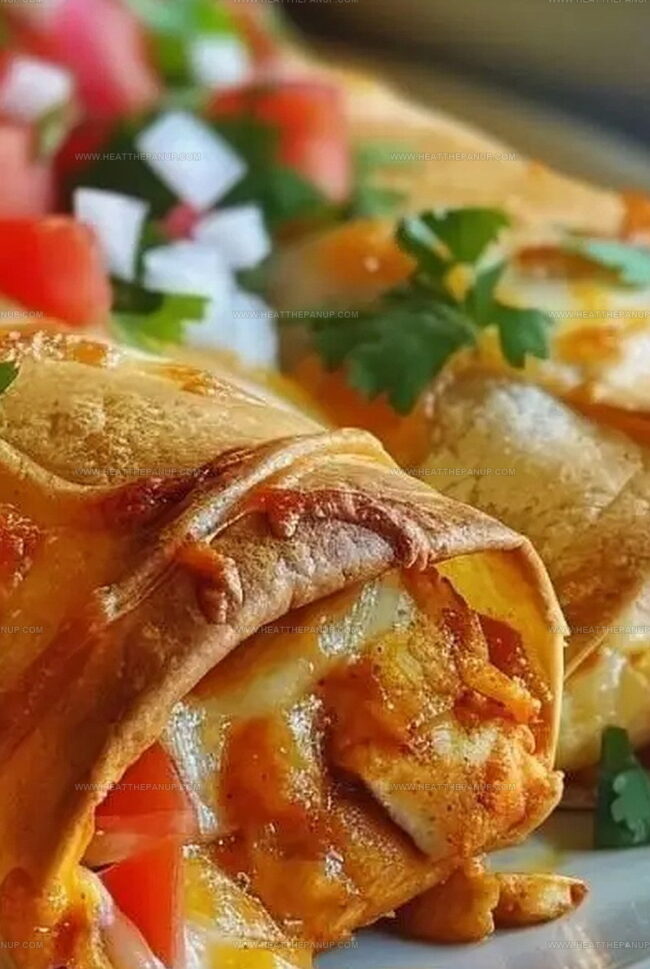
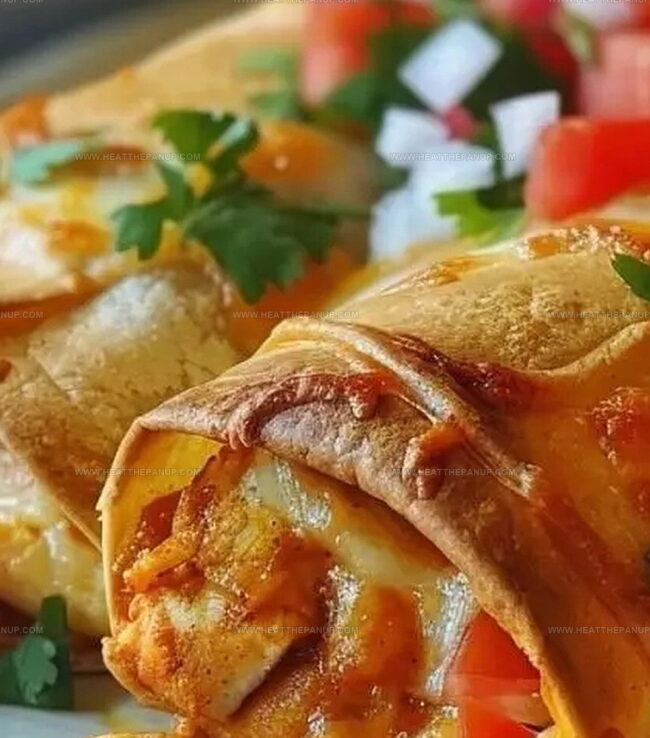
Crispy baked chicken chimichangas bring a burst of Tex-Mex magic to your dinner table.
Soft tortillas wrap around tender, seasoned meat that promises pure comfort.
Forget greasy deep-fried versions and welcome this healthier twist on a classic favorite.
Cutting back on oil doesn’t mean sacrificing flavor or texture in these golden-brown delights.
Each bite delivers a satisfying crunch that will make you forget traditional frying methods.
Southwestern spices dance through the filling, creating a melody of taste sensations.
What’s Great About Chi-Chi’s Chicken Chimichangas
Ingredients for Baked Chicken Chimichangas
Chicken and Cheese:Tortilla and Spices:Moisture and Additional Ingredients:Serving Sides (Optional):How to Make Chi-Chi’s Style Chimichangas
Step 1: Warm Up the Oven
Crank the oven to a toasty 400°F.
Grab a baking sheet and line it with parchment paper for easy cleanup.
Step 2: Mix the Flavor Bomb
In a big mixing bowl, toss together:Stir everything until it’s perfectly combined and looks like a flavor explosion.
Step 3: Wrap the Deliciousness
Lay out your flour tortillas and plop a generous scoop of the chicken mixture right in the center of each one.
Step 4: Fold and Roll
Carefully fold the sides of the tortillas over the filling, then roll them up into neat little packages.
Make sure they’re tucked in tight!
Step 5: Prepare for Baking
Place the chimichangas seam-side down on the parchment-lined baking sheet.
Give them a light spray of cooking spray to help them get golden and crisp.
Step 6: Bake to Perfection
Slide the baking sheet into the hot oven and bake for 20-25 minutes.
Watch for that gorgeous golden-brown color and crispy exterior.
Step 7: Cool and Serve
Pull the chimichangas out of the oven and let them rest for a few minutes.
Plate them up with sides of sour cream, guacamole, and extra salsa for dipping.
Tips for Crisp and Juicy Chimichangas
Storing and Reheating Chicken Chimichangas Easily
What Pairs Well with Baked Chimichangas
Chimichanga Flavor Twists and Style Ideas
FAQs
Monterey Jack and cheddar cheese are perfect for this recipe because they melt smoothly and add rich, tangy flavor. These cheeses create a creamy texture and complement the chicken’s savory taste.
Flour tortillas are recommended for better folding and crispiness. Corn tortillas might break or become too brittle during baking, making them difficult to roll and seal.
The recipe has mild spice from chili powder and optional cayenne pepper. You can control the heat by adjusting cayenne amount or omitting it completely. The salsa and green chilies also contribute subtle warmth.
Yes, these chimichangas freeze well. After assembling, you can freeze them before baking. When ready to eat, bake directly from frozen, adding a few extra minutes to cooking time for thorough heating.
Print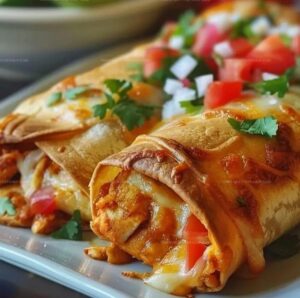
Chi-Chis Baked Chicken Chimichangas Recipe
- Total Time: 40 minutes
- Yield: 6 1x
Description
Sizzling Chi-Chi’s Baked Chicken Chimichangas bring Mexican-inspired comfort right to your kitchen. Crispy tortillas packed with seasoned chicken promise a delightful meal you’ll crave again and again.
Ingredients
Proteins and Dairy:
- 2 cups cooked shredded chicken
- 1 cup shredded Monterey Jack cheese
- 1 cup shredded cheddar cheese
Spices and Seasonings:
- 1 teaspoon ground cumin
- 1 teaspoon chili powder
- 1/2 teaspoon garlic powder
- 1/4 teaspoon cayenne pepper (optional)
- Salt and pepper, to taste
Additional Ingredients:
- 1/2 cup salsa
- 1/4 cup diced green chilies
- 6 large flour tortillas
- Cooking spray
- Sour cream (for serving)
- Guacamole (for serving)
- Salsa (for serving)
Instructions
- Prepare a baking setup by preheating the oven to 400°F and lining a baking sheet with parchment paper for optimal crispy results.
- Create a flavorful filling by thoroughly mixing shredded chicken with Monterey Jack and cheddar cheeses, incorporating salsa, green chilies, and a robust blend of cumin, chili powder, garlic powder, cayenne, salt, and pepper.
- Lay out flour tortillas and strategically place a generous portion of the seasoned chicken mixture in the center of each one.
- Craft the chimichangas by carefully folding the tortilla sides over the filling, then rolling them into compact, secure packages.
- Arrange the rolled chimichangas seam-side down on the prepared baking sheet, ensuring they are neatly positioned and not touching.
- Enhance the exterior crispness by lightly misting the chimichangas with cooking spray, which will promote a golden, crunchy finish.
- Bake in the preheated oven for 20-25 minutes, watching for a rich golden-brown color and crisp exterior that signals perfect doneness.
- Allow the chimichangas to rest for a few minutes after removing from the oven, which helps them set and makes handling easier.
- Serve immediately with classic accompaniments like sour cream, guacamole, and additional salsa, creating a vibrant and satisfying meal experience.
Notes
- Prevent Tortilla Tearing by ensuring the tortillas are at room temperature and pliable before filling, which helps them fold smoothly without cracking.
- Enhance Flavor Depth by marinating the chicken in the spice mix for 30 minutes before assembling, allowing the seasonings to penetrate deeply.
- Control Moisture carefully when mixing filling ingredients, as too much liquid can make tortillas soggy and prevent crispy baking.
- Customize Dietary Needs by substituting tortillas with low-carb alternatives like cauliflower wraps for gluten-free or keto versions, maintaining the delicious flavor profile.
- Prep Time: 15 minutes
- Cook Time: 25 minutes
- Category: Dinner, Lunch, Snacks
- Method: Baking
- Cuisine: Mexican
Nutrition
- Serving Size: 6
- Calories: 380
- Sugar: 2 g
- Sodium: 600 mg
- Fat: 18 g
- Saturated Fat: 9 g
- Unsaturated Fat: 6 g
- Trans Fat: 0 g
- Carbohydrates: 36 g
- Fiber: 2 g
- Protein: 24 g
- Cholesterol: 80 mg
Angelina Wiles
Content Editor & Culinary Enthusiast
Expertise
Food Writing and Editing, Vegetarian and Vegan Cuisine, Baking and Pastry Arts, Sustainable Cooking Practices
Education
Portland Community College
Certificate in Culinary Arts
Focus: Emphasis on sustainable cooking practices, vegetarian cuisine, and food writing.
Oregon Culinary Institute
Diploma in Baking and Pastry Arts
Focus: Specialized training in artisanal baking, pastry techniques, and dessert presentation.
Angelina’s love for cooking started with handwritten family recipes and weekend trips to farmers’ markets around Portland. She followed her passion with a Certificate in Culinary Arts from Portland Community College, then perfected her sweet side with a Diploma in Baking and Pastry Arts at Oregon Culinary Institute.
Angelina believes recipes should feel like a conversation, not a science project. She’s all about helping readers trust themselves in the kitchen with simple steps, fresh ideas, and easy twists on classic meals.
When she’s not editing recipes, she’s baking bread, sipping coffee, or getting inspired by the changing seasons.