
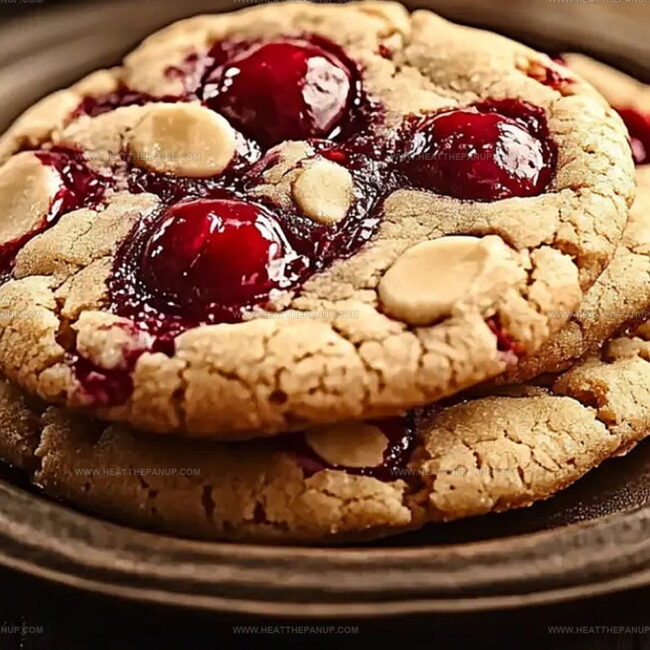
Irresistible Cherry Pie Cookies Recipe: Sweet Treats for All
Sweet memories of grandma’s kitchen dance through my mind when I think about these delightful cherry pie cookies.
Rustic charm meets modern baking in this simple yet irresistible treat.
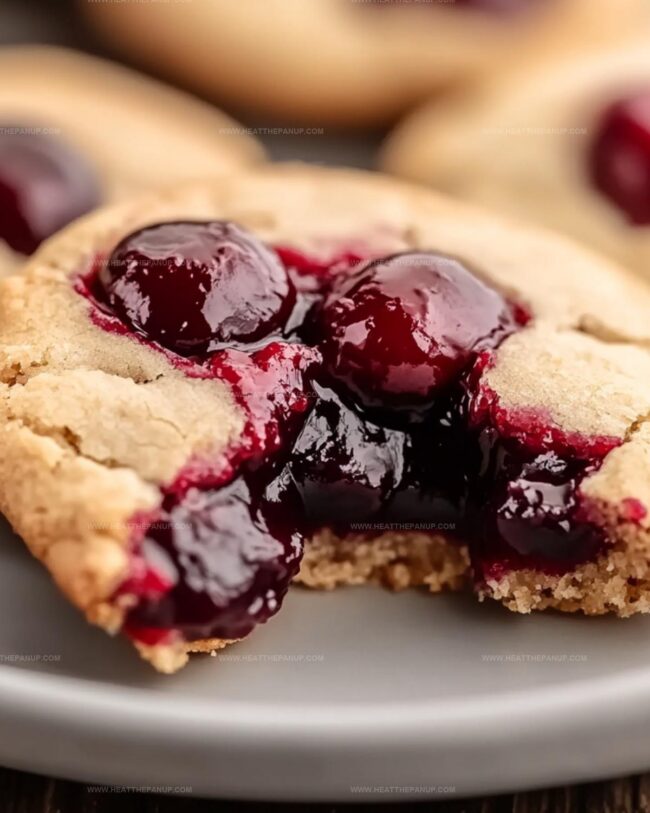
Soft, buttery dough cradles vibrant cherry filling like a warm embrace.
Unexpected layers of flavor mingle in each delicate bite.
Baking enthusiasts and dessert lovers will absolutely adore this playful twist on classic pie.
Simple ingredients come together to create something magical that feels both nostalgic and fresh.
Cherry Cookies That Taste Like Little Pies
Cherry Pie Cookies What Goes In
Cookie Base Ingredients:Filling and Topping:Baking Essentials:Cherry Pie Cookie Instructions from Start to Finish
Step 1: Whip Up Delectable Dough
Crank your oven to a toasty 350°F.
Grab a spacious mixing bowl and beat sugar and butter until they transform into a fluffy cloud.
Crack in an egg and splash vanilla, mixing until silky smooth.
Fold in sour cream, sprinkle salt and baking soda, then gradually incorporate flour until a perfect dough emerges.
Step 2: Craft Cookie Vessels
Generously grease a mini muffin pan or line with cute paper cups.
Unleash a cookie scoop and nestle one dollop of dough into each cavity.
Gently press down, molding each mound into adorable cup shapes.
Step 3: Bake to Golden Perfection
Slide the pan into the preheated oven.
Bake for 10-12 minutes until edges turn a gorgeous golden hue.
After baking, let cookies rest in the pan for 5 minutes, then transfer to a cooling rack.
Step 4: Create Cherry Magic
Once cookies cool completely, spoon luscious cherry pie filling into the center of each delicate cookie cup.
Step 5: Drizzle Chocolate Decadence
Melt white chocolate using your preferred method:Elegantly drizzle melted chocolate over filled cookie cups.
Step 6: Serve With Delight
Allow chocolate to set, then serve these irresistible Cherry Pie Cookies.
Pair with cold milk or enjoy as a standalone treat that’ll make taste buds dance!
Cookie Shaping Tips for Cherry Pie-Inspired Fun
Store Cherry Pie Cookies
Cherry Pie Cookies Suggestions
Heart Hand Pies with Strawberry Ruby Filling
FAQs
Yes, you can easily swap cherry pie filling with other flavors like blueberry, apple, or strawberry to create variety.
A mini muffin pan is essential for creating the cookie cups, but a standard muffin tin will also work if you don’t have a mini version.
Lightly grease the mini muffin pan with cooking spray or butter, or use paper liners to ensure easy removal of the cookie cups.
Yes, you can prepare the cookie dough in advance and refrigerate it for up to 2 days before baking. Just bring the dough to room temperature before shaping and baking.
Print
Cherry Pie Cookies Recipe
- Total Time: 25 minutes
- Yield: 12 1x
Description
Sweet homemade Cherry Pie Cookies blend nostalgic bakery charm with irresistible handheld dessert magic. Buttery pastry cradles luscious cherry filling, offering delightful comfort that connects childhood memories with gourmet baking craftsmanship you’ll savor.
Ingredients
Main Ingredients:
- 2 cups all-purpose flour
- 1 cup sugar
- 1/2 cup softened butter
Binding and Flavoring Ingredients:
- 1 egg
- 1/3 cup sour cream
- 1 teaspoon vanilla extract
Leavening and Seasoning Ingredients:
- 1/2 teaspoon baking soda
- 1/2 teaspoon salt
Filling and Topping:
- 1 (15 ounces / 425 grams) can cherry pie filling
- 3/4 cup white chocolate, melted (for drizzling on top)
Instructions
- Craft a delicate, buttery dough by blending sugar and softened butter until ethereally light and airy. Incorporate egg and vanilla, whisking until silky smooth.
- Fold in sour cream, introducing salt and baking soda to enhance the dough’s tender texture. Gradually integrate flour, gently mixing until a cohesive mixture forms.
- Prepare a mini muffin pan with a light coating of grease. Utilize a cookie scoop to distribute dough evenly, creating uniform portions in each cavity.
- Delicately press the dough into each cup, sculpting gentle indentations that will cradle the sweet filling.
- Position the pan in a preheated 350°F oven, allowing the cookie cups to transform into golden-edged delicacies over 10-12 minutes.
- Allow cookies to rest briefly in the pan, providing structural stability before transferring to a cooling rack.
- Once completely cooled, generously spoon luscious cherry pie filling into the center of each delicate cookie cup.
- Transform white chocolate into a velvety drizzle using gentle melting techniques, then elegantly cascade the liquid across the cherry-filled cups.
- Permit the white chocolate to solidify, creating an enchanting final touch that elevates these miniature desserts from simple to spectacular.
Notes
- Soften butter completely at room temperature to ensure smooth, even mixing for the perfect cookie texture.
- Use full-fat sour cream to create a tender, moist cookie base that holds its shape beautifully.
- Chill the dough for 15-20 minutes before shaping if it feels too soft, helping prevent spreading during baking.
- Swap cherry filling with alternative fruit preserves like blueberry or raspberry for variety and personal preference.
- Press cookie dough gently into muffin cups using the back of a rounded measuring spoon to create uniform, neat cups.
- Store cookies in an airtight container at room temperature for up to 3 days, keeping them fresh and delicious.
- For a gluten-free version, replace all-purpose flour with a 1:1 gluten-free baking blend to accommodate dietary needs.
- Prep Time: 15 minutes
- Cook Time: 10 minutes
- Category: Desserts, Snacks
- Method: Baking
- Cuisine: American
Nutrition
- Serving Size: 12
- Calories: 220
- Sugar: 14 g
- Sodium: 150 mg
- Fat: 9 g
- Saturated Fat: 5 g
- Unsaturated Fat: 3 g
- Trans Fat: 0 g
- Carbohydrates: 33 g
- Fiber: 1 g
- Protein: 2 g
- Cholesterol: 20 mg
Angelina Wiles
Content Editor & Culinary Enthusiast
Expertise
Food Writing and Editing, Vegetarian and Vegan Cuisine, Baking and Pastry Arts, Sustainable Cooking Practices
Education
Portland Community College
Certificate in Culinary Arts
Focus: Emphasis on sustainable cooking practices, vegetarian cuisine, and food writing.
Oregon Culinary Institute
Diploma in Baking and Pastry Arts
Focus: Specialized training in artisanal baking, pastry techniques, and dessert presentation.
Angelina’s love for cooking started with handwritten family recipes and weekend trips to farmers’ markets around Portland. She followed her passion with a Certificate in Culinary Arts from Portland Community College, then perfected her sweet side with a Diploma in Baking and Pastry Arts at Oregon Culinary Institute.
Angelina believes recipes should feel like a conversation, not a science project. She’s all about helping readers trust themselves in the kitchen with simple steps, fresh ideas, and easy twists on classic meals.
When she’s not editing recipes, she’s baking bread, sipping coffee, or getting inspired by the changing seasons.