
Homemade Cherry Pie Bars Recipe: Sweet & Scrumptious Treat
Sweet memories flood back whenever I create these delectable cherry pie bars that blend nostalgia with pure deliciousness.
Grandma’s cherished recipe inspired this modern twist on a classic dessert.
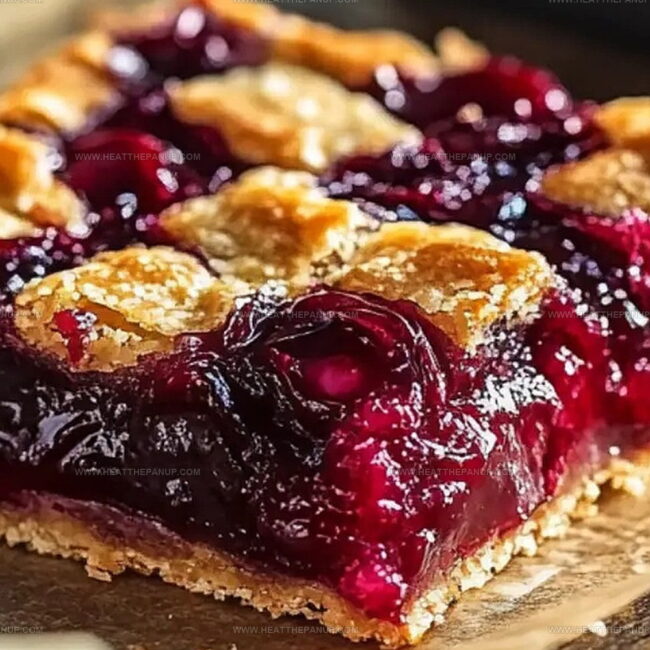
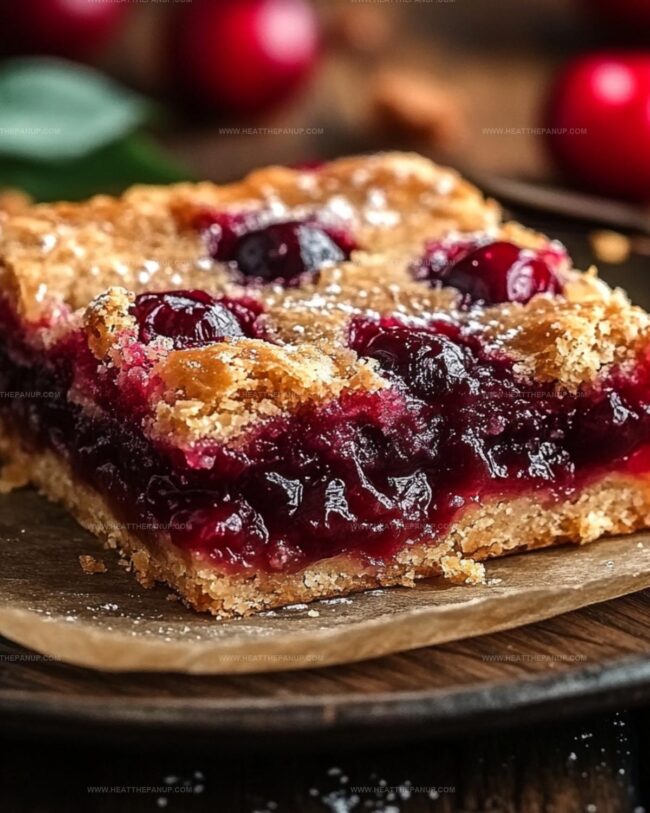
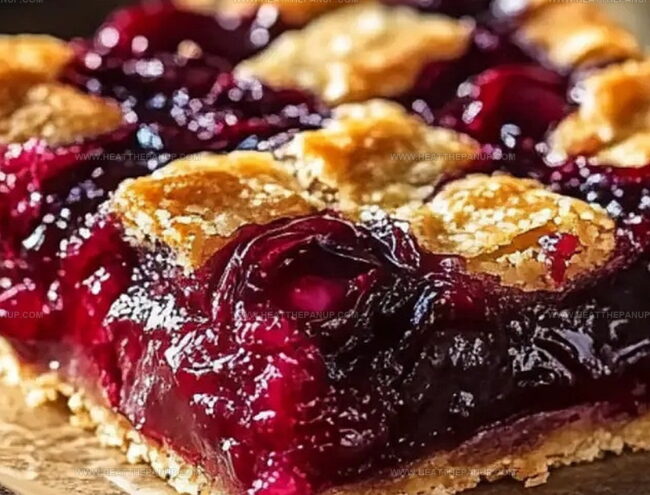
Bursting with juicy fruit and buttery crust, these bars offer a delightful escape from ordinary treats.
Layers of rich, golden pastry cradle vibrant red cherries in every single bite.
Each square promises a perfect balance between tart fruit and tender crumbles.
Homemade comfort comes alive through this simple yet incredible dessert that feels like a warm embrace.
Let’s bake something spectacular that will make everyone ask for seconds.
Cherry Pie Bars That Are Soft and Tart
Savor Simplicity: Quick and Delightful Dessert Bars
Cherry Pie Bars Ingredient Set
Base Ingredients:Dry Ingredients:Filling and Topping:Glaze Ingredients:Cherry Pie Bar Baking Instructions
Step 1: Warm Up the Oven
Crank your oven to a cozy 350°F.
Grab a 15x10x1-inch pan and give it a quick spritz of non-stick spray to prevent any sticky situations.
Step 2: Whip Up Butter and Sugar
In a spacious mixing bowl, transform butter and sugar into a fluffy cloud-like mixture.
Beat them together until they’re light, airy, and looking absolutely dreamy.
Step 3: Incorporate Eggs and Flavor Boosters
Gently introduce eggs one by one, ensuring each is fully blended before the next joins the party.
Splash in vanilla and almond extracts for an extra flavor punch.
Step 4: Marry Dry Ingredients
In a separate bowl, softly whisk flour and salt together.
Gradually fold this dry mixture into your creamy base, mixing until everything is perfectly harmonized.
Step 5: Layer Your Masterpiece
Spread a generous layer of batter across the bottom of your prepared pan.
Lovingly pour cherry pie filling over this base, creating a vibrant fruity landscape.
Dot the remaining batter across the cherry surface in playful spoonfuls.
Step 6: Bake to Perfection
Slide the pan into the oven and bake for 30-35 minutes.
Your bars are ready when a toothpick comes out clean, signaling a perfectly baked treat.
Step 7: Cool Down
Allow your bars to cool completely on a wire rack, letting the flavors settle and mingle.
Step 8: Create Magical Glaze
In a small bowl, whisk together:Blend until smooth and glossy.
Step 9: Finishing Touches
Once cooled, drizzle the glaze over your bars in elegant swirls.
Let the glaze set, then slice into squares and serve up your delectable creation.
Pie Bar Tips for Sweet Cherry Balance
Choose ripe, plump cherries with a deep red color for the most intense flavor and natural sweetness in your pie bars.
Spread the first layer of batter evenly and make sure it’s slightly thickened before adding cherry filling to maintain a crisp crust.
Adjust milk quantity to create a thicker or thinner glaze – less milk for a more concentrated drizzle, more milk for a lighter touch.
Use both vanilla and almond extracts sparingly to enhance the cherry taste without overwhelming the natural fruit notes.
Check bars at 30 minutes and use the toothpick test to avoid overbaking, which can dry out the delicate texture.
Store Cherry Pie Bars
Cherry Pie Bars Matches
Perfectly Pair Cherry Pie Bars with:Cherry Pie Bars Flavor Twists
FAQs
Yes, you can use fresh cherries. Pit and chop about 2 cups of fresh cherries, mix with a little sugar and cornstarch to create a homemade filling.
Absolutely! Replace the all-purpose flour with a gluten-free flour blend that contains xanthan gum for best results.
The edges will be lightly golden, and a toothpick inserted in the center will come out clean with just a few moist crumbs. The top should look set but not dried out.
Yes, these bars freeze wonderfully. Wrap them tightly in plastic wrap and then in foil. They’ll keep well in the freezer for up to 3 months.
Print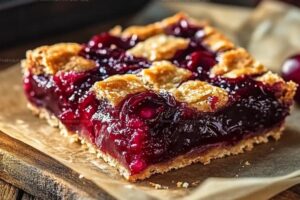
Cherry Pie Bars Recipe
- Total Time: 45 minutes
- Yield: 12 1x
Description
Sweet temptations come alive in these irresistible cherry pie bars, blending classic dessert comfort with modern bakery charm. Buttery crust cradles juicy cherries, promising delectable moments that will satisfy your craving for a homemade treat.
Ingredients
Cherry Pie Bars
Main Ingredients:
- 3 cups all-purpose flour
- 2 cups sugar
- 1 cup butter, softened
- 4 eggs
- 2 cans (21 ounces each) cherry pie filling
Flavoring Ingredients:
- 1 teaspoon vanilla extract
- 1/4 teaspoon almond extract
- 1 teaspoon salt
Glaze Ingredients:
- 1 cup powdered sugar
- 1/2 teaspoon vanilla extract
- 1/2 teaspoon almond extract
- 2 tablespoons milk
Instructions
- Prepare the baking environment by heating the oven to 350°F and coating a 15x10x1-inch pan with non-stick spray.
- Using a large mixing bowl, transform butter and sugar into a light, airy mixture through vigorous creaming.
- Introduce eggs individually, thoroughly blending each before adding the next, then incorporate vanilla and almond extracts for enhanced flavor complexity.
- Separately combine flour and salt, then gently integrate the dry mixture into the creamed base, ensuring uniform consistency.
- Distribute 3 cups of batter evenly across the pan’s surface, create a luscious layer of cherry pie filling, and delicately scatter remaining batter atop the cherries.
- Slide the pan into the preheated oven, baking for 30-35 minutes until a inserted toothpick emerges clean and pristine.
- Transfer the baked creation to a wire rack, allowing complete cooling and setting of the dessert.
- Craft a silky glaze by whisking powdered sugar with vanilla, almond extract, and milk until achieving a smooth, pourable consistency.
- Once fully cooled, artfully drizzle the glaze over the bars, permitting it to set before slicing into elegant squares for serving.
Notes
- Ensure butter is softened at room temperature for easier creaming and smoother batter consistency.
- Use fresh, high-quality cherries or premium canned pie filling for the most vibrant flavor profile.
- Consider reducing sugar by 2-3 tablespoons if using sweeter pie filling to balance overall sweetness.
- Swap almond extract with additional vanilla for nut-free version or if almond allergies are a concern.
- Line pan with parchment paper for easier removal and cleaner cutting of bars.
- Test doneness by checking center with toothpick – slight moist crumbs are okay, but no wet batter.
- Allow complete cooling before glazing to prevent runny, absorbed glaze and maintain crisp texture.
- Store bars in refrigerator for up to 4 days in airtight container to maintain freshness.
- Prep Time: 15 minutes
- Cook Time: 30 minutes
- Category: Desserts
- Method: Baking
- Cuisine: American
Nutrition
- Serving Size: 12
- Calories: 340
- Sugar: 28 g
- Sodium: 150 mg
- Fat: 15 g
- Saturated Fat: 9 g
- Unsaturated Fat: 6 g
- Trans Fat: 0 g
- Carbohydrates: 48 g
- Fiber: 1 g
- Protein: 3 g
- Cholesterol: 70 mg
Angelina Wiles
Content Editor & Culinary Enthusiast
Expertise
Food Writing and Editing, Vegetarian and Vegan Cuisine, Baking and Pastry Arts, Sustainable Cooking Practices
Education
Portland Community College
Certificate in Culinary Arts
Focus: Emphasis on sustainable cooking practices, vegetarian cuisine, and food writing.
Oregon Culinary Institute
Diploma in Baking and Pastry Arts
Focus: Specialized training in artisanal baking, pastry techniques, and dessert presentation.
Angelina’s love for cooking started with handwritten family recipes and weekend trips to farmers’ markets around Portland. She followed her passion with a Certificate in Culinary Arts from Portland Community College, then perfected her sweet side with a Diploma in Baking and Pastry Arts at Oregon Culinary Institute.
Angelina believes recipes should feel like a conversation, not a science project. She’s all about helping readers trust themselves in the kitchen with simple steps, fresh ideas, and easy twists on classic meals.
When she’s not editing recipes, she’s baking bread, sipping coffee, or getting inspired by the changing seasons.