Flavorful Cheesy Garlic Chicken Wraps Recipe That Kids Adore
Whipping up these delectable cheesy garlic chicken wraps will instantly transport your taste buds to flavor paradise.
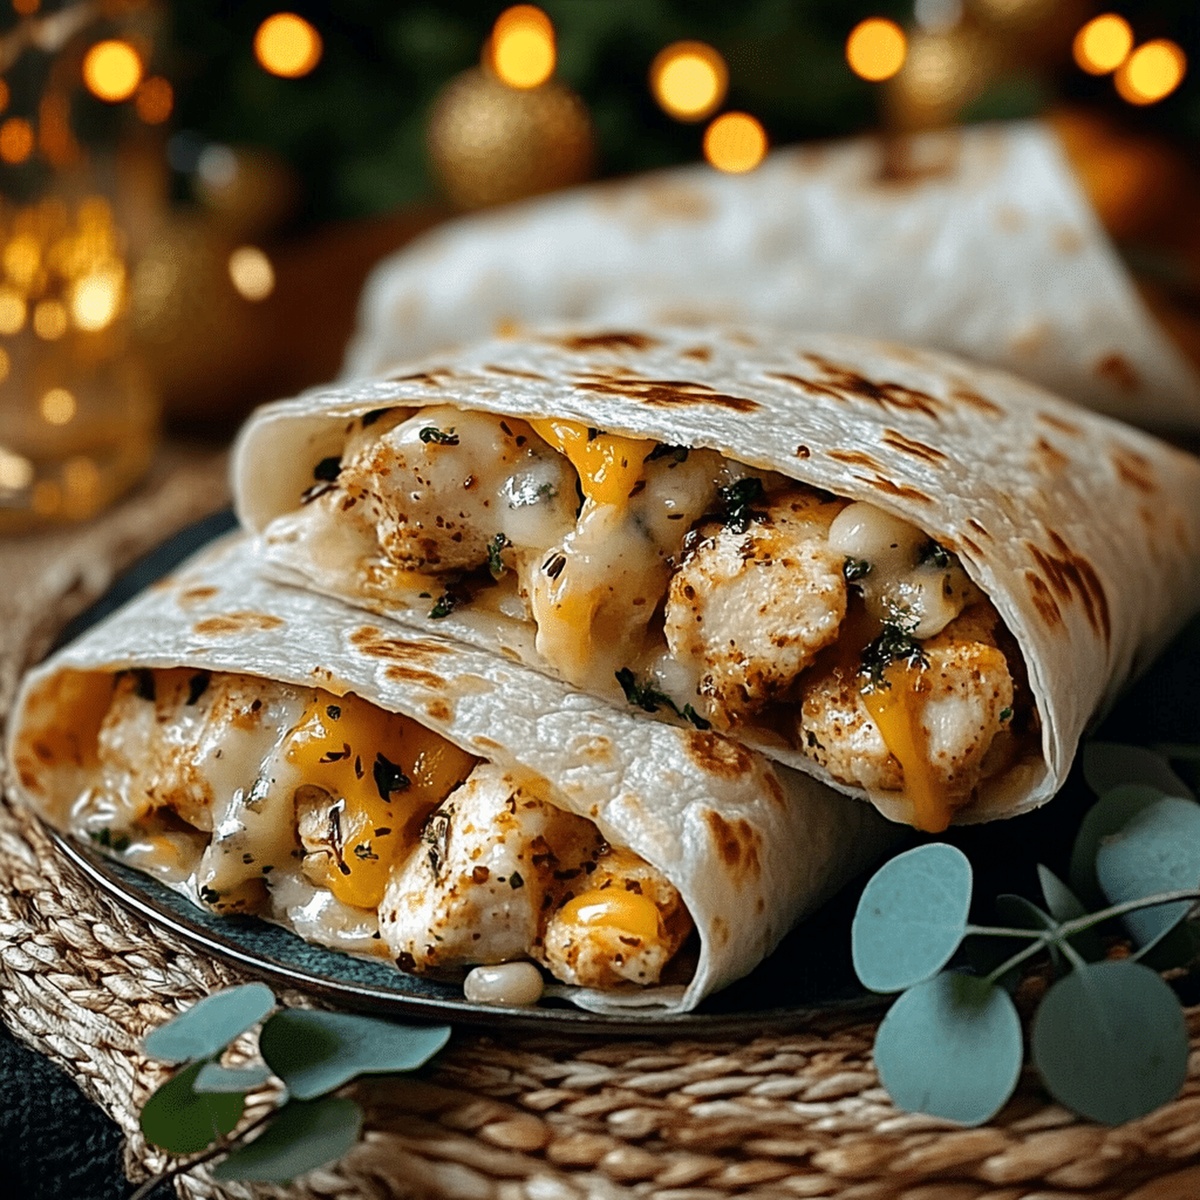
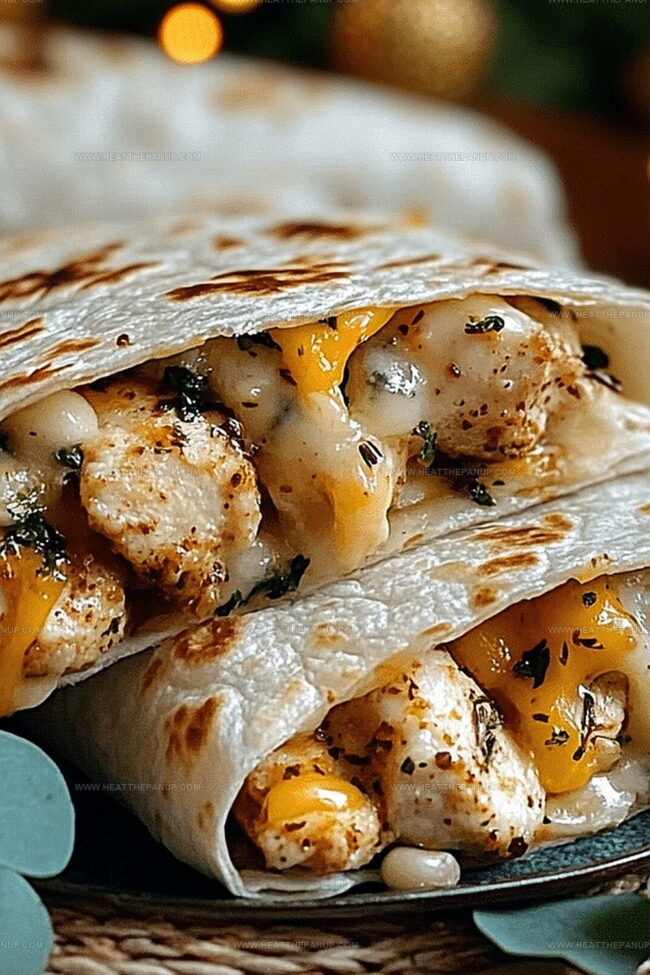
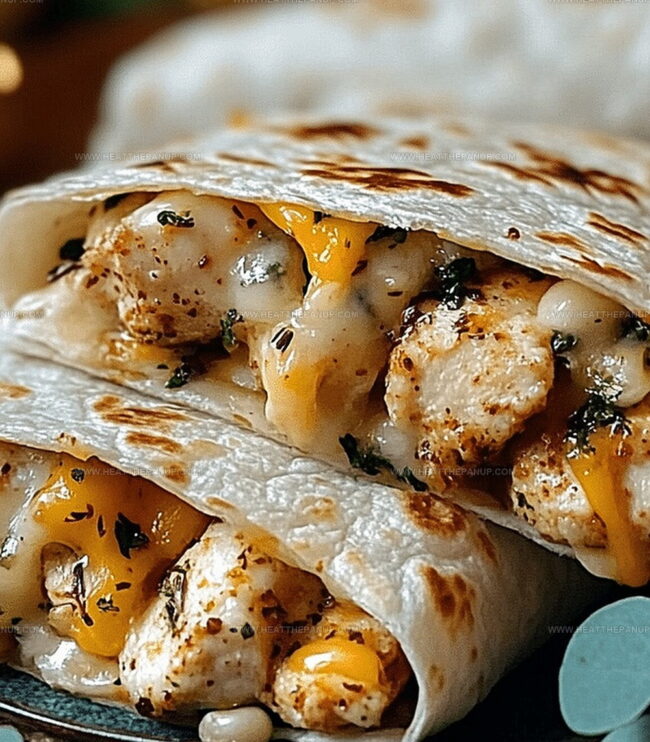
Soft tortillas cradle a mouthwatering blend of tender chicken and rich, melted cheese.
Fragrant garlic infuses every delightful bite with irresistible warmth and depth.
Crisp vegetables add a refreshing crunch that perfectly complements the savory protein.
Quick and simple ingredients make this recipe a weeknight dinner champion.
Home cooks of all skill levels can master these irresistible wraps in minutes.
You’ll want to savor every single satisfying morsel of this crowd-pleasing meal.
Why Cheesy Garlic Chicken Wraps Are A Go-To Dinner
Everything You Need For Cheesy Garlic Chicken Wraps
For the Protein:For the Seasonings:For the Cheese:For the Wrap Base:For the Flavor Enhancers:For the Garnish:How To Make Cheesy Garlic Chicken Wraps Easily
Step 1: Crank Up The Oven
Blast the oven to a toasty 375°F and line a baking sheet with parchment paper for super easy cleanup.
Step 2: Create Garlic Magic
Chop garlic cloves into tiny pieces and blend with olive oil to craft a super fragrant garlic infusion.
Step 3: Season The Chicken
Massage chicken breasts with salt, black pepper, and dried oregano, making sure every inch gets seasoned perfectly.
Step 4: Sear The Protein
Fire up a skillet over medium-high heat and brown chicken breasts for 3-4 minutes on each side until they develop a gorgeous golden color.
Step 5: Slice And Prepare
Transfer chicken to a cutting board and slice into thin, elegant strips that will nestle perfectly in tortillas.
Step 6: Warm The Tortillas
Quickly heat flour tortillas in the microwave or on a skillet to make them soft and pliable.
Step 7: Spread The Base
Brush each tortilla with the garlic-olive oil mixture, creating a delicious flavor foundation.
Step 8: Build The Filling
Arrange chicken strips in the center of each tortilla with precision.
Step 9: Add Cheesy Goodness
Sprinkle a luscious blend of:over the chicken strips.
Step 10: Wrap It Up
Fold the tortilla sides inward and roll tightly into compact, delicious bundles.
Step 11: Prepare For Baking
Place wrapped chicken bundles seam-side down on the prepared baking sheet.
Step 12: Bake To Perfection
Bake for 15-20 minutes until tortillas turn crispy golden and cheese melts into gooey deliciousness.
Step 13: Fresh Finale
Pull from oven and shower with freshly chopped parsley for a burst of color and freshness.
Step 14: Let It Rest
Allow wraps to sit for 2-3 minutes so cheese can set and flavors can dance together before serving.
Tips To Keep Chicken Wraps Hot And Crispy
Fun Twists On Cheesy Garlic Chicken Wraps
What Goes Great With Chicken Wraps
How To Store Cheesy Garlic Chicken Wraps The Easy Way
FAQs For Cheesy Garlic Chicken Wraps
Yes, you can substitute mozzarella and parmesan with cheddar, monterey jack, or a blend of your favorite melting cheeses for a unique flavor profile.
The current recipe is mild. To add heat, include red pepper flakes, diced jalapeños, or a dash of hot sauce in the garlic-olive oil mixture.
Fresh herbs like thyme or basil work well as alternatives. If using fresh herbs, use slightly more quantity compared to dried herbs to maintain robust flavor.
Prepare the wraps and refrigerate unbaked for up to 24 hours. When ready to serve, bake directly from the refrigerator, adding 3-5 extra minutes to cooking time.
Print
Cheesy Cheesy Garlic Chicken Wraps Recipe
- Total Time: 35 minutes
- Yield: 4 1x
Description
Comfort meets culinary delight in these cheesy garlic chicken wraps, a perfect blend of savory flavors and creamy textures. Packed with juicy chicken, melted cheese, and aromatic garlic, you’ll savor every delicious bite of this simple yet satisfying meal.
Ingredients
Proteins:
- 2 chicken breasts
- 1/2 cup shredded mozzarella cheese
- 1/4 cup grated parmesan cheese
Wraps and Base Ingredients:
- 4 large flour tortillas
- 2 cloves garlic
- 2 tbsp olive oil
Seasonings and Extras:
- 1 tsp dried oregano
- 1/2 tsp salt
- 1/4 tsp black pepper
- 2 tbsp fresh parsley (chopped)
Instructions
- Preheat the oven to 375°F and prepare a baking sheet with parchment paper for easy cleanup.
- Mince the garlic cloves finely and combine with olive oil to create an aromatic garlic infusion.
- Season the chicken breasts thoroughly with salt, black pepper, and dried oregano, ensuring even coverage.
- Heat a skillet over medium-high heat and sear the chicken breasts for 3-4 minutes on each side until golden brown and partially cooked.
- Transfer the partially cooked chicken to a cutting board and slice into thin, uniform strips.
- Warm the flour tortillas briefly in the microwave or on a skillet to enhance flexibility.
- Spread the garlic-olive oil mixture across each tortilla, creating a flavorful base.
- Distribute the chicken strips evenly in the center of each tortilla.
- Sprinkle a generous blend of mozzarella and parmesan cheeses over the chicken.
- Fold the tortilla sides inward, then roll tightly to create compact wraps.
- Arrange the wrapped chicken bundles seam-side down on the prepared baking sheet.
- Bake for 15-20 minutes until the tortillas turn crispy and golden, and cheese melts completely.
- Remove from oven and garnish with freshly chopped parsley for a vibrant finish.
- Let the wraps rest for 2-3 minutes before serving to allow cheese to set and flavors to meld.
Notes
- Enhance tortilla flexibility by warming them slightly, preventing cracking and making rolling easier.
- Searing chicken before baking creates a beautiful golden exterior and locks in moisture for tender, juicy meat.
- Opt for low-fat cheese options or use dairy-free alternatives to accommodate different dietary needs without compromising flavor.
- Experiment with additional herbs like basil or thyme to customize the wrap’s taste profile and add personal flair.
- Prep Time: 15 minutes
- Cook Time: 20 minutes
- Category: Lunch, Dinner, Snacks
- Method: Baking
- Cuisine: American
Nutrition
- Serving Size: 4
- Calories: 495
- Sugar: 1 g
- Sodium: 650 mg
- Fat: 24 g
- Saturated Fat: 8 g
- Unsaturated Fat: 12 g
- Trans Fat: 0 g
- Carbohydrates: 43 g
- Fiber: 2 g
- Protein: 30 g
- Cholesterol: 85 mg
James Hambly
Founder & Recipe Creator
Expertise
Recipe Development, Culinary Education, Farm-to-Table Cooking, Southern Cuisine
Education
Asheville-Buncombe Technical Community College
Certificate in Culinary Arts
Focus: Hands-on training in professional cooking techniques, emphasizing farm-to-table practices and Southern cuisine.
The Chef’s Academy
Associate Degree in Culinary Arts
Focus: Comprehensive culinary education covering global cuisines, kitchen management, and food safety.
James grew up surrounded by the smells of cast-iron skillets and slow-cooked Southern meals in Asheville, North Carolina.
He sharpened his skills with a Certificate in Culinary Arts from Asheville-Buncombe Technical Community College, and later leveled up with an Associate Degree from The Chef’s Academy.
James’s philosophy is simple: the best meals don’t need fancy tricks, just fresh ingredients, a hot pan, and a little bit of heart. His favorite days are spent testing one-pan wonders, chasing bold flavors, and creating recipes that feel easy, even on a busy night.