
Savory Cheddar Cheese Quick Bread Recipe: No-Fuss Comfort
My kitchen adventure with cheddar cheese quick bread began on a chilly afternoon when comfort seemed essential.
Crisp aromas of sharp cheese and warm dough started swirling through my tiny apartment.
Baking enthusiasts understand how simple ingredients can create magical moments of culinary delight.
Rustic breads offer unexpected pleasure with minimal effort and maximum satisfaction.
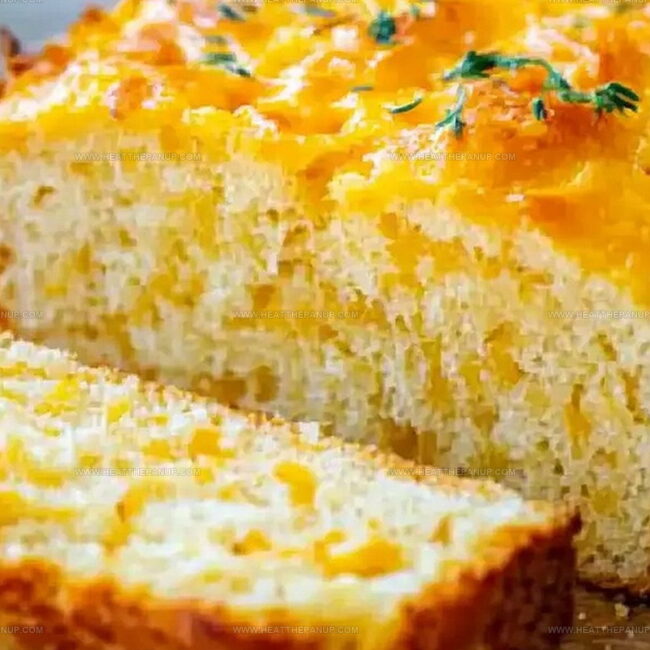
Packed with robust flavor, this recipe promises a delightful companion for soups, salads, or standalone snacking.
Cheese lovers will appreciate the rich, tangy notes that dance across each hearty slice.
Come experience a bread that turns ordinary meals into memorable celebrations.
Cheddar Bread That’s Quick, Savory, and Fresh-Baked
Cheddar Cheese Quick Bread What Goes In
Dry Ingredients:Cheese Ingredient:Wet Ingredients:Cheddar Quick Bread Preparation

Step 1: Fire Up the Oven
Crank the oven to 350°F.
Grab your loaf pan and give it a quick spray or butter rub to prevent sticking.
Step 2: Blend Dry Ingredients
Toss flour, baking powder, sugar, garlic powder, and salt into a big mixing bowl.
Whisk them together until perfectly combined.
Sprinkle in the shredded cheddar and give it a gentle stir.
Step 3: Mix Wet Components
In a separate bowl, whisk milk, egg, and melted butter until they’re smooth and friendly with each other.
Step 4: Combine Wet and Dry Mixtures
Pour the liquid mixture into the dry ingredients.
Stir gently and quickly – stop mixing as soon as everything looks incorporated.
You want a lumpy, rustic batter, not a tough bread.
Step 5: Fill the Pan
Scoop the batter into your prepared loaf pan.
Smooth the top slightly with a spatula.
Step 6: Bake to Golden Perfection
Slide the pan into the preheated oven.
Bake for 45-50 minutes.
You’ll know it’s done when the top turns a gorgeous golden brown and a toothpick comes out clean when poked in the center.
Step 7: Cool and Serve
Let the bread rest on a wire rack until it’s cool enough to handle.
Slide it out of the pan, slice, and enjoy your cheesy creation with butter or on its own.
Quick Bread Tips for Cheddar Cheese in Every Bite
Store Cheddar Cheese Quick Bread
Cheddar Cheese Quick Bread Accompaniments
Quick Cheddar Cheese Bread Flavor Spins
FAQs
Yes, you can substitute cheddar with other cheeses like sharp white cheddar, monterey jack, or pepper jack for varied flavor profiles.
Absolutely! This quick bread works perfectly as a breakfast side, afternoon snack, or accompaniment to soups and salads.
Mix ingredients just until combined and avoid overmixing, which can develop tough gluten and create a dense, dry texture. Also, don’t overbake – check for doneness with a toothpick around 45 minutes.
Definitely! Consider adding chopped herbs like chives or parsley, diced jalapeños for heat, or crumbled bacon for extra savory notes.
Print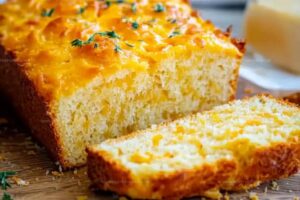
Cheddar Cheese Quick Bread Recipe
- Total Time: 55 minutes
- Yield: 8 1x
Description
Savory cheddar cheese quick bread delivers a rustic charm straight from homestyle kitchens. Sharp cheese and hearty crumb promise a delightful companion for soups, salads, or solo snacking.
Ingredients
Main Ingredients:
- 1 1/2 cups shredded cheddar cheese
- 1 cup milk
- 1 large egg
- 2 tablespoons (30 milliliters) butter (melted)
Dry Ingredients:
- 2 cups (240 grams) all-purpose flour
- 4 teaspoons (20 grams) baking powder
- 1 tablespoon (12.5 grams) sugar
- 1 1/2 teaspoons (4.5 grams) garlic powder
- 1/2 teaspoon (3 grams) salt
Instructions
- Prepare the oven environment by heating to 350°F (175°C) and thoroughly coat a loaf pan with cooking spray or butter to prevent sticking.
- Create a dry mixture by combining flour, baking powder, sugar, garlic powder, and salt in a spacious mixing bowl, ensuring even distribution of ingredients.
- Gently fold shredded cheddar cheese into the dry ingredients, allowing the cheese to be evenly dispersed throughout the mixture.
- In a separate vessel, thoroughly blend milk, egg, and melted butter until a smooth, homogeneous liquid forms.
- Carefully integrate the liquid components into the dry mixture, using gentle stirring techniques to maintain a light texture and prevent dense bread development.
- Transfer the resulting batter into the prepared loaf pan, smoothing the surface to ensure even baking and consistent rise.
- Position the pan in the preheated oven and bake for 45-50 minutes, monitoring the development of a golden-brown exterior and checking for complete internal cooking with a toothpick test.
- Allow the freshly baked bread to rest on a wire cooling rack, enabling it to gradually reach room temperature and stabilize its internal structure.
- Once completely cooled, extract the bread from the pan, slice with a sharp knife, and serve to enjoy the savory, cheesy creation.
Notes
- Prevent a dense texture by mixing ingredients just until combined, stopping as soon as no dry flour remains.
- Add extra flavor by incorporating crispy bacon bits or chopped herbs like chives or rosemary into the batter for a gourmet twist.
- For a gluten-free version, substitute all-purpose flour with a 1:1 gluten-free baking blend, ensuring the bread maintains its tender crumb.
- Store bread wrapped tightly in plastic wrap or aluminum foil at room temperature for 2-3 days, or freeze slices for up to one month for longer preservation.
- Prep Time: 10 minutes
- Cook Time: 45 minutes
- Category: Snacks, Breakfast
- Method: Baking
- Cuisine: American
Nutrition
- Serving Size: 8
- Calories: 200
- Sugar: 1 g
- Sodium: 320 mg
- Fat: 9 g
- Saturated Fat: 5 g
- Unsaturated Fat: 2.5 g
- Trans Fat: 0 g
- Carbohydrates: 24 g
- Fiber: 1 g
- Protein: 8 g
- Cholesterol: 40 mg
Angelina Wiles
Content Editor & Culinary Enthusiast
Expertise
Food Writing and Editing, Vegetarian and Vegan Cuisine, Baking and Pastry Arts, Sustainable Cooking Practices
Education
Portland Community College
Certificate in Culinary Arts
Focus: Emphasis on sustainable cooking practices, vegetarian cuisine, and food writing.
Oregon Culinary Institute
Diploma in Baking and Pastry Arts
Focus: Specialized training in artisanal baking, pastry techniques, and dessert presentation.
Angelina’s love for cooking started with handwritten family recipes and weekend trips to farmers’ markets around Portland. She followed her passion with a Certificate in Culinary Arts from Portland Community College, then perfected her sweet side with a Diploma in Baking and Pastry Arts at Oregon Culinary Institute.
Angelina believes recipes should feel like a conversation, not a science project. She’s all about helping readers trust themselves in the kitchen with simple steps, fresh ideas, and easy twists on classic meals.
When she’s not editing recipes, she’s baking bread, sipping coffee, or getting inspired by the changing seasons.