Dreamy Cappuccino Nanaimo Bars Recipe: A Sweet Canadian Twist
Sweet tooths will adore these decadent cappuccino nanaimo bars that blend rich coffee flavors with creamy indulgence.
Layers of buttery goodness promise a delightful dessert experience.
Canadian pastry traditions shine through in this tempting treat.
Smooth chocolate and espresso notes create an irresistible combination.
Chocolate lovers and coffee enthusiasts will find pure bliss in every bite.
Each carefully crafted layer delivers a punch of delectable flavor.
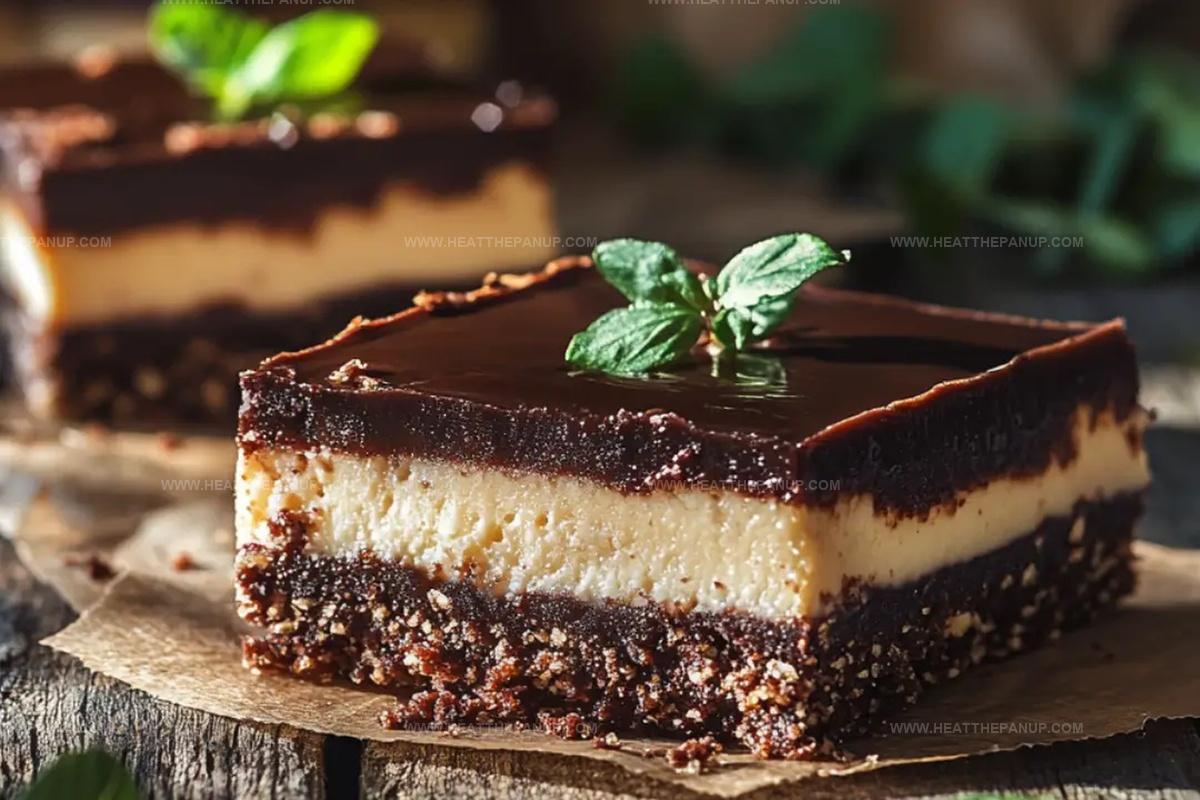
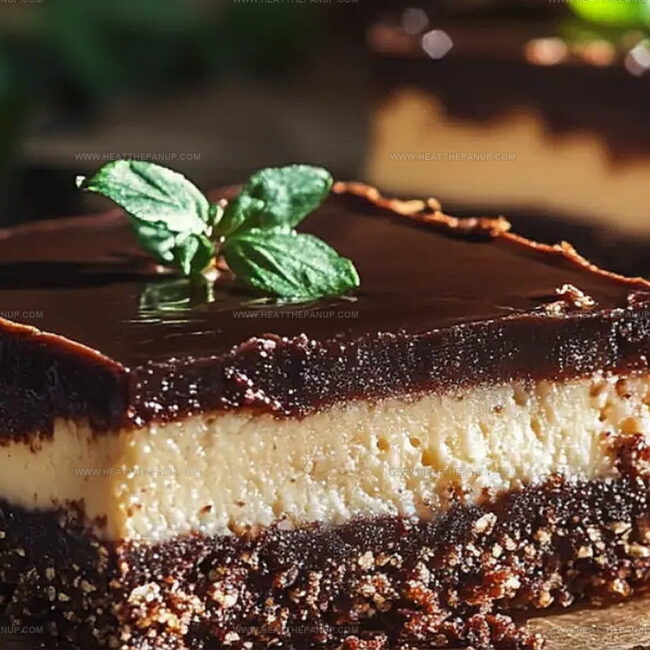
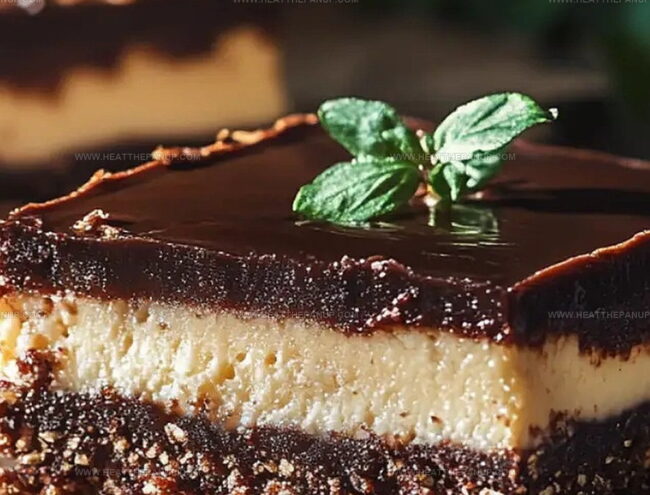
Cappuccino Bars With Classic Nanaimo Layers
Cappuccino Nanaimo Bars Ingredient Guide
Base Layer Ingredients:Cappuccino Cream Filling Ingredients:Chocolate Topping Ingredients:Cappuccino Nanaimo Bar Layering Tips
Step 1: Create the Delectable Base
In a medium saucepan over low heat, melt together:Whisk in the beaten egg, stirring constantly until the mixture thickens.
Remove from heat.
Mix in:Press the mixture evenly into a parchment-lined 8×8-inch pan.
Chill in the refrigerator while preparing the next layer.
Step 2: Whip Up the Cappuccino Cream
Dissolve espresso powder in hot water.
In a medium bowl, beat softened butter until creamy.
Gradually add:Beat until the mixture becomes smooth and fluffy.
Spread the cappuccino cream evenly over the chilled base.
Refrigerate for 30 minutes to set.
Step 3: Craft the Chocolate Topping
Melt chocolate chips and butter in a microwave-safe bowl, using 20-second intervals and stirring between each.
Allow the chocolate to cool slightly before pouring over the cappuccino filling.
Spread evenly with an offset spatula.
Step 4: Chill and Slice
Refrigerate the bars for at least 1 hour until completely set.
Cut into squares using a sharp knife, cleaning the blade between cuts for pristine edges.
Serve chilled and enjoy the ultimate coffee-infused treat!
Bar Tips for Creamy Cappuccino Nanaimo Layers
Store & Reheat Cappuccino Nanaimo Bars
Cappuccino Nanaimo Bars Matches
Sip Cappuccino Companions: Rich Beverage Matches
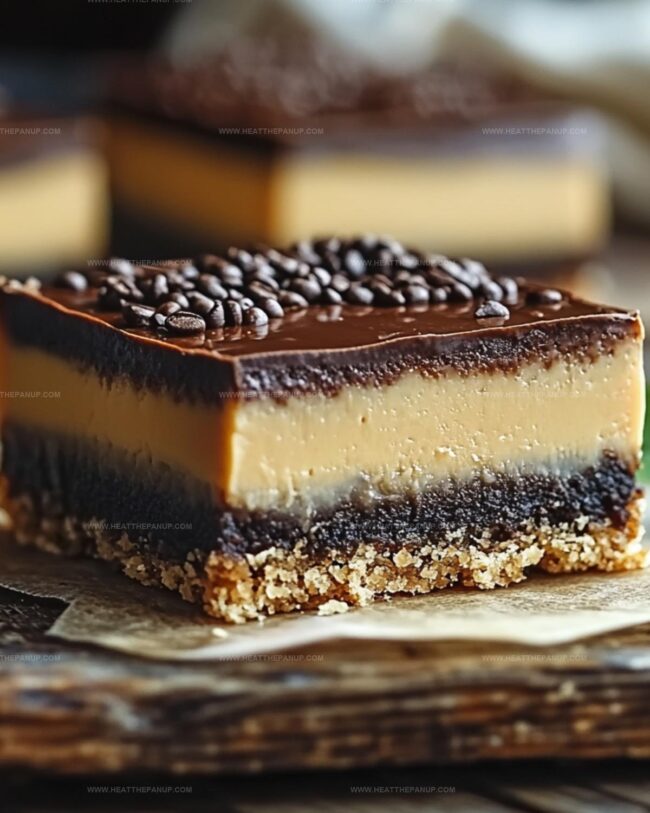
Cappuccino Nanaimo Bars Flavor Upgrades
FAQs
These bars combine classic Canadian Nanaimo bar layers with a coffee-infused twist, featuring an espresso-flavored cream filling that adds rich cappuccino flavor to the traditional dessert.
Not at all! They’re surprisingly simple, requiring no baking and just basic layering techniques. Each layer is easy to prepare and can be made with standard kitchen ingredients.
Yes, you can swap graham cracker crumbs with cookie crumbs, use different nuts like almonds or pecans, and adjust espresso strength to your preference. The recipe is quite flexible for personal taste modifications.
Use a sharp knife and wipe it clean between each cut. Chilling the bars completely helps create crisp, neat edges and prevents the layers from smearing during cutting.
Print
Cappuccino Nanaimo Bars Recipe
- Total Time: 30 minutes
- Yield: 12 1x
Description
Silky Canadian cappuccino nanaimo bars blend rich espresso with creamy custard layers for an indulgent Pacific Northwest dessert. Sweet chocolate ganache crowns these no-bake treats, offering coffee lovers a delightful Canadian classic you’ll crave with every luxurious bite.
Ingredients
Base Layer:
- 1 3/4 cups graham cracker crumbs
- 1/2 cup unsalted butter, melted (113 grams)
- 1/2 cup shredded coconut
- 1/4 cup granulated sugar
- 1/3 cup unsweetened cocoa powder
- 1/4 cup finely chopped pecans or walnuts (optional)
- 1 large egg, beaten
Cappuccino Cream Filling:
- 2 cups powdered sugar
- 1/2 cup unsalted butter, softened (113 grams)
- 2 tablespoons instant espresso powder or cappuccino mix
- 2 tablespoons heavy cream
- 2 tablespoons hot water
- 1 teaspoon pure vanilla extract
Chocolate Topping:
- 1 cup semi-sweet chocolate chips
- 2 tablespoons unsalted butter (28 grams)
Instructions
- Craft the foundation by melting butter, sugar, and cocoa powder in a saucepan over gentle heat, whisking until silky and uniform.
- Incorporate beaten egg into the mixture, stirring vigilantly until the texture transforms and thickens (roughly 1-2 minutes), then remove from heat.
- Fold graham cracker crumbs, coconut, and optional nuts into the chocolatey base, ensuring comprehensive integration.
- Transfer the mixture into a parchment-lined 8×8-inch pan, pressing firmly to create an even, compact layer.
- Chill the base in the refrigerator while preparing the next component.
- Dissolve espresso powder in hot water to create a concentrated coffee essence.
- Whip softened butter until light and airy, then gradually introduce powdered sugar, espresso liquid, heavy cream, and vanilla extract.
- Beat the filling until achieving a luxurious, smooth consistency with peak fluffiness.
- Spread the cappuccino cream uniformly across the chilled base, ensuring complete coverage.
- Return the pan to the refrigerator, allowing the filling to set and solidify for approximately 30 minutes.
- Melt chocolate chips and butter in short microwave intervals, stirring between each to prevent scorching.
- Allow the chocolate mixture to cool slightly before gently pouring over the cappuccino layer.
- Use an offset spatula to distribute the chocolate topping evenly and smoothly.
- Refrigerate the assembled dessert for a minimum of one hour until completely set.
- Slice into precise squares using a sharp knife, cleaning the blade between cuts to maintain crisp edges.
Notes
- Experiment with instant coffee or cold brew concentrate as an alternative to espresso powder for a unique flavor profile.
- Toast coconut and nuts beforehand to enhance their nutty, rich undertones and add extra depth to the base layer.
- Consider using dark chocolate with 70% cocoa content for a more intense, sophisticated chocolate topping that complements the cappuccino cream.
- Swap graham crackers with gluten-free alternatives like almond flour or gluten-free cookie crumbs to make the recipe celiac-friendly.
- Prep Time: 30 minutes
- Cook Time: 0 minutes
- Category: Desserts
- Method: Chilling
- Cuisine: Canadian
Nutrition
- Serving Size: 12
- Calories: 332
- Sugar: 22 g
- Sodium: 75 mg
- Fat: 20 g
- Saturated Fat: 10 g
- Unsaturated Fat: 9 g
- Trans Fat: 0 g
- Carbohydrates: 38 g
- Fiber: 1 g
- Protein: 3 g
- Cholesterol: 31 mg
Angelina Wiles
Content Editor & Culinary Enthusiast
Expertise
Food Writing and Editing, Vegetarian and Vegan Cuisine, Baking and Pastry Arts, Sustainable Cooking Practices
Education
Portland Community College
Certificate in Culinary Arts
Focus: Emphasis on sustainable cooking practices, vegetarian cuisine, and food writing.
Oregon Culinary Institute
Diploma in Baking and Pastry Arts
Focus: Specialized training in artisanal baking, pastry techniques, and dessert presentation.
Angelina’s love for cooking started with handwritten family recipes and weekend trips to farmers’ markets around Portland. She followed her passion with a Certificate in Culinary Arts from Portland Community College, then perfected her sweet side with a Diploma in Baking and Pastry Arts at Oregon Culinary Institute.
Angelina believes recipes should feel like a conversation, not a science project. She’s all about helping readers trust themselves in the kitchen with simple steps, fresh ideas, and easy twists on classic meals.
When she’s not editing recipes, she’s baking bread, sipping coffee, or getting inspired by the changing seasons.