Whip Up Sweet Fall Magic with This Candy Acorns Recipe
Whipping up adorable candy acorns brings pure childhood magic to your kitchen adventure.
Sweet nostalgia beckons from this delightful seasonal treat.
Crafting these miniature delicacies requires minimal ingredients and maximum creativity.
Little hands can help shape the chocolate-dipped morsels into woodland-inspired bites.
Nutty and rich flavors combine with smooth chocolate coating to create irresistible nibbles.
Small gatherings will marvel at these charming confections that look almost too cute to eat.
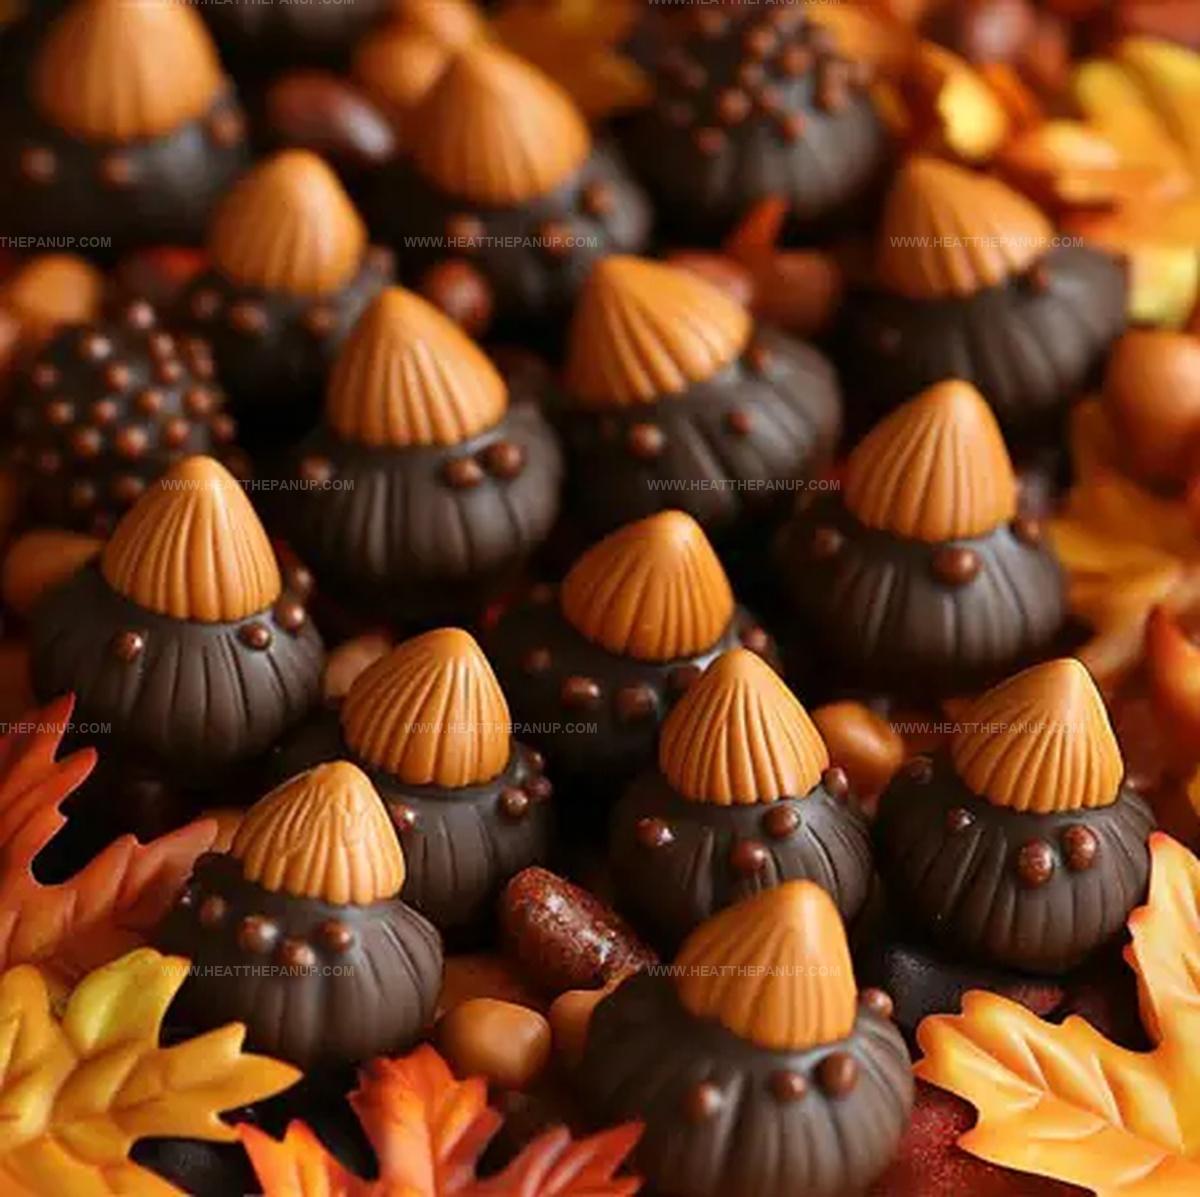
Candy Acorns – What Makes Them Adorable and Tasty

What You Need to Make Candy Acorns
Candy Base:Melting Ingredients:Decoration Ingredient:How to Assemble Candy Acorns

Step 1: Prepare Ingredients
Gather the following ingredients for your delightful candy acorns:Step 2: Unwrap Chocolate Delights
Carefully remove chocolate kisses from their wrappers.
You’ll want one kiss for each acorn you plan to create.
A full bag typically yields around 75 adorable treats.
Step 3: Select Perfect Cookies
Pull out whole, unbroken sandwich cookies from the package.
Ensure you have exactly the same number of cookies as chocolate kisses.
Step 4: Melt Chocolate Base
In a microwave-safe bowl, combine chocolate baking chips and coconut oil.
Heat in 30-second intervals, stirring between each cycle until the mixture becomes smooth and completely melted.
Step 5: Create Acorn Base
Using a toothpick or thin chopstick, spread melted chocolate on the flat side of a cookie.
Gently attach a chocolate kiss to create the acorn’s body.
Position the cookie kiss-side up and allow to set.
Step 6: Add Acorn Cap
Reheat chocolate mixture if it has hardened.
With your toothpick, add a small amount of melted chocolate to the opposite side of the cookie.
Attach an unmelted chocolate chip to simulate the acorn’s cap.
Step 7: Cool and Set
Carefully lay each candy acorn on its side.
Allow them to cool completely until the chocolate hardens and the pieces are securely attached.
Step 8: Display and Enjoy
Once cooled, arrange your woodland-inspired treats on a decorative plate or in a serving bowl.
These charming candy acorns are perfect for parties, gifts, or a sweet seasonal snack.
Helpful Candy Acorn Assembly Tips
Store Candy Acorns to Keep Them Fresh
Best Snacks to Pair with Candy Acorns
Savor Sweet Pairings with Candy Acorns
Candy Acorn Creative Takes
FAQs
You’ll need Hershey’s Kisses, chocolate wafer cookies (like Nabisco Famous Chocolate Wafers), chocolate baking chips, and coconut oil.
No, they’re surprisingly simple! The recipe requires basic steps like melting chocolate, attaching kisses to cookies, and adding a chip for the acorn’s stem.
Absolutely! Kids can help unwrap kisses, attach pieces with adult supervision during melting and handling hot chocolate, and watch the fun transformation.
When stored in an airtight container at room temperature, these cute treats will stay fresh for about 5-7 days, maintaining their shape and taste.
Print
Candy Acorns Recipe
- Total Time: 20 minutes
- Yield: 15 1x
Description
Sweet nostalgia meets woodland charm with these delightful candy acorns, perfect for autumn gatherings. Crafted from chocolate and nuts, these adorable treats will enchant guests and spark childhood memories.
Ingredients
Chocolate and Sweet Base:
- 11 ounces (311 grams) chocolate kisses, any flavor
- 1 cup (170 grams) baking chips, any flavor
- 75 mini vanilla wafers (about half of an 11 ounce/311 grams package)
Binding and Texture Agent:
- 1 teaspoon (5 milliliters) coconut oil or cooking oil
Instructions
- Gather unwrapped chocolate kisses and an equivalent number of whole, unbroken cookies to create charming candy acorns.
- Prepare a small microwave-safe bowl for melting chocolate baking chips with coconut oil.
- Microwave chocolate mixture in 30-second intervals, stirring between each cycle until completely smooth and fully liquefied.
- Use a toothpick or chopstick’s thin end to apply melted chocolate to a cookie’s flat surface.
- Carefully attach the flat end of a chocolate kiss to the cookie, creating the acorn’s cap.
- Position the assembled piece kiss-side up and allow chocolate to set and secure the kiss firmly.
- If chocolate hardens during process, reheat briefly in microwave following previous melting technique.
- Apply a minimal amount of melted chocolate to opposite side of cookie where kiss is not attached.
- Carefully place an un-melted baking chip onto the chocolate dot, forming the acorn’s stem.
- Gently lay the candy acorn on its side, ensuring balanced positioning.
- Allow complete cooling until chocolate sets and acorn maintains its structured shape.
- Display as decorative treats or arrange in a serving bowl for delightful snacking.
Notes
- Precision is key when melting chocolate, so use short microwave intervals and stir consistently to prevent burning.
- Choose sturdy, whole cookies without cracks to ensure stable acorn bases that won’t crumble during assembly.
- Work in a cool environment to help chocolate set faster and maintain the acorn shape without sliding or misaligning.
- For dietary variations, swap traditional chocolate chips with vegan or sugar-free alternatives to accommodate different nutritional needs.
- Prep Time: 15 minutes
- Cook Time: 5 minutes
- Category: Snacks, Desserts
- Method: Microwaving
- Cuisine: American
Nutrition
- Serving Size: 15
- Calories: 90
- Sugar: 8g
- Sodium: 30mg
- Fat: 5g
- Saturated Fat: 3g
- Unsaturated Fat: 2g
- Trans Fat: 0g
- Carbohydrates: 10g
- Fiber: 0g
- Protein: 1g
- Cholesterol: 0mg
Angelina Wiles
Content Editor & Culinary Enthusiast
Expertise
Food Writing and Editing, Vegetarian and Vegan Cuisine, Baking and Pastry Arts, Sustainable Cooking Practices
Education
Portland Community College
Certificate in Culinary Arts
Focus: Emphasis on sustainable cooking practices, vegetarian cuisine, and food writing.
Oregon Culinary Institute
Diploma in Baking and Pastry Arts
Focus: Specialized training in artisanal baking, pastry techniques, and dessert presentation.
Angelina’s love for cooking started with handwritten family recipes and weekend trips to farmers’ markets around Portland. She followed her passion with a Certificate in Culinary Arts from Portland Community College, then perfected her sweet side with a Diploma in Baking and Pastry Arts at Oregon Culinary Institute.
Angelina believes recipes should feel like a conversation, not a science project. She’s all about helping readers trust themselves in the kitchen with simple steps, fresh ideas, and easy twists on classic meals.
When she’s not editing recipes, she’s baking bread, sipping coffee, or getting inspired by the changing seasons.